
Honey-Sweetened Peach Jam: Reasons You'll Love This Southern Classic
Honey-Sweetened Peach Jam


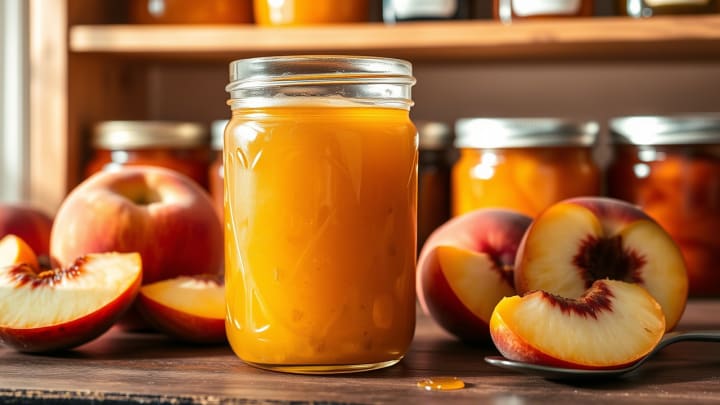
Honey Sweetened Peach Jam: A Naturally Sweet Spread
Making your own jam is a rewarding way to enjoy fresh, seasonal fruit in a wholesome, homemade format. This version skips refined sugar in favor of raw honey, resulting in a sweet, golden jam that brings out the natural richness and deep flavor of ripe summer peaches.
Whether spooned onto warm toast or used in baking, this jam offers a lovely way to preserve peaches long after their season has passed. It’s also a tasty companion to peach-forward recipes like peach cobbler egg rolls or comforting baked items like sweet potato cornbread.
Why Use Honey Instead of Sugar?
Honey adds more than just sweetness—it contributes subtle floral undertones, additional nutrients, and a smoother texture than white sugar.
Here’s why honey is an excellent alternative:
Rich in antioxidants and enzymes
Lower glycemic index than refined sugar
Blends seamlessly with fruit
Helps retain fruit color and aroma
Love natural sweeteners? Check out this honey cake recipe for another way to enjoy the benefits of honey in your cooking.
Ingredients & Tools
Before starting, gather your supplies. The process is simple, and the right setup makes it even smoother.
Ingredients
6 cups chopped fresh peaches (peeled and pitted)
1 cup raw honey
2 tablespoons lemon juice
1/2 teaspoon ground cinnamon (optional)
1/4 teaspoon sea salt (optional)
Basic Equipment
Large pot or saucepan with a heavy bottom
Wooden spoon or silicone spatula
Jar funnel and ladle
Immersion blender or masher
Water bath canner or a large deep pot
Sterilized mason jars and lids
Jar lifter and tongs
Jam making is straightforward—you don’t need specialty gadgets, but having clean tools and a well-organized workspace helps ensure success.
Step-by-Step Instructions
1. Peel and Prep the Peaches
Begin by placing the peaches in boiling water for about 45 seconds, then quickly transfer them to a bowl of cold water. This method loosens the skins, making them easier to peel without damaging the flesh.
Once peeled, remove the pits and chop the fruit into small chunks. Measure out six cups and place them in your pot.
2. Add Lemon Juice and Simmer
Add 2 tablespoons of fresh lemon juice to the chopped fruit. Lemon juice provides acidity, which balances the sweetness and helps the jam set properly during cooking.
Begin heating the mixture over medium heat, stirring frequently to prevent scorching.
3. Soften and Blend
As the fruit cooks, it will start to break down. At this point, blend the mixture until smooth using an immersion blender, or mash it manually if you prefer a chunkier texture. Continue simmering for 25 to 35 minutes, until the jam thickens.
4. Test for Doneness
To check if your jam is ready, place a small amount on a cold plate from the freezer. Wait a few seconds, then gently run your finger through it. If the surface holds its shape and doesn’t run back together, the jam is ready to jar.
5. Stir in the Honey
Turn the heat to low and mix in 1 cup of raw honey. Stir for 5 minutes to ensure it fully incorporates. Avoid adding honey too early, as long boiling can reduce its flavor and benefits.
Canning Your Jam
1. Prepare Jars
Wash your jars and lids in warm soapy water, then immerse them in hot (not boiling) water for a few minutes to sterilize. Let them drain on a clean cloth or rack until completely dry.
2. Fill and Seal
Using a funnel, ladle the hot jam into jars. Leave about 1/4 inch of space at the top to allow for expansion during processing. Wipe the rims clean, place the lids on, and screw on the bands until just snug.
3. Process the Jars
Carefully lower the jars into a boiling water bath and process them for 10 minutes. Remove them with a jar lifter and place on a heat-safe surface away from drafts.
Let the jars sit without moving them for 12 to 24 hours. Afterward, check that each lid has sealed by pressing down in the center—there should be no movement.
Properly sealed jars can be stored in a pantry for up to one year.
Delicious Ways to Use This Jam
You’ll find this jam pairs well with:
Toast or scones
Greek yogurt parfaits
Oatmeal or overnight oats
Cheese platters
Thumbprint cookies or tarts
It also makes a wonderful addition to baked items like sweet potato cornbread, turning a simple dish into something special.
Flavor Variations
Feel free to experiment with extra ingredients:
Vanilla Peach Jam: Add 1 teaspoon of vanilla extract after cooking
Ginger Peach Jam: Grate 1 teaspoon of fresh ginger into the pot
Peach Chia Jam: Stir in 2 tablespoons of chia seeds after blending
Warm Spiced Jam: Add a pinch of nutmeg or cardamom for complexity
Troubleshooting Tips
A few simple precautions will ensure your jam turns out perfectly:
Use ripe, juicy peaches for the best flavor and consistency
Don’t skip lemon juice—it’s essential for balance and preservation
Avoid overcooking, which can result in overly thick or sticky jam
Always sanitize jars and tools to prevent contamination
Frequently Asked Questions
Can I use frozen peaches?
Yes—just thaw and drain them before use.
Is pectin needed?
Not for this recipe. Peaches and lemon juice contain enough natural pectin.
How long will the jam last?
Unopened jars will keep up to one year. Once opened, refrigerate and use within 2 to 3 weeks.
Can I double the recipe?
For best results, make two separate batches. Doubling may affect cook time and consistency.
Final Thoughts
This honey sweetened peach jam is a healthy and flavorful way to preserve summer’s bounty. Easy to make and endlessly versatile, it offers a refined sugar-free option that’s rich, golden, and bursting with peach flavor.
For more peach-inspired creations, explore peach cobbler egg rolls or pair your jam with slices of sweet potato cornbread for a comforting, balanced bite.
About the Creator
Freshlymaderecipes
Welcome I'm passionate about creating easy, delicious recipes that bring joy to every table. From quick weeknight meals to delightful treats, flavorful dishes and savor the journey with me! 🌟
Keep reading
More stories from Freshlymaderecipes and writers in Feast and other communities.
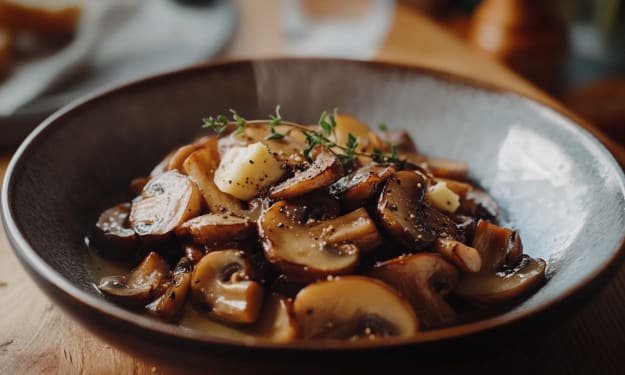
Sautéed Mushrooms: Irresistible Steps You’ll Love
How to Make the Best Sautéed Mushrooms at Home Sautéed mushrooms are one of the simplest yet most satisfying dishes you can make in under 15 minutes. With their deep umami flavor, silky texture, and endless pairing options, they can turn any basic meal into something gourmet.
By Freshlymaderecipes9 months ago in Feast
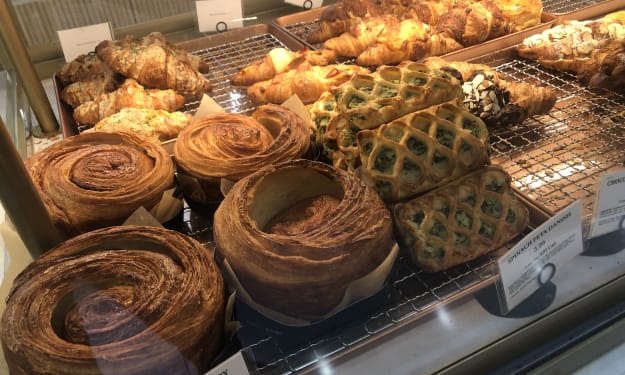
My Tous les Jours Trip
As someone who lives in a rural area, I don't get the chance to visit fancy restaurants or bakeries that often. So, when a friend told me about a French-Asian bakery that's less than an hour away, I knew I had to check it out and grab some pictures for social media. Tous les Jours ended up providing an immersive experience that went above and beyond my expectations--although I did leave with a few reservations.
By Kaitlin Shanks23 days ago in Feast
North America Pasta Market Size & Forecast 2025–2033
Introduction Pasta has quietly transformed from a traditional Italian staple into a universal comfort food across North America. Once associated mainly with classic recipes and home cooking, it now appears in gourmet menus, meal kits, microwaveable bowls, and plant-based diets. According to Renub Research, the North America pasta market was valued at US$ 6.23 billion in 2024 and is projected to reach US$ 8.91 billion by 2033, expanding at a CAGR of 4.05% from 2025 to 2033.
By Janine Root 7 days ago in Feast


Comments
There are no comments for this story
Be the first to respond and start the conversation.