
Pink Velvet Cookies Sweeten Your Day with Every Bite!
Step into a baking adventure where cookies become more than just dessert—they become moments of joy wrapped in pink! These Pink Velvet Cookies offer a soft, buttery crumble, creamy white chocolate chunks, and a beautiful rosy hue.

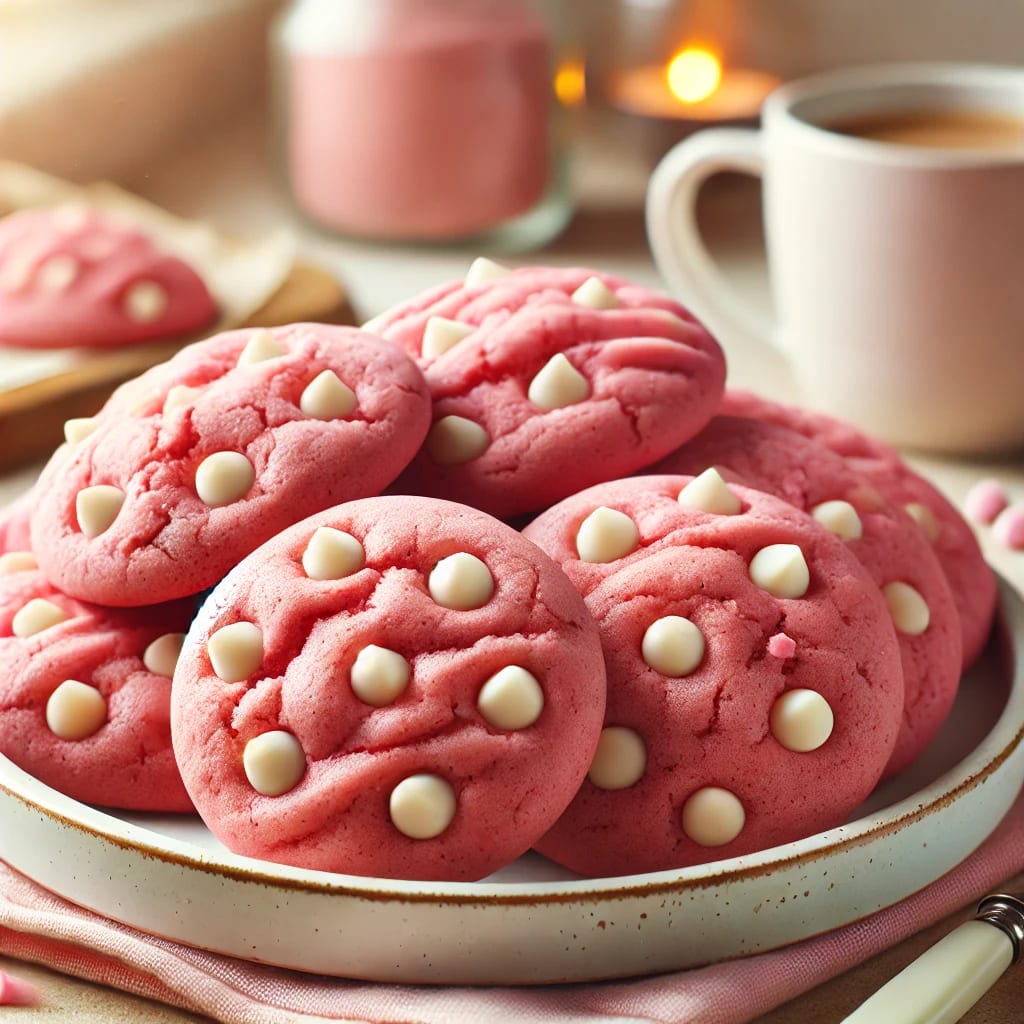
These cookies are a treat to bake and savor, perfect for celebrations like baby showers, Galentine’s Day, or simply as an afternoon pick-me-up.
Follow this step-by-step guide to craft your own batch of delicious magic!
Ingredients for Perfect Pink Velvet Cookies
1 cup (2 sticks) unsalted butter, softened (European-style butter amps up the richness!)
1 cup granulated sugar
½ cup packed light brown sugar (adds that caramel-like chewiness)
2 large eggs, room temperature
1 tsp vanilla extract (or almond extract for a fragrant twist)
2½ cups all-purpose flour
¼ cup cornstarch (secret ingredient for a soft texture!)
1 tsp baking soda
½ tsp salt
1–2 tbsp red gel food coloring (adjust for that perfect pink tone)
1 cup white chocolate chips (for creamy bursts in every bite!)
Step-By-Step Instructions for Cookie Bliss
Step 1: Preheat and Prepare
Preheat your oven to 350°F (175°C) and line baking sheets with parchment paper. Bonus tip? Use light-colored baking sheets to keep your cookies evenly baked without over-browning.
Step 2: Cream It All Together
Cream the butter, granulated sugar, and brown sugar in a large bowl for 2–3 minutes until the mixture turns light and fluffy. This is where the magic of cookie texture begins—do not skip it!
Step 3: Add Eggs and Vanilla
Mix in the eggs, one at a time, ensuring each is fully blended into the dough. Stir in vanilla extract for that warm, cozy flavor foundation.
Step 4: Combine Dry Ingredients
Whisk together the flour, cornstarch, baking soda, and salt in a separate bowl. Slowly add this dry mix to your wet ingredients. Remember, overmixing can ruin the tender texture, so stop as soon as everything is combined.
Step 5: Get the Perfect Pink
Add one tablespoon of red gel food coloring and gently mix. Want a bolder hue? Add an extra half tablespoon until you achieve your ideal shade.
Step 6: Fold in the Chocolate
Using a spatula, gently fold in the white chocolate chips. This ensures even distribution without breaking the tender dough.
Step 7: Shape and Bake
Scoop dough into 1.5-inch balls (a cookie scoop works perfectly!) and space them 2 inches apart on the baking sheet. Bake for 10–12 minutes until the edges are set but the centers remain soft—they will continue to cook as they cool.
Step 8: Cool and Enjoy
Cool your cookies on the baking sheet for 5 minutes before transferring them to a wire rack. This crucial step ensures a perfect texture. Then, enjoy your freshly baked treats with your favorite latte or a sprinkle of edible glitter for extra fun!

Tips for Baking Success
Choose Gel Food Coloring: Gel provides vibrant color without altering the texture of your dough.
Chill Your Dough: Sticky dough? Chill it for 30 minutes to create thick, bakery-style cookies.
Freeze for Later: Roll dough into balls, freeze them and bake straight from frozen—add one extra minute to the baking time.
Creative Twists for Extra Magic
Add one teaspoon of rose water for a floral flavor.
Swap white chocolate chips for raspberry chunks or freeze-dried strawberries.
Dip-cooled cookies in pink candy melts for a fancy finish.
Why These Cookies Are a Must-Try
Crispy edges, a soft, velvety center, and pockets of melted white chocolate make these cookies irresistible. The cornstarch ensures a delicate, melt-in-your-mouth texture, while the pop of pink adds a playful, celebratory touch to any occasion.
Bake, Share, and Tag Us!
Brighten someone’s day—or your own—by gifting these cookies in pastel boxes or serving them on a chic dessert stand. Do not forget to snap a picture and share your creations with #PinkVelvetJoy. We cannot wait to see your cookie magic.
Happy Baking, Superstar!
About the Creator
Hundreds of Thousands of NHS Staff in England Attacked and Harassed, Survey Shows
A major workforce survey has revealed that hundreds of thousands of employees working in England’s National Health Service have faced violence, harassment and abuse while carrying out their duties. The findings have sparked renewed concern among health leaders and unions, who warn that hostility toward healthcare workers is reaching unacceptable levels. The data comes from the latest NHS Staff Survey, one of the largest workplace surveys in the United Kingdom. More than 760,000 NHS employees took part, providing a detailed picture of working conditions across hospitals, clinics and ambulance services. The results highlight a troubling pattern of aggression directed at staff from patients, visitors and, in some cases, colleagues. According to the survey, around one in seven NHS employees reported experiencing physical violence from patients or members of the public during the previous year. This represents roughly 14 percent of staff—equivalent to more than 200,000 workers across the healthcare system. Even more widespread was verbal harassment and bullying. Over a quarter of respondents said they had experienced harassment, abuse or bullying in the workplace within the last 12 months. Experts say this includes a range of incidents, from aggressive threats and verbal insults to racist abuse and intimidation. Healthcare unions have described the situation as deeply worrying, arguing that violence against medical staff is becoming increasingly normalized in some settings. Nurses, ambulance crews and emergency department staff are often the most exposed because they deal directly with patients during stressful situations such as medical emergencies or long waiting times. In particular, ambulance workers reported some of the highest levels of violence in the survey. In certain services, nearly a third of staff said they had faced at least one incident of aggression from patients or the public. Experts note that frontline responders frequently encounter unpredictable situations involving intoxication, mental health crises or highly distressed individuals. Healthcare leaders say the consequences of this violence go far beyond physical injury. Many staff report psychological stress, anxiety and burnout after repeated exposure to abuse. Some workers take sick leave following violent incidents, while others consider leaving the profession entirely. In response to the survey findings, NHS leaders stressed that abuse toward healthcare workers is unacceptable. Officials emphasized that staff should be able to perform their duties without fear of violence or harassment. “NHS staff work tirelessly to care for patients and deserve to feel safe and respected at work,” said one senior health official responding to the survey results. Healthcare organizations have increasingly called for stronger protections, including better security in hospitals and clearer reporting systems for incidents of abuse. The issue of violence against healthcare workers has grown more visible in recent years. Data from hospitals and trusts across England shows that incidents of aggression have risen since the COVID-19 pandemic, partly driven by strained healthcare services, staff shortages and long patient waiting times. At the same time, experts say many incidents likely go unreported. Some staff fear that reporting abuse will not lead to meaningful action, while others believe such behavior has become an unfortunate but expected part of the job. Unions and professional groups are now urging the government to take stronger action. They have called for tougher penalties for individuals who assault healthcare workers, as well as increased funding for workplace safety measures. Campaigners also emphasize the need for cultural change. Many healthcare leaders argue that public awareness is crucial, reminding patients and visitors that doctors, nurses and paramedics are there to help. Despite the troubling statistics, NHS officials say steps are being taken to improve staff safety. Initiatives include violence-prevention standards, staff training on managing aggressive situations and improved cooperation with police in serious cases. However, unions warn that unless the root causes—such as staff shortages and overloaded emergency departments—are addressed, the pressure on frontline workers will continue. For the hundreds of thousands of NHS employees who dedicate their careers to saving lives, the message from health leaders is clear: caring for patients should never come with the risk of being attacked or abused on the job.
By Fiaz Ahmed 2 days ago in Feast
Foods Seniors
As we age, maintaining a balanced diet becomes increasingly important for overall health and vitality. Alkaline foods help regulate the body's pH levels, reduce inflammation, and support bone health—all crucial concerns for older adults. These ten recipes transform simple, nutrient-dense ingredients into delicious meals that are gentle on digestion and big on flavor. Best of all, they're incredibly easy to prepare.
By yue . shui2 days ago in Feast


Comments
There are no comments for this story
Be the first to respond and start the conversation.