
Demystifying the Macaron
Tips and tricks to help understand everyone’s favorite French cookie
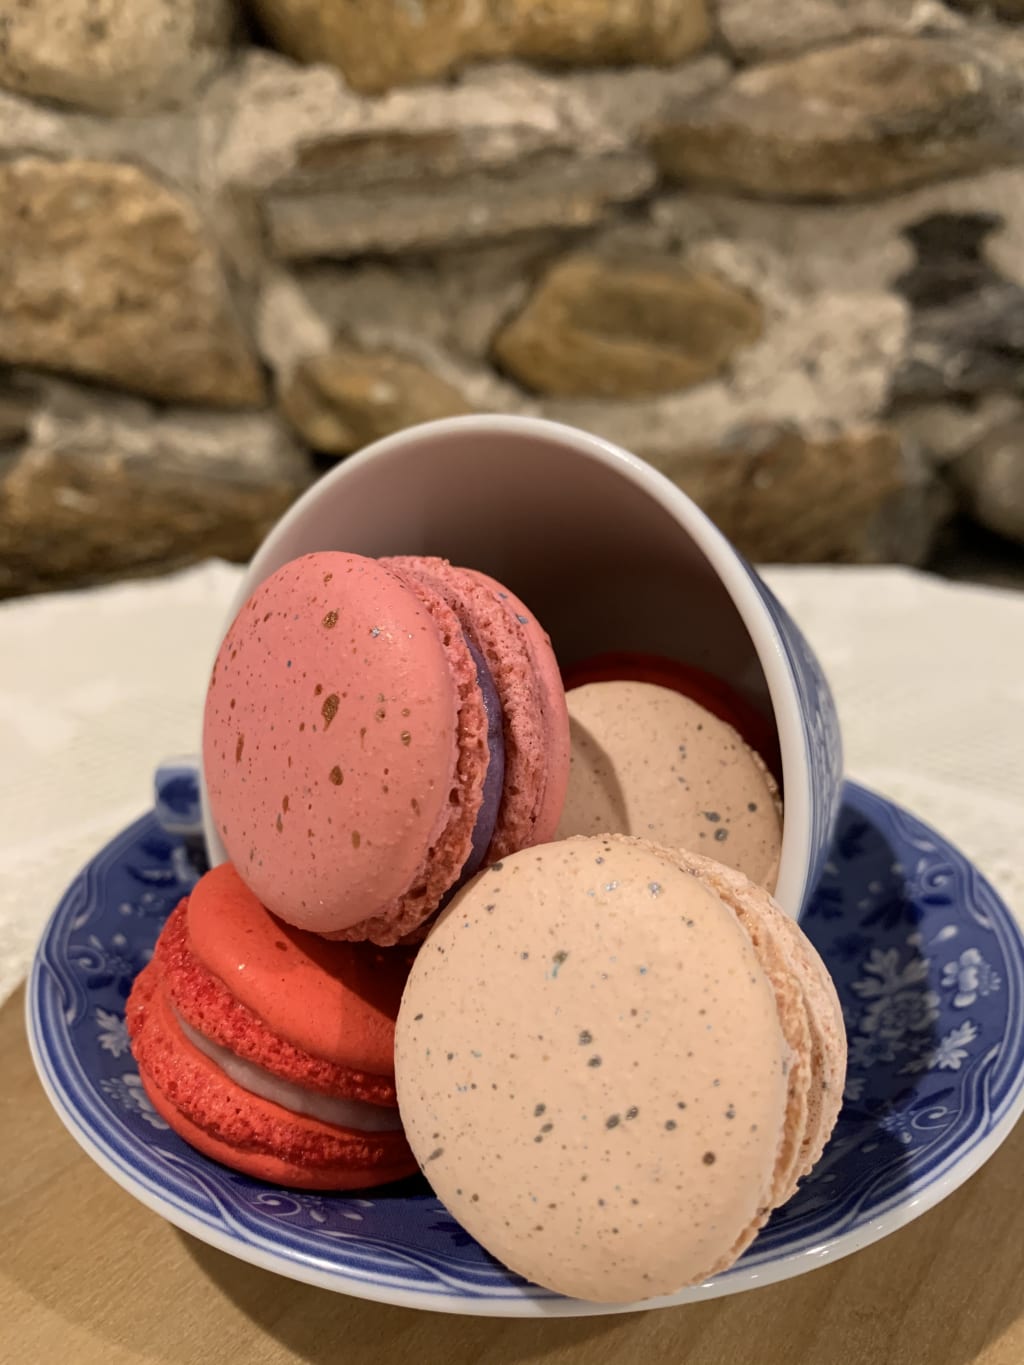
Macarons are a magnificent cookie. Their versatility is that of legend - the flavor combinations, the colors, the myriad of ways they can be presented. They're seen on dessert tables of most modern events, from weddings to baby showers, birthday parties to retirement gatherings; these naturally gluten-free goodies are a fan favorite sure to wow all of your guests - but perhaps the only thing that matches their versatility is their level of difficulty.
It’s no secret that these meringue sammies fall apart at even the slightest mishap - oven temperature too high, atmosphere too moist, or maybe you just stirred too vigorously. Uniformity and consistency is so difficult to attain, that during school in order to avoid a lower grade due to the few ‘undesirables’ we had created, the second our Chef instructor’s back was turned we would all shove the aforementioned offenders into our mouths reminiscent of Lucy and Ethel in a candy factory.
“Why not just throw them away?” You might ask, well two reasons:
1) they checked the garbage cans for just such a reason
2) what kind of uncultured swine wastes a macaron
However, if you are exceedingly careful, and follow directions exceptionally well, you might just crack the code (instead of their delicate shells) and become a master over these dazzling little babies (spend as much time as I have with these cookies and you’ll be assigning them personalities, too).
Before we begin, I would like to make a few things very clear. The method I use is an Italian Meringue method - the most common is a French Meringue method, but I find it to offer less stability and a final product that seems a little dull in comparison (Italian Meringue is cooked with a sugar syrup, while French - or Common - Meringue is uncooked). The Italian Meringue method requires a few more steps, and a bit more specialized equipment, but if you plan on making these more than once it’s worth the investment. The next thing is that, while I appreciate creativity, if you substitute any ingredient or do not follow the directions, your failure is your own. Think of this recipe as a base camp - become comfortable, get everything set up, make sure your tent is secure before you go stomping around in the woods and using flavor oils or hazelnut flour. Get a good feel for this recipe before you go mucking it up.
So, now that that's out of the way; let’s look at what equipment you’ll need:
- Stand Mixer with Whisk Attachment
- Medium Sized Bowl (stainless steel is my personal favorite, but any standard mixing bowl is fine)
- Rubber Spatula
- Kitchen Scales (make sure it reads in grams)
- Small (2 qt) Saucepan (with deep sides)
- Probe Thermometer (digital)
- (2) Sheet Pans
- Flat Parchment Paper (cut to fit your sheet pans) or (2) Silicone Baking Mats
- Piping Bag fitted with a Medium Round Tip (my personal favorite is the Ateco 806)
- Sieve (or crank sifter - think old school, like your mom had)
- Medium Container (to measure your almond flour and confectioners sugar into)
- (3) Small Containers (to separate your eggs - one for whites, one for yolks, one to weigh each separate amount needed into)
- Stove Top
- Convection Oven (a still oven will work as well, but convection is recommended)
- Gel Based Food Color (if you want to tint your shells - it MUST be gel based)
Once you’ve assembled your all-star cast, get ready to make some macs! The recipe will be below, ingredients and amounts written along with their use and instructions. Okay...... readysetgo!
Into your medium container measure:
300g almond flour (blue diamond is my preferred brand, make sure it’s a finely ground almond flour)
300g confectioners sugar
Place your sieve/sifter over your mixing bowl and sift all of the almond flour/sugar mixture into it - using your rubber spatula make a small well in the middle of the mixture
Into (2) of your small containers, separate
7-8 eggs (cold, room temperature, it really doesn't matter)
Take special care to ensure no yolks make it into your egg whites, because the fat from the yolk will inhibit the protein coagulation that turns egg whites into gorgeous fluffy clouds. Once your eggs are separated use your third container to measure
110g of egg whites (very precise measurement, use your -CLEAN- hands to pull some out if you need to)
Place the measured amount of egg whites into the bowl of your mixer fitted with a whisk attachment - make sure the bowl of the mixer and the whisk attachment are VERY clean, so as not to inhibit protein coagulation. Those egg whites, so finicky.
Use the same container you previously used to measure a second
110g of egg whites (again, be precise)
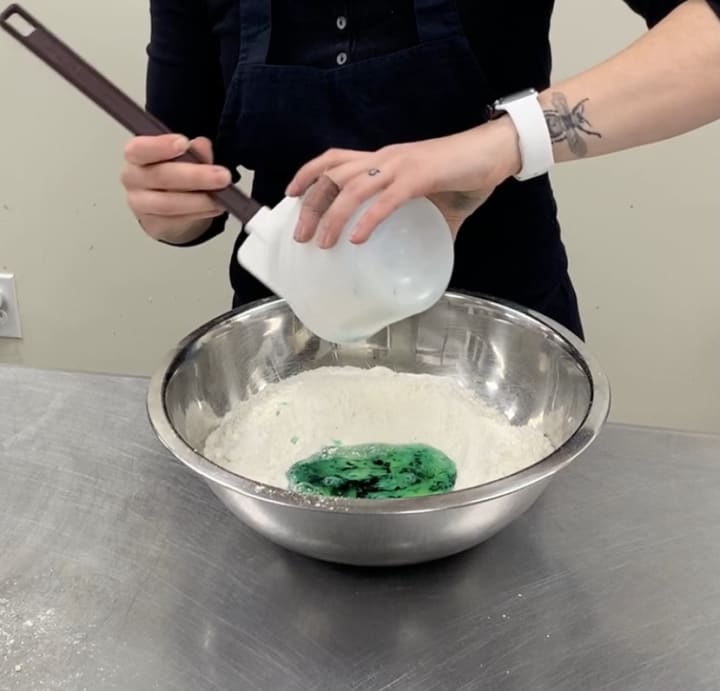
NOW if you have gel color, this is where you add it - to the second amount of egg whites, start with a few squeezes (no more than 2g) of your desired color. Take this egg white/gel color mixture and pour it into the well you created in your almond flour/sugar mixture a few steps ago
Next, take your sauce pan and place it on your scales. Once it’s zeroed out, measure
75g of water (always do water first - this will help coat the sides of the pan and keep the sugar from attaching to it and crystalizing)
300g granulated sugar
Place the saucepan with water and sugar onto your stove top, turning it to the highest setting. Do not stir, just leave it be, and wait for it to start boiling.
Once the mixture begins to boil, turn the mixer with the egg whites in the bowl on LOW. Place the thermometer probe into the boiling mixture, and wait.....and wait...... and wait some more.
When the thermometer reads 237°F, turn the mixer on HIGH and allow those whites to really start whipping. Wait for the thermometer to read 243°F then remove your thermometer and turn off your heat.
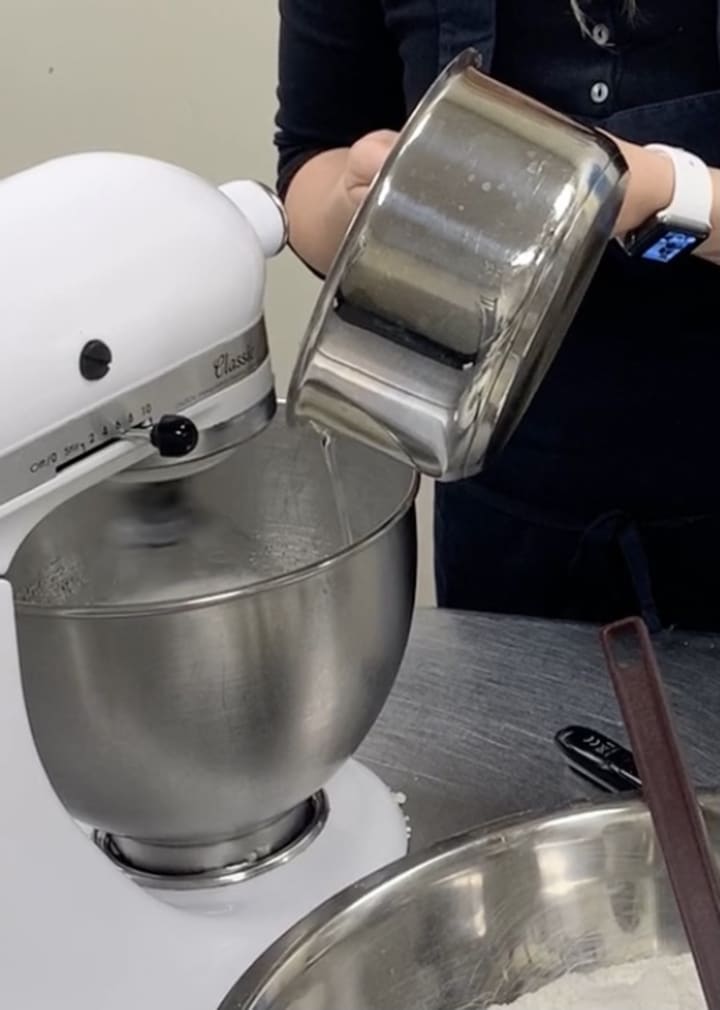
CAREFULLY take your sugar over to the mixer, keep that baby on high, and slowly stream your hot sugar syrup into the mixer. I CANNOT STRESS ENOUGH how important it is to stand as far away as you can to avoid sugar syrup flying out at you, but also how important it is to pour the sugar syrup into a very specific place. I know, I’m not asking for much. Pour the syrup in the tiny, itty-bitty spot between the whisk and the side of the mixer bowl. It will not be the end of the world if it pours more down the SIDE of the bowl, but it’s potentially dangerous to pour it onto the whisk (flying sugar syrup - it hurts, I’m pretty sure it’s classified as a weapon).
Once all of the sugar is in, take your pot to the sink and put water in it immediately, you will thank me later. Allow the mixer to go until the meringue (that you successfully just made!!) holds stiff peaks and cools to about 135°F. During this time I recommend prepping up your sheet pans.
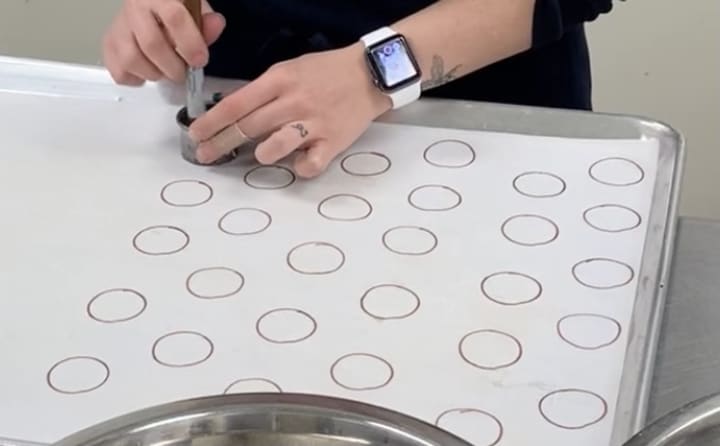
If you’re using a silicone mat, you can trace circles with a permanent marker onto a piece of parchment paper and place it underneath your silicone mat to use as your piping guide, if you’re using parchment paper to line your sheet pan, trace your circles onto one side in a “honeycomb” pattern (a row of 4 followed by a row of 3 followed by a row of 4, etc.) allowing about 1-2” between each circle. Make sure you trace a circle to be piped into all 4 of the corners of the pan, that will help hold the parchment down in the oven.
Now, take a trip back over to your mixer and check on that meringue! Is it ready? If so, continue on, if not just give it a few more minutes, but best not to exceed 15-20 minutes total - otherwise you'll be dealing with a meringue that's too dry to really fold into anything.
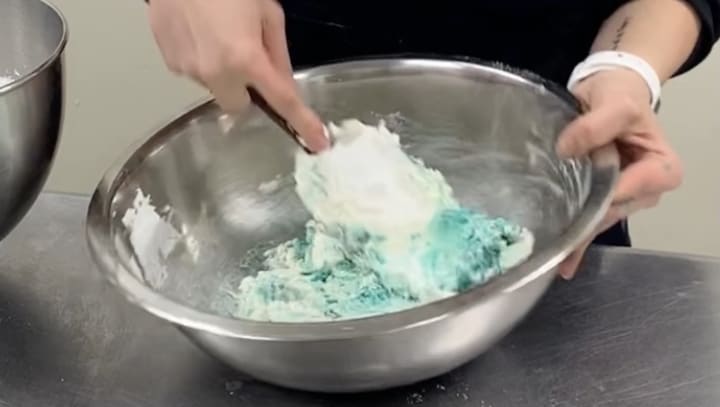
Okay, here we go, you've got your meringue and you've got your well of almond flour/sugar with some egg whites sitting in the middle. Great! Take your rubber spatula, scoop out a little less than 1/3 of the Italian Meringue in your mixing bowl, and begin folding it into your almond flour mixture. Here's where it gets hard - like, physically hard - because you have to keep a patient folding technique. Don't do any fast stirring, or aggressive mixing, but you don't have to count your folds either. Have you ever seen one of those recipes where it says "Fold batter no more than 50 times or you risk sacrificing your soul to the Dark Lord and an eternity of damnation"? Yeah, this isn't one of those - thank the Italian Meringue. Patiently fold the batter until the first installment of meringue is fully incorporated, and no white streaks remain. Take your spatula and scoop out another third, and continue that process all over again - fully incorporated, no whites remain, yada yada.
NOW. This is the actual tricky part - depending on your location, the atmosphere in your kitchen, humidity levels, and the way you're holding your tongue, you might only need 2/3 of the prepared Italian Meringue, or you might need all of it. It's difficult to explain what you're looking for in your batter, but I'm going to do my best:
It should fall from your spatula, but NOT flow freely like lava. It should not be stiff, nor should it appear like cookie dough that you scoop. If you place it in your piping bag, you shouldn't have to struggle to pipe it, but it shouldn't be flowing willy-nilly out of the piping tip.
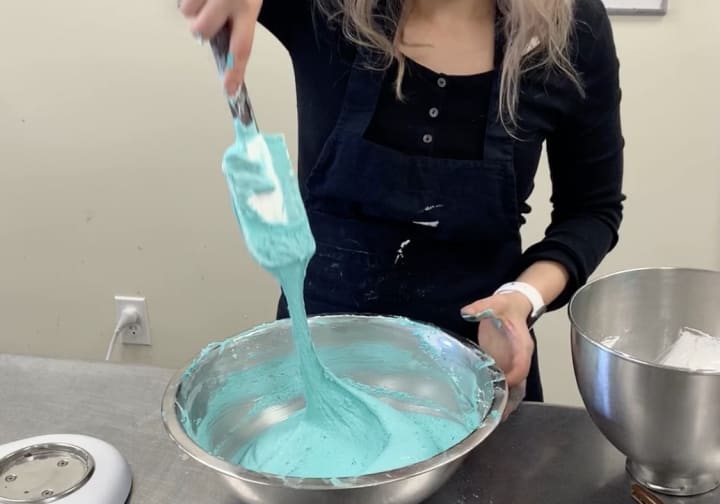
If you're close to this consistency, but not quite, add very small amounts of the Italian Meringue into the batter, and fold until fully incorporated, until you achieve this consistency. Once achieved, place it in your piping bag, and get ready to pipe.
Hold your piping bag as straight as you can - try not to lean the bag one way or another - and keep it about 1/2" above the prepared sheet pan. Pipe into the middle of one of your drawn circles, and allow the batter to fill up the surface of the circle. Once you've filled the circle, stop squeezing and quickly move your piping bag counter-clockwise to avoid a "peak" on the top of your shell. It will likely take you a few tries to get this movement down, so don't be discouraged if your first few rows are a little disheveled.
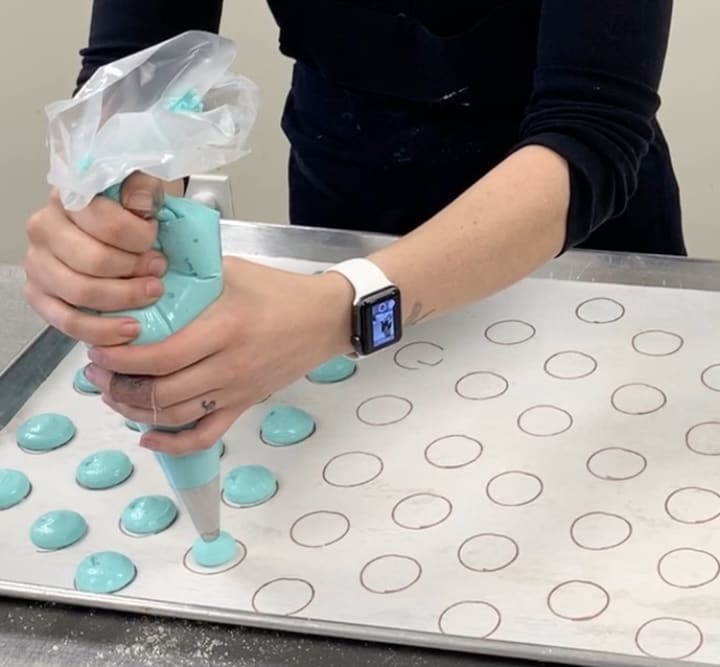
Once all shells are piped, and you either run out of sheet pans or batter, hold the edges of the pan and gently place your thumbs down onto the paper or silicone mat. Place the pan on a flat, solid surface, and give it 2-3 decisive taps - what you're looking for here is the popping of any bubbles that might remain on the surface of your macs.
Place the shells away from any sources of heat or humidity, and turn your Convection oven to 325∘F. and move a rack to the highest spot available - this will help keep the convection fan from blowing your shells too much, but still allowing the shells to be heated by the even temperature of a convection oven.
While your oven is preheating, the shells will form a skin on their tops. You'll know this has formed, because you'll be able to gently touch the shell and feel resistance, and make no mark when doing so. Once they're ready, and your oven has preheated, place one pan at a time on the topmost rack, and bake them for 10 minutes. I know it's hard, but do not open the oven door until that timer goes off!
Once the timer goes off, remove them from the oven, and put them somewhere they can cool completely. Match up as many pairs as you can, and put filling onto one side, gently placing the other side on top of the filling and twisting until the filling reaches the outside edges of the cookies.
Another big secret? Macarons are better with age! Put them in an airtight container - either filled, or just the shells awaiting a filling - and place them in the freezer. They're at their best when they've been allowed to age for at least 24 hours.
And there you have it! Good luck, and happy baking.
p.s. Need a few ideas for fillings? Try:
Fruit Preserves
Chocolate Ganache
Vanilla Buttercream
Edible Cookie Dough (I said what I said)
About the Creator
Keep reading
More stories from The Music Muse and writers in Feast and other communities.
Letting Go
It would be fair to say that few people thoroughly enjoyed 2020 - one could even go so far as to say few people didn't have an outright bad time. Taking into consideration all of the shortcomings offered to us by this storied year, I've found myself coming to the realization that while I did not have much to show in the way of physical accomplishments for the year, the greatest thing to come out of 2020 was an ability to slow down and spend time introspectively.
By The Music Muse5 years ago in Longevity
Titan Submersible Disaster Investigation: Structural Failure Caused Catastrophic Implosion
The tragic loss of the Titan submersible has been attributed to a catastrophic structural failure that caused the vessel to implode under immense deep-sea pressure, according to the findings of a detailed investigative report. The report concludes that all five individuals aboard the submersible died instantly when the vessel’s hull collapsed thousands of meters beneath the surface of the Atlantic Ocean.
By Irshad Abbasi 3 days ago in Feast
Cold Dish Recipes
Cold dishes are the unsung heroes of any great meal—they awaken the palate, balance rich flavors, and offer refreshing contrast. These ten recipes transform simple ingredients into extraordinary creations that will have everyone reaching for seconds. Best of all, they're incredibly simple to prepare. Let's dive in!
By yue . shui4 days ago in Feast
Writing To Succeed
If you want to find something that will help readers find your writing, possibly expand your audience, and maybe even get you noticed for other things, then you’re not alone. But how can you get it done in a world full of want-to-be writers? Look less at what you’re writing now, and more at what other writers have used to boost their views and reads.
By Jason Ray Morton 3 days ago in Writers


Comments
There are no comments for this story
Be the first to respond and start the conversation.