
The 24 Hour Magic Cake Why no Bake Eclair Dessert is taking over My kitchen
Forget the oven this 5 ingredient masterpiece transforms simple crackers into a creamy French bakery dream while you sleep

The Secret to the Ultimate No-Bake Chocolate Eclair Cake: A Crowd-Pleasing Dessert
The Nostalgic Magic of No-Bake Desserts
There is something uniquely comforting about a dessert that requires zero time in the oven. For many of us, the kitchen is the heart of the home, but on busy weekdays or hot summer evenings, the last thing we want to do is turn on the stove. This is where the No-Bake Chocolate Eclair Cake steps in as a true culinary hero. It’s a classic, nostalgic treat that tastes exactly like a traditional French eclair but with a fraction of the technical difficulty.
The beauty of this recipe lies in its simplicity and the "magic" that happens while you sleep. By layering simple ingredients and letting them rest, you create a texture that is light, creamy, and indistinguishable from a cake that was baked for hours.
Why This Recipe Works
The secret to this cake's success is the chemical reaction—or rather, the softening process—between the vanilla pudding and the graham crackers. When left overnight, the crackers absorb the moisture from the pudding, transforming from a crunchy biscuit into a soft, sponge-like cake layer. It’s the perfect solution for dinner parties, potlucks, or those moments when you need a high-impact dessert with low-stress preparation.
Ingredients You’ll Need Ingredient Quantity
Instant Vanilla Pudding Mix 2 packages (100g each)
Cool Whip (or Whipped Cream) 1 container (225g), thawed
Whole Milk 3 cups (cold)
Graham Cracker Squares 2 large packets (Honey or Plain)
Ready-to-Use Chocolate Glaze 1 tub (450g)Step-by-Step Instructions
1. Prepare the Creamy Filling
In a large mixing bowl, whisk together the two packages of instant vanilla pudding mix with the cold milk. Continue whisking for about two minutes until the mixture begins to thicken. Once the pudding is set, gently fold in the thawed Cool Whip. Using a spatula, blend them together until you have a smooth, pale yellow, and airy consistency. This mixture will serve as the "eclair" filling that makes every bite melt in your mouth.
2. Mastering the Layers
Take a 9x13-inch glass or aluminum pan. Start by lining the bottom with a single, tight layer of graham cracker squares. Don't be afraid to break a few crackers to fill in the gaps; you want a solid base.
Next, spread exactly half of your pudding mixture over the crackers, smoothing it out to the edges with the back of a spoon. Add a second layer of graham crackers on top of the pudding, followed by the remaining half of the mixture. Finish with a third and final layer of graham crackers. At this stage, your "cake" is built!
3. The Cooling Phase
Cover the pan tightly with plastic wrap and place it in the refrigerator for at least 30 to 60 minutes. This short rest allows the pudding to firm up before you apply the chocolate glaze, ensuring the layers stay distinct and beautiful.
4. The Perfect Chocolate Finish
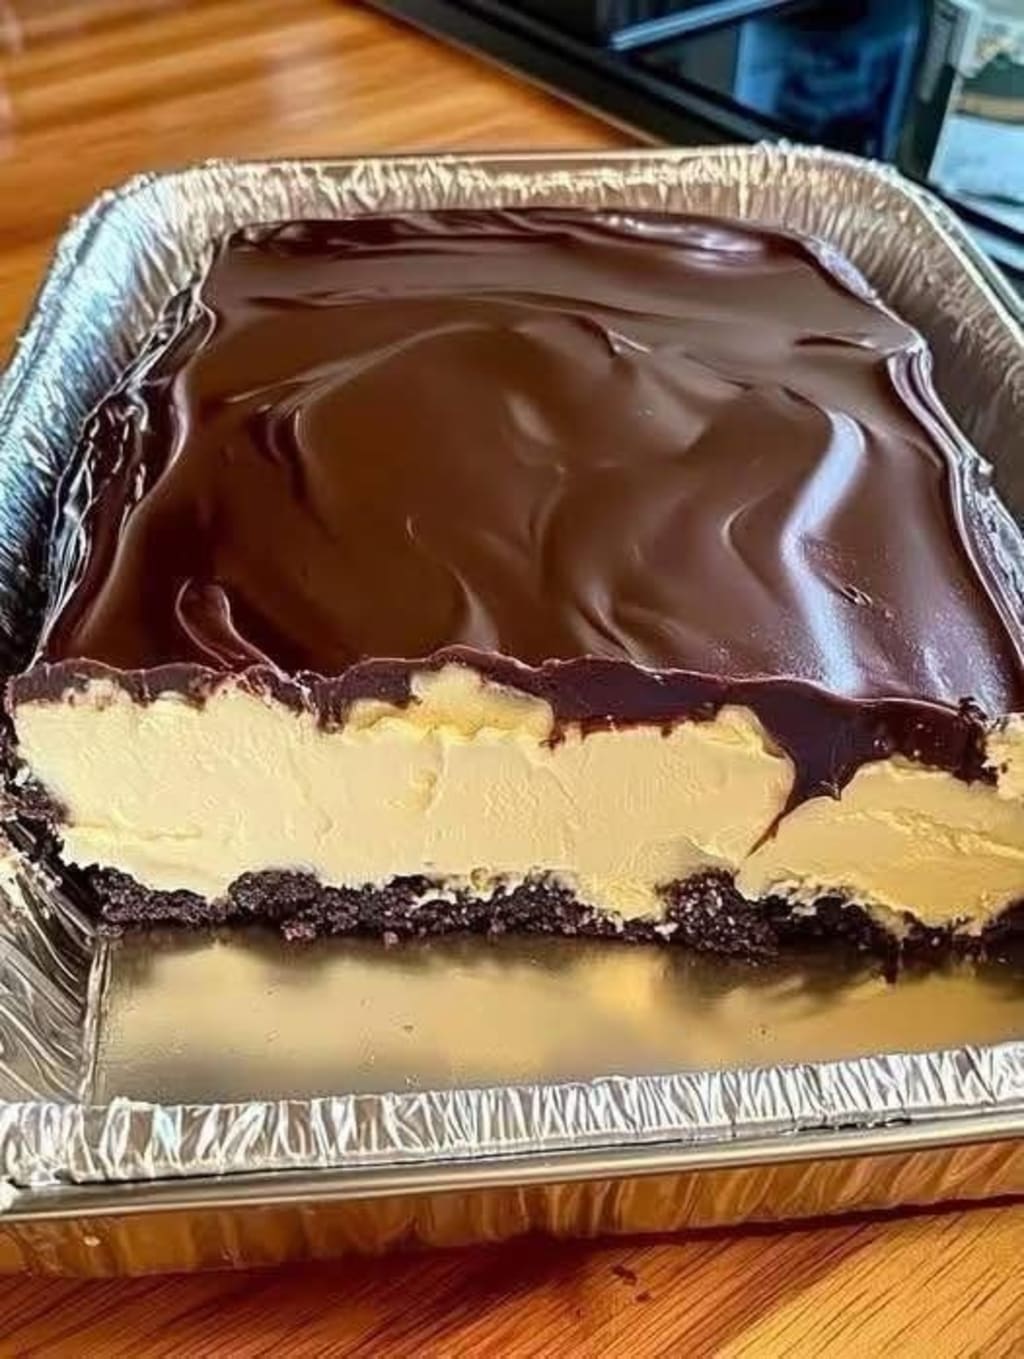
To get that professional, glossy look you see in the photos, take your chocolate glaze and remove the lid and foil. Microwave it for about 15-20 seconds. You don't want it hot; you just want it pour able. Stir it well, then pour it over the top layer of graham crackers. Use a spatula to spread it evenly into a smooth, dark chocolate mirror finish.
5. The "Overnight" Rule
This is the most important step: Patience. Cover the cake again and let it chill in the refrigerator for a full 24 hours (or at least 12). During this time, the crackers will soften completely. When you cut into it the next day, you’ll see those beautiful, clean layers that look like they came from a professional bakery.
Pro-Tips for Success
The Glaze Secret: If you don't have store-bought glaze, you can make a quick g an ache by melting semi-sweet chocolate chips with a bit of heavy cream.
Storage: This cake stays fresh in the fridge for up to 3 days, but honestly, it usually disappears within minutes of being served!
Serving: Use a sharp knife dipped in warm water to get those perfect, clean squares for your photos.
Final Thoughts
Whether you’re a seasoned baker or a total beginner, the No-Bake Chocolate Eclair Cake is a recipe that never fails to impress. It’s affordable, easy to scale for large groups, and consistently delicious. Give it a try, and you’ll see why it’s a staple in kitchens around the world.
About the Creator
Souhail
"Passionate about uncovering hidden mysteries in everyday objects and sharing creative life hacks. Join me as I explore the stories behind the things we use every day."
Tatt~Master
— Assembly Line Tatt Machine ~ Impressions to Impress — As I begin to understand more about the Tattoo Phenomenon. I've written silly, yet verbatim, dating site anecdotes in 'Frazzled.' So let me ask you: Would you be More attracted to someone slathered with tattoos, or Less?
By Jay Kantor4 days ago in Humor


Comments
There are no comments for this story
Be the first to respond and start the conversation.