
Stop Soaking Duck Eggs in Brine! Try This Dry-Curing Hack for Golden, Oil-Rich Yolks in Just 10 Days
Stop Soaking Duck Eggs in Brine! Try This Dry-Curing Hack for Golden, Oil-Rich Yolks in Just 10 Days

"Mom, we’re out of salted duck eggs! Time to make another batch!" Every weekend, my son raids the kitchen cabinets for his favorite treat. Since childhood, he’s adored that moment when chopsticks pierce the egg white, releasing a burst of crimson oil, followed by the gritty, fragrant yolk melting into steaming rice porridge. But traditional brine-curing takes weeks—too slow for our household’s cravings. If I make too few, they vanish instantly; too many, and they risk spoiling. After years of trial and error, I’ve cracked the code: a 10-day dry-curing method that guarantees every egg oozes oil and boasts a velvety, sandy yolk. Let me show you how!
Why Ditch the Brine? The "Dry Cure" Revolution
The secret? Alcohol + salt + cling wrap = magic.
Here’s the science: High-proof liquor (56% ABV or higher) sterilizes the eggshell and opens its pores, allowing salt to penetrate faster than brine ever could. Meanwhile, the alcohol jump-starts fat breakdown in the yolk, turbocharging oil production. Last summer, I cured 30 eggs this way. When we cracked them open? Each yolk gleamed like molten amber, dripping gold at the slightest touch.
Step-by-Step: Foolproof Salty Duck Eggs in 10 Days
Ingredients & Tools:
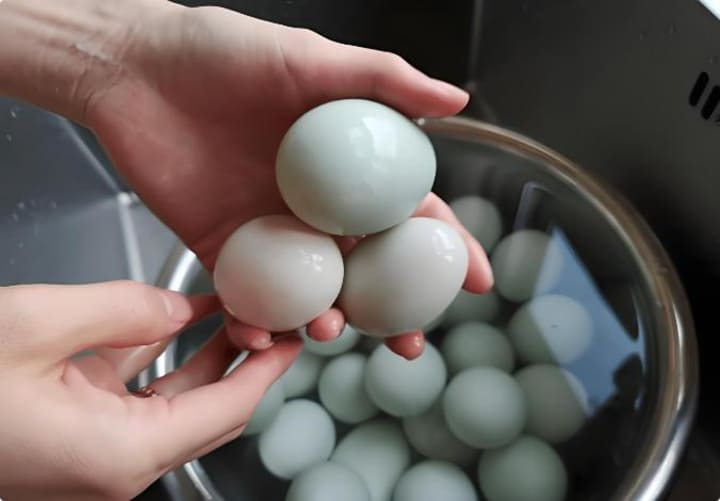
• 20 fresh duck eggs (avoid cracked shells!)
• 1 bowl high-proof liquor (56% Erguotou works best)
• 250g salt (coarse or fine)
• Cling film
• Airtight container
Day 1: Prep Like a Pro

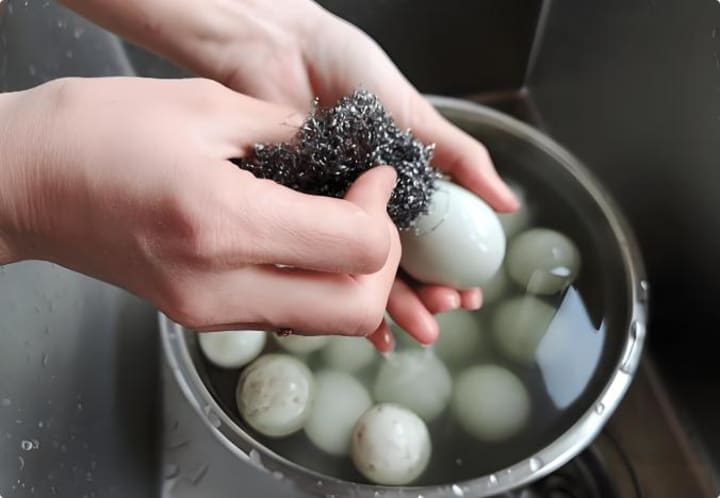
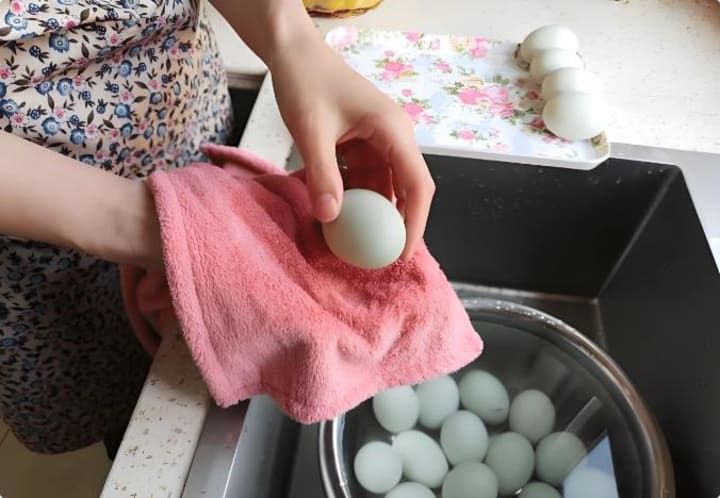
1. Never wash eggs with water! Their natural protective coating is key. Gently scrub dirt off using a dry loofah sponge. For stubborn mess (ahem, chicken poop?), rinse briefly in lukewarm water, then immediately pat dry with paper towels. Air-dry in shade for 2 hours.
2. Bathe eggs in liquor: Roll each egg in alcohol until fully coated. Pro tip: The higher the ABV, the faster the cure! (Using 42% liquor once added 3 extra days to my timeline.)
Day 2: Salt Armor Time
3. Pour salt into a deep dish. Roll each tipsy egg in salt, focusing on the pointed ends (thinner shell = faster flavor infusion). Aim for a "sugar-glazed hawthorn" look—salt should cling like glitter.
4. Wrap like a mummy: Individually swaddle each egg in cling film, pressing gently to seal salt against the shell. Skip plastic bags—they trap moisture and mold!
Day 3-9: The Waiting Game
5. Nestle wrapped eggs in a bone-dry container. Store in a cool, dark spot (18-25°C ideal). Avoid sunlight like vampires—my balcony-stored batch once rotted in 3 days!
Day 10: The Grand Reveal
6. Test one egg: Tap a small hole with chopsticks. If the white is semi-translucent and yolk edges blush red, it’s ready. For maximum oil flow, wait until day 10.
3 Golden Rules for That Instagram-Worthy Yolk
1. Egg selection hack: Check the "butt"! Fresh eggs have smaller air sacs at the rounded end, yielding denser yolks.
2. Salt thickness matters: Aim for a 2mm crust. Thin layers lead to bitter whites and shy yolks.
3. Temperature control: Above 30°C? Move jars to the fridge to slow fermentation.
A Kitchen Victory (and a Giggle)
Last week, my neighbor Mrs. Li dropped by for tea. One bite of my eggs, and she demanded a masterclass. As we worked, her toddler grandson peered into the jar, gasping, "Grandma, these eggs pee gold!" I nearly knocked over the salt laughing.
So this weekend, grab some duck eggs and try this trick. When you unwrap that first glossy gem and watch golden rivulets cascade into your congee? Voilà—your kitchen will smell like triumph.
Bonus: Troubleshooting Tips
• White too salty? Reduce curing time by 1-2 days next batch.
• No oil? Check liquor potency or extend curing by 3 days.
• Mold alert: Always use sterilized containers and fresh cling film.
Now go forth and cure—your porridge (and your kids) will thank you! 🦆✨
About the Creator
My Tous les Jours Trip
As someone who lives in a rural area, I don't get the chance to visit fancy restaurants or bakeries that often. So, when a friend told me about a French-Asian bakery that's less than an hour away, I knew I had to check it out and grab some pictures for social media. Tous les Jours ended up providing an immersive experience that went above and beyond my expectations--although I did leave with a few reservations.
By Kaitlin Shanks24 days ago in Feast
Vegan Food Market Trends & Summary (2025–2033)
Introduction The global shift toward healthier, more ethical, and environmentally responsible consumption has transformed vegan food from a niche lifestyle choice into a fast-growing mainstream market. According to Renub Research, the Vegan Food Market was valued at USD 20.06 billion in 2024 and is projected to reach USD 46.09 billion by 2033, expanding at a robust CAGR of 9.68% during 2025–2033. This impressive trajectory reflects not only changing consumer values but also rapid innovation across food technology, retail, and distribution.
By jaiklin Fanandish5 days ago in Feast


Comments
There are no comments for this story
Be the first to respond and start the conversation.