
Roasted Butternut Squash Soup
The most comforting way to warm up on a cold day

One of my favorite things about fall is the food! Fall is comfort food season. As the temperature drops, it's natural for the body to crave warmth and comfort. For me, there is no greater comfort or better way to warm the body (and soul) than with a nice big bowl of hot soup.
Soup is an excellent introductory type of recipe to get anyone in the kitchen. It requires very basic, minimal equipment and pretty much any ingredient or combination of ingredients can be transformed into a delicious soup; the possibilities are virtually endless.
This recipe for roasted butternut squash soup is my all-time favorite thing to make firstly because it's the first dish I made when I first discovered my passion for cooking back when I was about 12 years old, and secondly because it's so darn simple to make. All it takes is just a few simple ingredients (4 to be exact, or 5 if you include the oil) and time.
With this soup, all the rich complex flavor comes by virtue of getting the most from these minimal ingredients; allowing them to develope their maximum flavour with time. Time is the secret ingredient.
Here is what you will need to make this velvety and buttery rich soup.
Ingredients:
1 large butternut squash
1 large onion
6 big cloves of garlic
Approximately 4 liters of liquid, either vegetable stock, chicken stock or water will work fine too
Here's how to make it.
Method:
Step 1: Roast the Butternut Squash.
By first roasting your squash, you are building the foundation of flavor. The flesh will soften and caramelize as it roasts slowly in the oven which intensifies the natural buttery richness of the squash. In addition to building flavor, it's also much easier and less labour intensive to break the squash down this way.
To roast your squash, preheat your oven to 375 F. Line a large baking sheet with parchment paper or tin foil. Using a good sharp knife, cut the squash in half lengthwise. Sprinkle a little salt and pepper on the sliced sides of each half, and drizzle each side with a little oil. Then place the halves sliced side down onto your sheet pan.

Roast the squash for 45-50 minutes or until they are completely tender.
You can test their state of doneness by sticking a knife, fork or skewer in. There should be no resistance. Both the skin and flesh of the squash will be caramelized and golden.


Step 2: Prep Your Ingredients
Allow your squash to cool enough so that you can handle them with your hands. Using just a regular spoon, first scoop out the seeds and discard, then scoop out all the softened orange flesh into a large bowl or container.

Next, chop your large onion into medium sized chunks and set aside in a separate bowl. You don’t want the onions to be too small of a dice because they will burn rather than turn brown.

For the garlic, simply bash each clove with the wide flat side of your knife to loosen their peels, then set aside separately from the onion and squash.
I prefer to simply bash or crush the garlic, leaving them whole for the most part so as to allow them to get color too. Garlic, more so than other ingredients, can burn very easily when chopped finely. Since we are trying to get the most out of our ingredients for this recipe, keeping the garlic whole will allow you to cook them long enough to build on that rich caramelized semi-sweet flavor base, whereas burnt garlic would only serve to add bitterness which we don’t want.
Step 3: Get Cooking!
Get a large stock pot and place it on one of your large stove top burners on a medium to medium-high heat. Wait a few minutes for the pot to warm up, then add enough oil to thinly coat the bottom of the pot. You have the option of also adding a little nub of butter. Frying onions in plain oil works fine, but adding that little piece of butter will go a long way in adding more richness to your onion base.
* Chef Tip: Always allow your pot or pan to heat first before adding your fat. This will help to create an almost non-stick surface to your cooking vessel even if it's not non-stick.
You'll know your oil is sufficiently hot and ready for frying when it runs easily in the pan. Now add your chopped onions. Season them right away with a little salt and pepper. The salt will help draw out the moisture from the onions and aid in the breaking down and caramelizing process.
Fry the onions for 3-5 minutes, stirring occasionally, until they soften, become translucent and turn a beautiful golden brown. In this application, golden brown is the ideal level of caramelization for these onions. Caramelizing them to their full dark brown state would be delicious, but might also overpower the flavor of the butternut squash.
Once the onions have reached that lovely golden brown, add in the bashed garlic. Again stirring every 30 seconds or so, cook the garlic until the cloves too gain a bit of golden color (about 3-5 minutes).
Now with the flavor base built, add the butternut squash flesh. I like to mix it in with the garlic and onion so as to distribute that caramlized flavour throughout the pot.

Next we add the liquid. You want enough liquid to fully cover all your ingredients and to have enough room or leaway to stir the pot with ease.
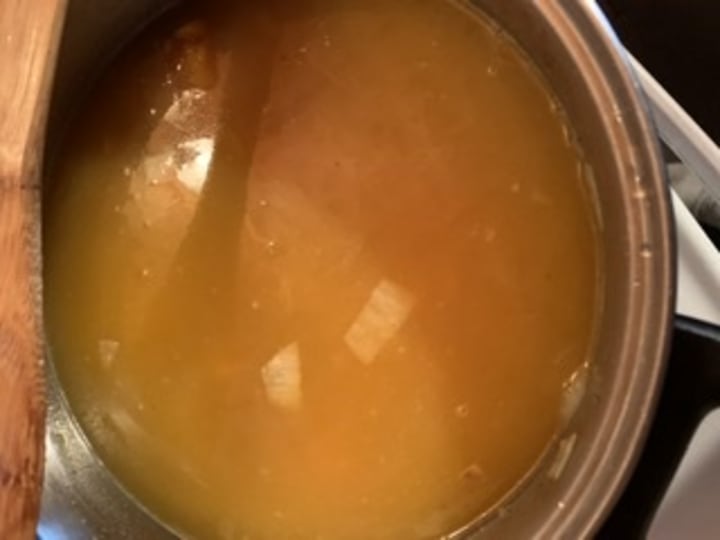
Turn the heat up to high and allow the pot to come to a strong boil, which will take a few minutes given the amount of liquid. As soon as you've reached the boiling point, cover the pot and reduce the heat to low. You're looking to keep the pot at a simmer which is a slow small bubble boil versus a big bubble rolling boil.
At the beginning of this recipe I said that the key ingredient to making any delicious soup is time especially for this kind of soup, where time maximizes and intensifies the flavors. Time makes things better.
The minimum amount of time I let this simmer for is 1 hour. It takes at least that long for all the flavors to meld and marry. However, if you have more time on your hands, there's no reason why you can't cook it for a little longer. The end result will only get better.
*Chef's Tip: Notice that we haven't added any major seasoning to the soup just yet. Remember that when the soup cooks, the flavors intensify so we don't want to add any significant amount of salt at the beginning of the cooking process because then that too will intensify and you might be left with a salty soup. Always season any kind of slow or long cooking dish at the end!!
After the hour of simmering steadily, taste your broth. If you smile and feel happy and warm inside, your soup is ready! Now you can season (add salt and pepper) to your liking.
Step 4: Blend
Allow the soup to cool uncovered until it is at least lukewarm, maybe an hour. Using either a standard blender or a hand blender, puree your soup.
If you're using a hand blender, you can puree the soup directly in the pot. If you are using a standard blender, try to scoop some solids with liquid in each batch that you puree. That way you won't have some that's too thick and others that are too thin. I stick to 1 ladle of solid to 2 or 3 ladles of liquid.
Another thing I love about this soup is that is doesn't need any cream or other liquid to make it rich. All that time we put into building flavor pays off here at the end, eliminating the need for any supplementary flavor boosters. That keeps this recipe extremely affordable to make, and also suitable for all types of eaters; omnivores, vegetarians and even vegans.
This recipe yields about 4 liters of soup, plus a bowl or so extra. It does freeze pretty well so feel free to keep one container for immediate eating, and freeze the other to enjoy at a later date.

I like to enjoy this soup with a nice piece of artisanal bread toasted and rubbed with a little fresh garlic.
This is such a wonderful recipe to make because it doesn't take a million ingredients or use fancy equipment or require that you to be a master chef to prepare it. It's simple and leaves you feeling like someone just have you a big furry bear hug.
I hope you enjoy it as much as I do!
About the Creator
Keep reading
More stories from writers in Feast and other communities.
My Tous les Jours Trip
As someone who lives in a rural area, I don't get the chance to visit fancy restaurants or bakeries that often. So, when a friend told me about a French-Asian bakery that's less than an hour away, I knew I had to check it out and grab some pictures for social media. Tous les Jours ended up providing an immersive experience that went above and beyond my expectations--although I did leave with a few reservations.
By Kaitlin Shanks20 days ago in Feast
Your Guide to Adagio Tea's Sister Sites
Adagio doesn't just sell tea--they also maintain five sister sites that contain recipes, reviews, forums and other resources for tea lovers. The layouts are a little outdated, and web traffic isn't exactly booming, but these sites still get occasional updates that make them worth checking out. Plus, you'll get access to over a decade's worth of information.
By Kaitlin Shanks5 days ago in Feast
A Dart at Dusk
Seconds ago, the sullen sun set on the two of us… my exuberant furry companion and me. A fresh breeze embraces us, delivering welcome relief from the day’s oppressive heat. His typical stumbling and staggering along — apace with a sloth — has turned into trip-trapping, high-stepping, almost skipping along.
By Angie the Archivist 📚🪶a day ago in Petlife


Comments
There are no comments for this story
Be the first to respond and start the conversation.