
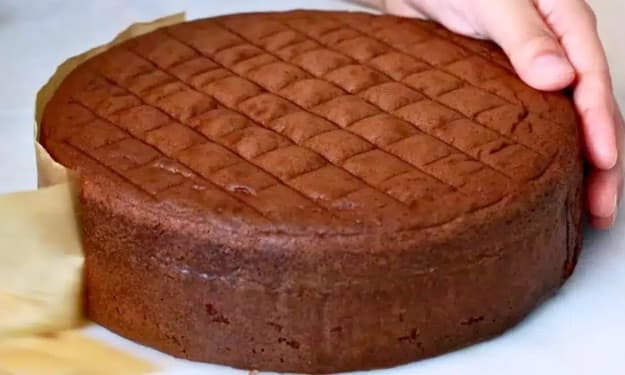
HOW TO MAKE A SPONGE CAKE?
A Light and Fluffy Delight


Wipe cake is an exemplary pastry known for its vaporous surface and light, sensitive flavor. Whether you're involving it as the base for a layered cake or serving it all alone, this flexible cake makes certain to dazzle. In this article, we'll tell you the best way to make a basic wipe cake without any preparation. With only a couple of fixings and a little consideration, you can make a light and cushioned wipe cake that is ideal for any event.
Fixings You'll Need
For a fundamental wipe cake, assemble the accompanying fixings:
1 cup (120g) regular flour
1 teaspoon baking powder
¼ teaspoon salt
4 huge eggs, at room temperature
1 cup (200g) granulated sugar
1 teaspoon vanilla concentrate
¼ cup (60g) unsalted spread, dissolved (discretionary for additional wealth)
¼ cup (60ml) warm water
Powdered sugar, for cleaning (discretionary)
Bit by bit Guidelines
Stage 1: Preheat Your Broiler
Preheat your broiler to 350°F (175°C). Set up a 8-inch round cake skillet by lubing it with margarine or oil and fixing it with material paper. This assists the cake with coming out effectively in the wake of baking.
Stage 2: Filter Dry Fixings
In a medium-sized bowl, filter together the regular flour, baking powder, and salt. Filtering guarantees that the dry fixings are uniformly conveyed, which makes a light surface in the cake.
Stage 3: Whisk the Eggs and Sugar
In an enormous blending bowl, whisk the eggs and granulated sugar together. You can utilize an electric blender or a hand whisk. Beat the combination on fast for around 5-7 minutes until it becomes pale, thick, and copies in volume. This cycle is designated "circulating air through," which makes the wipe's light surface.
Stage 4: Add the Vanilla Concentrate
When the egg and sugar blend is thick and cushioned, add the vanilla concentrate and whisk it in momentarily to integrate it into the combination.
Stage 5: Overlay in the Dry Fixings
Presently, delicately overlap the filtered flour combination into the beaten egg blend. Utilize a spatula and overlay in the flour cautiously to try not to flatten the air you've integrated into the hitter. Do this in little groups, adding a little flour at an at once until the player is smooth.
Stage 6: Add the Softened Margarine (Discretionary)
In the event that you favor a somewhat more extravagant surface, you can add the liquefied margarine at this stage. Tenderly overlay the dissolved spread into the hitter. Be certain not to overmix, as this can flatten the player.
Stage 7: Add Warm Water
Add the warm water to the hitter and overlap it in delicately. This relaxes the hitter somewhat and gives it a pleasant, soggy surface.
Stage 8: Empty the Hitter into the Dish
When the hitter is completely consolidated, empty it into the pre-arranged cake dish. Utilize a spatula to smooth the highest point of the player, guaranteeing an even layer.
Stage 9: Heat the Cake
Heat the cake in the preheated broiler for 25-30 minutes. The cake is prepared when it becomes brilliant brown and a toothpick or cake analyzer embedded into the middle confesses all.
Stage 10: Cool the Cake
Permit the wipe cake to cool in the search for gold 10 minutes. Then, cautiously eliminate the cake from the skillet and move it to a wire rack to totally cool. It's critical to allow the cake to cool completely prior to frosting or effectively guaranteeing the best surface.
Stage 11: Serve and Appreciate!
When the cake has cooled, you can appreciate it with no guarantees, or residue it with powdered sugar for a basic completion. You can likewise layer it with whipped cream, new natural products, or chocolate ganache for added character.
Tips for Wonderful Wipe Cake
Room temperature eggs: Ensure the eggs are at room temperature before you start. This assists them with preparing better and gives the cake a fluffier surface.
Don't overmix: While collapsing in the dry fixings, do so delicately to protect the air you've beaten into the eggs. Overmixing can make the cake thick.
Utilize a spotless bowl and whisk: Any oil or oil on your blending devices can keep the eggs from whipping appropriately.
Try not to open the broiler entryway: Abstain from opening the stove entryway during the initial 20 minutes of baking, as abrupt temperature changes can make the cake breakdown.
Varieties to Attempt
Layered Wipe Cake: Utilize the wipe cake as a base for a layered cake. Fill it with new natural product, whipped cream, or custard between the layers.
Chocolate Wipe Cake: For a chocolate turn, substitute a portion of the flour with cocoa powder. You can utilize ¼ cup of unsweetened cocoa powder instead of ¼ cup of flour.
Natural product Wipe Cake: Overlap in diced organic products like strawberries, raspberries, or citrus zing for a new and tasty rendition of wipe cake.
End
Wipe cake is a light, fleecy pastry that fills in as the ideal base for the overwhelming majority various cakes and sweets. With only a couple of essential fixings and cautious planning, you can make a delicate and breezy cake that is ideal for any festival or just as a treat with some tea or espresso. Whether you serve it plain, layer it with frosting, or add new natural product, this wipe cake recipe will turn into a go-to #1 for any event. Cheerful baking
About the Creator
Zahra Syed
Exploring stories that spark curiosity and inspire thought. Join me on a journey of fresh perspectives, personal reflections, and captivating topics. Let's dive deeper together—because there's always more to discover!
Keep reading
More stories from Zahra Syed and writers in Feast and other communities.
HOW TO MAKE A CHOCOLATE SPONGE CAKE?
A chocolate wipe cake is a lighter, fluffier rendition of the exemplary chocolate cake, with a delicate, breezy surface and a rich cocoa flavor. Dissimilar to customary cakes, wipe cakes depend on beaten eggs and flour for structure instead of baking powder or pop. This pursues it an ideal decision for layering with whipped cream or icing, or essentially getting a charge out of all alone. Follow this simple manual for make a flavorful chocolate wipe cake!
By Zahra Syedabout a year ago in Feast
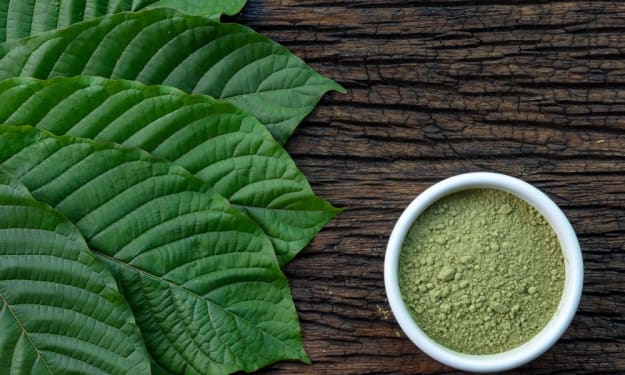
Kratom Powder Benefits: What Research and Experts Actually Say
Interest in herbal products has grown rapidly over the last decade. People now explore natural botanicals for different wellness routines, and kratom often appears in that conversation. Many online searches focus on kratom powder benefits, but the topic requires careful discussion.
By thomas oshobo3 days ago in Feast
The BAFTA Awards
By now, in a stunning departure from recent years, most of the world is aware of what happened at the BAFTA film awards. Social Media Headlines will tell you the bare bones: that John Davidson, a Tourette's Syndrome advocate, shouted a racial slur at two Actors of Colour, Michael B Jordan and Delroy Lindo.
By Natasja Rose4 days ago in Psyche


Comments
There are no comments for this story
Be the first to respond and start the conversation.