
How to Debone Every Chicken Cut with Confidence
Underrated skill home cooks should have, a step-by-step process.
Deboning chicken might sound like a job best left to professional chefs or experienced home cooks. After all, who has the time—or the skills—to turn a whole chicken or tricky cuts like thighs and wings into perfectly deboned pieces? But here’s the truth: deboning chicken at home is not nearly as complicated as it seems. With the right tools, a little guidance, and a dash of confidence, you can easily transform your store-bought chicken into ready-to-cook perfection.
Why bother? For one, deboning your own chicken saves money, as bone-in cuts are often cheaper than their boneless counterparts. Plus, there’s a freshness and satisfaction that comes with doing it yourself—not to mention the culinary possibilities that open up when you’re in control of every piece. Imagine turning leftover bones into rich chicken stock or customizing the size and shape of your cuts to match your favorite recipes.
This guide is here to show you that deboning chicken is an empowering skill and not intimidating at all. Let’s start with the essentials and work our way through each cut, proving that home deboning is a practical and rewarding skill every beginner cook can master.
To Get Started: Tools of the Trade
Having the right tools can make the process safer, faster, and more efficient. Here’s a breakdown of the essential tools, why the right knife matters, and a few optional extras to consider.
Essential Tools for Deboning Chicken
To successfully debone chicken at home, you’ll need a few must-have tools:
- Boning Knife: Its sharp, thin, and flexible blade makes it ideal for cutting close to the bone, minimizing meat waste.
- Cutting Board: A sturdy, non-slip surface ensures stability while working and keeps your knife from dulling.
- Kitchen Shears: Useful for cutting through tough joints and trimming excess fat or skin.
Why the Right Knife Matters
A proper boning knife isn’t just a convenience—it’s the cornerstone of successful deboning. Its sharpness and flexibility allow precise cuts, reducing waste and making it easier to work around bones. A dull or bulky knife increases the risk of accidents and frustration, slowing you down and compromising your results.
Optional Tools for a Smoother Process
While not essential, these tools can elevate your deboning experience:
- Bone Tweezers: Handy for removing small or hidden bones, especially in chicken thighs or fillets.
- Meat Mallet: Helps flatten meat for even cooking after deboning.
- Disposable Gloves: Keeps your hands clean and improves grip when handling raw chicken.
- Paper Towels: Useful for patting the chicken dry, ensuring a secure grip and safer cuts.
Safety First: Setting the Stage for Success
When working with raw chicken, cleanliness and proper sanitation are non-negotiable. A clean workspace and sanitized tools not only ensure food safety but also make the deboning process smoother and more enjoyable. Contaminated surfaces or tools can lead to foodborne illnesses, so it’s essential to start with a clean slate and maintain it throughout your prep.
Quick Tips for Handling Raw Chicken Safely
- Wash Hands Thoroughly: Always wash hands with soap before and after handling chicken.
- Separate Raw Chicken: Keep chicken away from other ingredients to avoid cross-contamination.
- Use a Dedicated Cutting Board: Choose one reserved for raw meat to prevent bacterial spread.
- Sanitize Tools and Surfaces: Wash knives, boards, and counters with hot soapy water or a diluted bleach solution.
- Keep Chicken Cold: Work quickly and refrigerate unused portions immediately.
How to Store Bones Properly
- When to Store: If you plan to make stock or soup later, keep bones to add rich flavor to your broth.
- How to Store: Place bones in an airtight container or freezer bag and freeze immediately. They’ll stay fresh for up to three months.
How to Dispose of Bones Properly
- When to Dispose: If you don’t plan to use the bones, dispose of them promptly to avoid odor or contamination.
- How to Dispose: Double-bag the bones in a sturdy trash bag to contain odors and bacteria. Dispose of them in an outdoor bin, especially in warm weather.
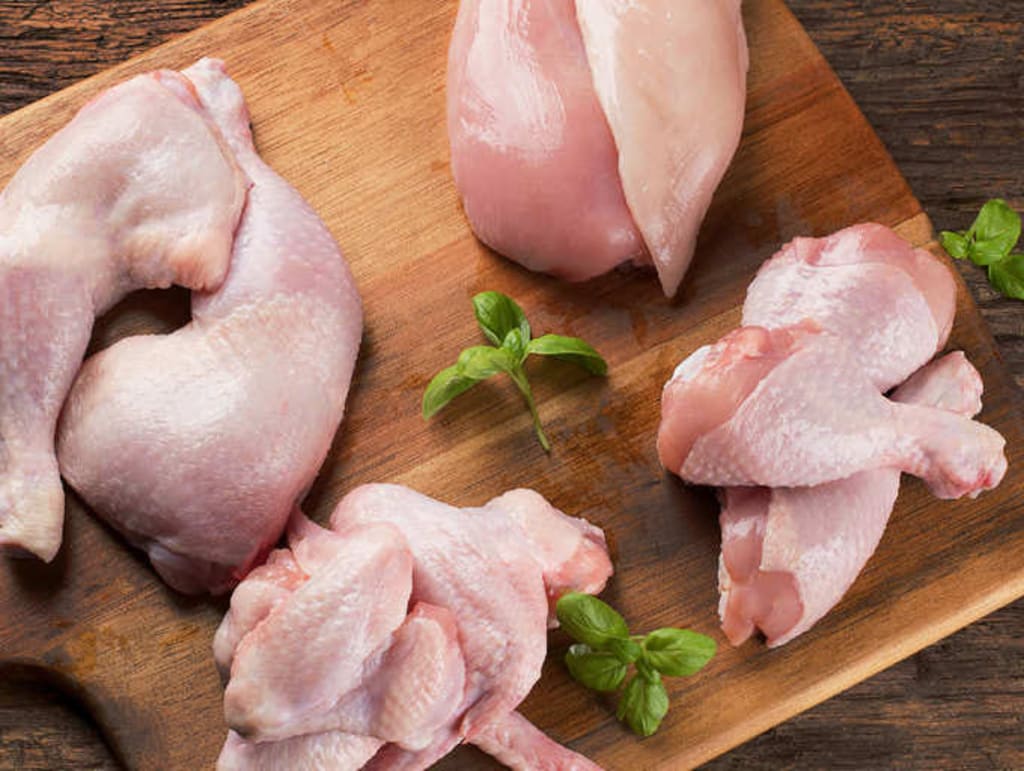
Breaking It Down: Deboning Chicken, Cut by Cut
This section is arranged to take you from the easiest cuts to the more advanced ones, helping you build confidence with each step. Starting with simple cuts like chicken breasts and moving to whole chickens ensures a gradual learning curve, making the process approachable for any beginner.
Chicken Breast: The Simple Start
Chicken breasts are an excellent choice for beginners because they’re boneless or semi-boneless cuts with minimal connective tissue to navigate. Their flat, even shape makes it easy to see and feel for any remaining bones or cartilage, allowing you to focus on developing your knife skills without frustration. Additionally, deboning a chicken breast often involves straightforward tasks like removing the breastbone or tenderloin, which are easy to identify and remove cleanly. This simplicity provides a low-pressure way to practice and gain confidence in handling poultry.
Step-by-Step Guide to Removing the Breastbone and Tenderloin
- Position the Breast: Place the chicken breast side up on your cutting board. The thicker side should face you.
- Locate the Breastbone: Feel for the ridge running along the middle of the breast.
- Cut Along the Bone: Using a sharp boning knife, make a shallow cut along one side of the breastbone. Follow the curve of the bone as you slice.
- Separate the Meat: Gently pull the meat away with your free hand as you continue slicing close to the bone.
- Remove the Tenderloin: Flip the breast over and locate the small strip of meat on the underside. Use your knife or fingers to separate it from the breast.
- Check for Small Bones: Feel the meat for any remaining cartilage or pin bones and remove them with tweezers or the knife.
- Trim Excess Fat: Use kitchen shears to remove any visible fat or skin if desired.
Chicken Thighs: Discovering the Hidden Bone
Chicken thighs are a versatile and flavorful cut that’s well worth mastering. They’re slightly more challenging than chicken breasts due to their smaller size and single bone nestled within the meat. However, with a little practice, deboning chicken thighs becomes a quick and satisfying task, yielding a tender, juicy cut perfect for countless recipes.
Step-by-Step Guide to Locating and Removing the Thigh Bone
- Position the Thigh: Lay the chicken thigh skin-side down on your cutting board. The bone should be visible or easily felt running through the center.
- Score Along the Bone: Use a sharp boning knife to make a shallow cut along the length of the bone, exposing it fully.
- Free the Edges: Carefully slice around the bone, separating it from the surrounding meat. Work slowly to avoid cutting through the meat.
- Lift and Remove: Once the bone is mostly free, use your fingers or the knife to gently lift and detach it. Cut through any remaining connective tissue.
- Check for Residual Cartilage: Feel for any small bits of cartilage or bone fragments and remove them.
Tips for Preserving the Most Meat
- Stay Close to the Bone: Keep the knife angled toward the bone while cutting to avoid trimming away too much meat.
- Small, Controlled Cuts: Use short, precise motions rather than long strokes to maintain control.
- Save the Skin: If the recipe calls for skin-on thighs, avoid cutting into the skin—it helps keep the meat moist and flavorful during cooking.
Chicken Legs: From Drumstick to Deboned Delight
Deboning chicken drumsticks might seem unnecessary, but it’s incredibly useful in certain situations. Whether you’re stuffing them with your favorite fillings, creating tender boneless bites for stir-fries, or simply aiming for faster cooking times, mastering this skill expands the versatility of this popular cut. While the drumstick has more connective tissue than other cuts, it’s a manageable challenge that delivers rewarding results.
Step-by-Step Guide to Identifying and Separating the Drumstick and Thigh
- Locate the Joint: Lay the chicken leg skin-side down. Feel for the joint where the drumstick meets the thigh—it’s slightly flexible.
- Expose the Joint: Make a shallow cut through the skin and meat at the joint to expose the connecting tissue.
- Cut Through the Joint: Use your knife to slice through the soft cartilage at the joint, separating the drumstick from the thigh cleanly.
Techniques for Removing the Long Bone Cleanly
- Grip and Score: Hold the drumstick firmly and make shallow cuts around the top of the bone to loosen the meat.
- Scrape Downward: Use the back of your knife to scrape the meat down the length of the bone, separating it from the connective tissue.
- Twist and Pull: Once the meat is loosened, twist and pull the bone gently to remove it completely. If necessary, use your knife to detach any stubborn tissue.
Chicken Quarters: Two-in-One Skills
Chicken quarters are a versatile cut that includes both the thigh and drumstick, making them a great option for those who want the rich flavor of dark meat with the convenience of having both pieces in one. These cuts are larger and meatier, often chosen for grilling, roasting, or creating impressive stuffed dishes. Deboning a chicken quarter can make cooking more efficient and expand your recipe options, such as rolling and stuffing the meat for elegant presentations or simplifying the cooking process for quick meals. It’s especially worth deboning chicken quarters when you want uniform cooking or need boneless portions for a specific dish.
How to Debone a Chicken Quarter Without Losing Meat
- Start Skin-Side Down: Lay the quarter skin-side down on your cutting board to expose the bones and make them easier to work with.
- Locate the Joint: Feel for the joint where the thigh and drumstick connect. Make a shallow cut to expose the cartilage, separating the two pieces slightly for easier handling.
- Score Along the Thigh Bone: Run your knife along the length of the thigh bone, making shallow cuts to expose it. Angle your knife toward the bone to avoid cutting away too much meat.
- Free the Thigh Bone: Use the tip of your knife to slice around the edges of the thigh bone, loosening it. Lift and pull the bone out gently once it’s fully detached.
- Remove the Drumstick Bone: Repeat the process for the drumstick bone by scoring around its length and scraping downward to loosen the meat. Twist and pull gently to remove the bone.
- Trim and Check: Remove any remaining cartilage or small bone fragments, and trim excess fat if desired.
Chicken Wings: The Mini-Challenge
Chicken wings are often served bone-in, but deboning them opens up a world of culinary possibilities. Whether you’re making stuffed appetizers, crispy boneless wings, or preparing them for soups and stews, deboning chicken wings allows for easier eating and creative presentations. Boneless wings are also a hit at parties, offering all the flavor of traditional wings without the mess. With a little patience, deboning wings can transform this popular cut into a versatile ingredient for countless dishes.
Step-by-Step Guide to Splitting and Deboning Chicken Wings
- Separate the Sections: Locate the joints that connect the drumette, wingette, and wingtip. Use a sharp knife or kitchen shears to cut through the cartilage at each joint. Discard the wingtip or save it for stock.
- Position the Wingette: Lay the wingette flat on your cutting board, skin-side down.
- Locate the Bones: Feel for the two thin bones running through the wingette.
- Make a Cut: Use the tip of your knife to make a small incision along one bone, exposing it slightly.
- Remove the First Bone: Slide the knife under the bone and cut away any attached cartilage. Gently twist and pull the bone out.
- Repeat for the Second Bone: Follow the same process to remove the second bone, leaving the meat intact.
- Debone the Drumette: Stand the drumette upright and score around the top of the bone. Scrape downward with your knife to separate the meat, then twist and remove the bone.
Using Shears for Precision
Kitchen shears are an excellent tool for handling chicken wings, especially when precision is key. They make cutting through joints and cartilage quick and clean, reducing the risk of uneven sections or jagged cuts. Use shears to split the wing sections or trim away excess fat and skin before deboning. Their compact size and ease of use give you better control in tight spaces, ensuring a neat and efficient process every time.
Whole Chicken: The Ultimate DIY Project
Deboning a whole chicken is a cost-effective way to make the most of your purchase. It allows you to separate the meat into versatile cuts while saving the bones for flavorful stocks or broths. This technique also gives you control over the portion sizes and ensures no part of the chicken goes to waste. Whether you’re preparing multiple meals or creating an elegant stuffed roast, deboning a whole chicken unlocks endless cooking possibilities.
Step-by-Step Instructions: From Backbone to Boneless Perfection
- Prepare the Chicken: Place the chicken breast-side down on a sturdy cutting board. Ensure you have a sharp boning knife or kitchen shears ready.
- Separate the Backbone: Locate the backbone running down the center of the chicken. Use kitchen shears to cut along both sides of the backbone. Remove it and set it aside for stock if desired.
- Flatten the Chicken: Flip the chicken over and press firmly on the breastbone to flatten it (spatchcock). This step makes the remaining bones easier to access.
- Remove the Breastbone: Locate the white cartilage or ridge along the center of the chicken. Make a small cut at the top and pull it out gently, working your way downward.
- Detach the Wings: Slice through the joint where the wings meet the body. Either leave the wings attached if desired or debone them using the earlier method.
- Separate the Thighs and Drumsticks: Flip the chicken back over. Cut through the joint connecting each leg to the body. Debone the thighs and drumsticks individually by following the techniques mentioned earlier.
- Remove the Rib Bones: Run your knife along the inside edges of the ribcage, separating the meat from the bones. Work carefully to preserve as much meat as possible.
- Trim and Check: Inspect the meat for any small bones or cartilage and remove them. Trim any excess fat as needed.
Your First Step to Deboning Mastery
Deboning chicken at home isn’t just a handy skill—it’s a way to save money, reduce waste, and elevate your cooking. From simple cuts like breasts to tackling whole chickens, you now have the tools and techniques to handle it all.
Don’t be afraid to practice! This guide is written with beginners in mind, so take it one cut at a time, and you’ll soon master the art of deboning. Each attempt brings you closer to culinary confidence. Next time you buy chicken, use this guide to transform your purchase into perfectly prepared cuts. Happy deboning!
About the Creator
My Tous les Jours Trip
As someone who lives in a rural area, I don't get the chance to visit fancy restaurants or bakeries that often. So, when a friend told me about a French-Asian bakery that's less than an hour away, I knew I had to check it out and grab some pictures for social media. Tous les Jours ended up providing an immersive experience that went above and beyond my expectations--although I did leave with a few reservations.
By Kaitlin Shanks26 days ago in Feast
Searching for the Best Pizza in Doha
The search for the best pizza in Doha doesn’t begin with a map or a list. It usually starts with a feeling. Hunger, yes—but also nostalgia, comfort, or the simple desire to slow down at the end of a long day. Doha is a city that moves quickly, shaped by ambition and constant change, yet food often becomes the place where life briefly pauses. Pizza, though not native to Qatar, has quietly earned its place in that pause.
By Harley Morris3 days ago in Feast


Comments
There are no comments for this story
Be the first to respond and start the conversation.