
Best Chocolate Molds for Holiday Treats
In this guide, we will explore the best chocolate molds available, discuss different types and techniques, and share useful tips to help you create stunning holiday treats.

The holiday season is a wonderful time to gather with friends and family over delicious homemade treats. Creating your own chocolates not only adds a personal touch to your celebrations but also gives you the opportunity to experiment with exciting flavors and designs.
Understanding Chocolate Molds
Chocolate molds are a key component in turning basic ingredients into delightful holiday confections. Whether you're an experienced confectioner or just beginning to experiment in the kitchen, choosing the right mold is essential for achieving consistent, eye-catching results.
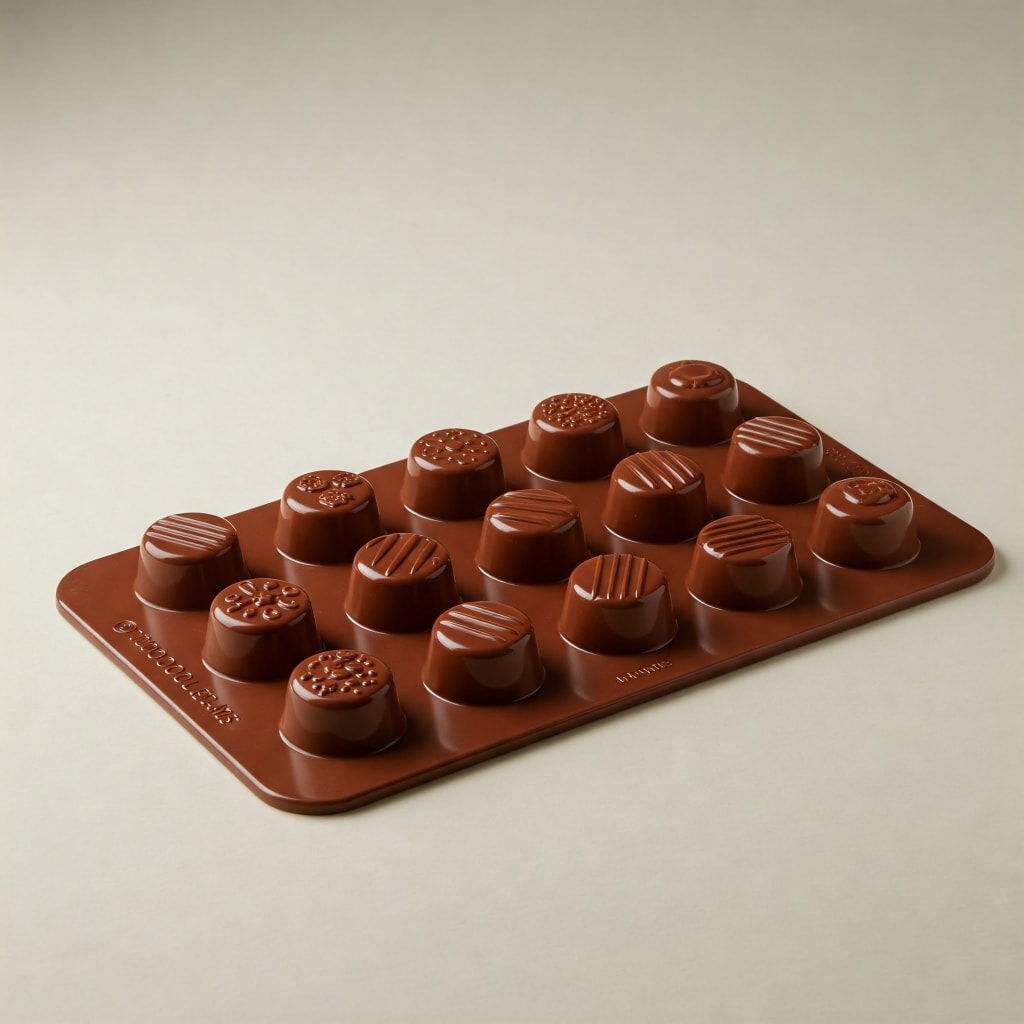
Materials Used in Chocolate Molds
Different materials used for chocolate molds offer unique benefits. Here are the most common types:
Polycarbonate: Known for its durability and ability to produce a shiny, professional finish, polycarbonate is the choice for many when aiming for high-quality, glossy chocolates.
Silicone: Valued for its flexibility and non-stick properties, silicone molds are perfect for intricate designs and are also used for other treats like jellies and gummies.
Other Materials: Some molds are made from metal or composite materials. Each type brings its own advantages regarding heat distribution, ease of cleaning, and durability.
Benefits of Using Chocolate Molds
Using a well-chosen mold can transform your holiday treat-making process:
- Uniformity: Molds ensure that each piece of chocolate is consistent in shape and size.
- Creativity: With a wide variety of shapes and sizes available, molds let you express your creativity in every piece.
- Presentation: Beautifully molded chocolates can elevate the overall look of your dessert table and make thoughtful gifts.
Types of Molds for Holiday Treats
When it comes to holiday treats, the type of mold you choose plays a significant role in the final appearance and texture of your chocolates. Below are some popular choices:
Polycarbonate Molds
Polycarbonate molds are a favorite among many chocolate makers. They provide a high-gloss finish that is ideal for display purposes. However, using them effectively requires careful chocolate tempering—a process that stabilizes the cocoa butter to achieve a smooth finish and a pleasant snap when the chocolate is broken.
Advantages:
- Yields a professional, glossy finish.
- Sturdy and long-lasting.
- Suitable for detailed and intricate designs.
Tip: For a detailed process on achieving that professional finish, check out How to Make Perfect Candies with Polycarbonate Molds.
Silicone Molds
Silicone molds offer a flexible and user-friendly option for creating not just chocolates, but also a variety of other treats. Their flexible nature makes them ideal for designs with intricate details or for recipes that might stick to less forgiving surfaces.
Advantages:
- Easy to demold, even for intricate shapes.
- Versatile and available in many creative designs.
- Suitable for use with chocolates as well as jellies and gummies.
Tip: For ideas on how to use these molds to create delightful desserts beyond chocolate, see How to Use Silicone Molds for Perfectly Shaped Jellies and Gummies.
Specialty Molds
Specialty molds are designed for creating layered or multi-flavored treats that can add an extra element of sophistication to your holiday offerings. These molds are excellent if you plan to experiment with different flavors or incorporate additional textures like nuts or dried fruits into your chocolates.
Advantages:
- Allows for creative layering and flavor combinations.
- Perfect for unique, gourmet holiday treats.
- Encourages experimentation with different textures.
Tip: For creative recipes and ideas using these specialty molds, explore Layered Chocolates: Multi-Flavor Recipes Using Chocolate Molds.
How to Choose the Right Mold
Selecting the appropriate mold for your holiday treat-making project depends on several factors. Here are some considerations to help guide your choice:
Material and Durability
Polycarbonate: Best for creating high-gloss, professional-looking chocolates. These molds work well if you want your treats to stand out visually.
Silicone: Ideal for beginners and for recipes that involve more detailed or delicate designs.
Other Options: Explore other materials if you need specific qualities such as enhanced heat retention or unique textural effects.
Design and Seasonal Themes
Holiday Motifs: Look for molds that reflect seasonal themes—think snowflakes, stars, or festive holiday icons.
Versatility: Some molds are designed for multiple uses, allowing you to switch between chocolate, candy, and even jelly creations.
Ease of Use and Maintenance
Non-stick Properties: Especially important in silicone molds, non-stick surfaces help in easy demolding.
Cleaning: Consider molds that are simple to clean—many silicone options are dishwasher-safe, which can be a major convenience.
Size and Output
Batch Production: If you plan on making a large number of treats, choose molds that can produce several pieces at once.
Portion Control: Smaller molds work well for bite-sized treats, while larger ones might be better for centerpieces or sharing with a group.
Budget Considerations
Cost vs. Longevity: Investing in a high-quality mold might be more expensive initially, but it can yield better results and last through many holiday seasons.
Value for Money: Evaluate how frequently you plan to use the mold and how it fits within your overall treat-making strategy.
Practical Tips for Working with Chocolate Molds
Achieving excellent results with chocolate molds is both an art and a science. Here are some practical tips to help you along the way:
Preparing Your Workspace
Clean and Organized Area: Ensure that your work surface is free of dust and clutter.
Proper Temperature: Work in a cool environment to prevent premature melting of the chocolate.
Essential Tools: Have a spatula, thermometer, and a reliable heat-proof bowl on hand for melting and tempering your chocolate.
The Tempering Process
Tempering is crucial for ensuring that your chocolate has a smooth, glossy finish and a satisfying snap. The process involves carefully heating and cooling the chocolate to stabilize the cocoa butter crystals.
Step-by-Step Tempering:
- Melt the chocolate gently over a double boiler.
- Monitor the temperature carefully with a thermometer.
- Allow the chocolate to cool to the right temperature before pouring it into your molds.
If necessary, reheat slightly to achieve the ideal consistency for molding.
Pouring the Chocolate
Slow and Steady: Pour the tempered chocolate slowly into the mold to avoid air bubbles.
Tapping Out Air: Gently tap the filled molds on the counter to release any trapped air bubbles.
Setting Time: Allow the chocolate to set completely in a cool, dry place. You can also refrigerate it for a short period, but be cautious of sudden temperature changes which might cause cracks.
Demolding with Care
Wait for Full Set: Ensure the chocolate is completely hardened before attempting to remove it from the mold.
Gentle Techniques: Use your fingertips or a small, delicate tool to lift the chocolate from the mold, especially if the design is intricate.
Creative Ideas for Holiday Treats
Now that you understand the basics of choosing and using chocolate molds, here are some creative ideas to inspire your holiday treat-making:
Festive Polycarbonate Chocolates
Creating shiny, professional-looking chocolates is easier with polycarbonate molds. These treats can be customized with various add-ins such as nuts, dried fruits, or even flavored centers.
Ingredients:
- High-quality dark or milk chocolate
- Optional add-ins: nuts, dried fruits, a pinch of sea salt
Steps:
Temper Your Chocolate: Follow a precise tempering method to ensure the chocolate sets with a brilliant shine.
Fill the Molds: Gently pour the chocolate into clean, dry polycarbonate molds.
Add Extras: Incorporate nuts or dried fruits if desired.
Set and Release: Let the chocolate fully set before demolding carefully.
Versatile Silicone Treats
Silicone molds are perfect for creating not only chocolates but also gelatin-based treats like jellies and gummies. Their flexibility ensures a smooth release and detailed designs.
Ingredients:
- Gelatin or agar-agar for jellies
- Fruit juice or puree
- Sugar and a dash of lemon juice
Steps:
Mix and Heat: Combine your ingredients in a saucepan and heat until the gelatin dissolves.
Pour into Silicone Molds: Fill the molds evenly.
Cool Completely: Allow the mixture to set naturally before carefully removing the treats.
Multi-Layered Holiday Chocolates
For a gourmet twist, try making layered chocolates that incorporate multiple flavors. This technique allows you to create visually striking treats that offer a complex taste experience.
Ingredients:
- Several types of chocolate (for example, dark, milk, and white)
- Flavor extracts (such as vanilla or almond)
- Optional extras: crushed candy canes, toasted nuts
Steps:
Prepare Each Layer: Temper each type of chocolate separately to maintain distinct layers.
Layering Process: Pour one layer into the mold and let it partially set before adding the next.
Build the Flavor: Sprinkle your chosen flavor extracts or extras between layers.
Final Set: Let the entire creation set thoroughly before demolding.
Final Thoughts
The art of making holiday treats is not just about following a recipe—it’s about experimenting, enjoying the process, and sharing the results with those you love. Whether you decide to work with the durability of polycarbonate molds or the flexible ease of silicone molds, each type offers unique advantages that can help you craft treats that look as delightful as they taste.
Enjoy experimenting with different molds and recipes this holiday season, and remember that every mistake is just another step toward mastering the art of crafting delicious, beautiful chocolates. Happy holiday treat making!
About the Creator
Maryjo J. Moran
Writing with Passion!
Keep reading
More stories from Maryjo J. Moran and writers in Feast and other communities.
Top 5 Common Mistakes to Avoid When Making Weed-Infused Gummies
Learning how to make weed-infused gummies at home can be an exciting adventure. These tasty treats are a popular way to enjoy cannabis, offering a discreet, portable, and flavorful experience. However, many beginners encounter pitfalls that can lead to wasted ingredients or disappointing results. To ensure your gummies turn out perfectly, here are the top five mistakes to avoid when crafting your own weed-infused gummies.
By Maryjo J. Moranabout a year ago in Feast
Australia Fish and Seafood Market 2026: Sustainable Consumption, Aquaculture Growth & Premium Seafood Demand
Australia Fish and Seafood Market Australia’s fish and seafood market is expanding steadily as consumers increasingly prioritize high-quality protein sources and sustainable food options. Fish and seafood products—including salmon, tuna, shrimp, shellfish and other marine species—play a vital role in the Australian diet due to their nutritional value and culinary versatility. Growing awareness of seafood’s health benefits, particularly its omega-3 fatty acids, vitamins and minerals, is driving consumption across households, restaurants and foodservice channels.
By Amyra Singh7 days ago in Feast


Comments
There are no comments for this story
Be the first to respond and start the conversation.