
A Beginner's Guide to Installing Laminate Flooring
Step-by-Step Instructions for Beautiful and Durable Floors
Title: A Beginner's Guide to Installing Laminate Flooring
Introduction:
Installing laminate flooring is an excellent way to enhance the beauty and functionality of your home. Whether you're a seasoned DIY enthusiast or a beginner, with the right tools, materials, and a step-by-step guide, you can tackle this project with confidence. In this article, we'll provide you with a beginner's guide to installing laminate flooring, covering everything from preparation to the final touches.
1. Gather Your Materials:
Before starting the installation process, gather all the necessary materials. These typically include laminate flooring planks, underlayment, spacers, a tapping block, a circular saw or miter saw, a tape measure, a pencil, a pry bar, a hammer, and safety equipment like knee pads and safety goggles. It's crucial to have everything on hand to ensure a smooth and efficient installation.
2. Prepare the Subfloor:
Proper preparation of the subfloor is essential for a successful laminate flooring installation. Start by removing any existing flooring, such as carpet or vinyl, and thoroughly clean the subfloor to ensure it's free of debris and level. If necessary, use a self-leveling compound to even out any uneven areas. Repair any damages or cracks in the subfloor before proceeding.
3. Install Underlayment:
Underlayment is a crucial layer that provides cushioning, sound insulation, and moisture protection. Roll out the underlayment across the entire floor, leaving a small gap along the edges to prevent buckling. Tape the seams securely, ensuring a smooth and continuous surface. Follow the manufacturer's instructions for your specific underlayment type.
4. Plan the Layout:
Careful planning of the layout will ensure a visually appealing result. Start by measuring the dimensions of the room and calculating the square footage needed. Consider the direction of natural light and the flow of the space. It's generally recommended to install laminate flooring parallel to the longest wall in the room. Use spacers to create an expansion gap between the planks and the walls.
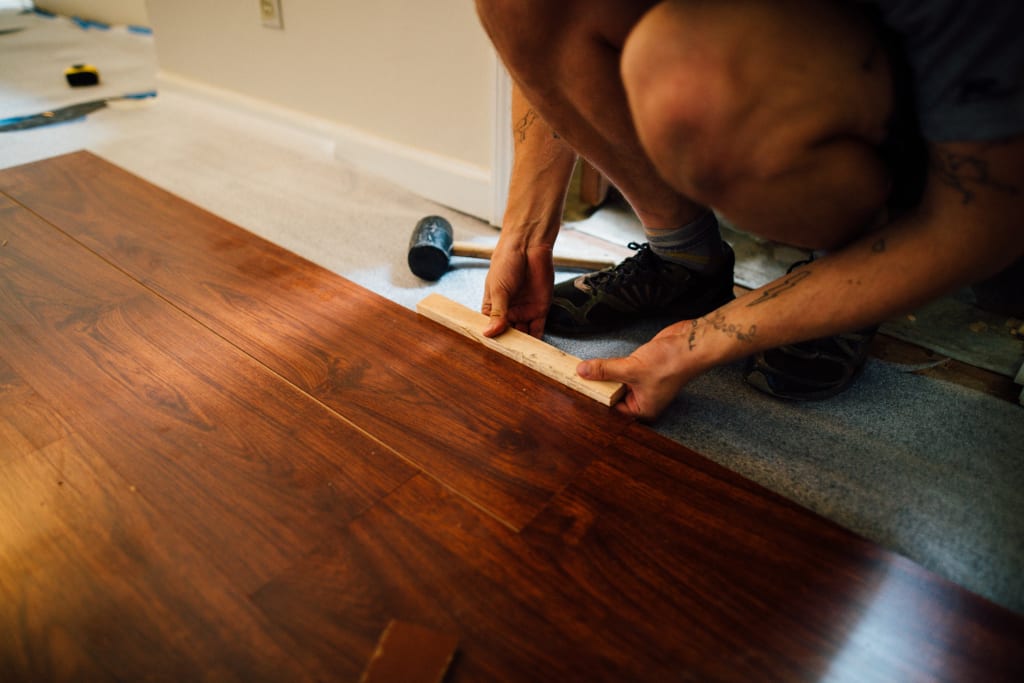
5. Install the First Row:
Begin by laying the first row of laminate flooring along the starting wall. Make sure the tongue side faces the wall. Use a tapping block and a hammer to gently tap the planks together, ensuring a snug fit. Use a circular saw or a miter saw to cut the planks to the appropriate length when necessary. Remember to leave an expansion gap between the last plank and the wall.
6. Continue with Subsequent Rows:
Continue installing subsequent rows of laminate flooring, interlocking the tongue and groove edges. Stagger the end joints to create a more natural look and improve structural integrity. Use the tapping block and a hammer to ensure each row fits tightly together. Check periodically with a level to maintain a flat and even surface.
7. Trim and Finish:
When you reach the final row, you'll likely need to trim the planks to fit the remaining space. Measure and mark the planks carefully before cutting to avoid mistakes. Use a pry bar and a tapping block to install the final row, ensuring a tight fit. Once all the planks are installed, remove the spacers and install the baseboards or quarter-round molding to cover the expansion gap.
8. Clean and Maintain:
After completing the installation, clean the laminate flooring using a microfiber mop or a soft broom to remove any dust or debris. Avoid using excessive water or abrasive cleaners, as they can damage the surface. Follow the manufacturer's guidelines for maintenance and care to keep your laminate flooring looking its best for years to come.
9. Enjoy Your New Flooring:
Now that your laminate flooring installation is complete, it's time to sit back, relax, and enjoy your beautiful new floors. Laminate flooring offers durability, easy maintenance, and a wide range of styles and designs to suit any aesthetic preference. It provides a cost-effective and practical solution for transforming your space.
10. Seek Professional Help When Needed:
While installing laminate flooring is a project that many beginners can successfully tackle, there may be instances where professional help is warranted. If you encounter structural issues with the subfloor, have complex room layouts, or feel unsure about any step of the process, it's wise to consult with a professional installer. They can provide guidance, ensure proper installation, and address any challenges that may arise.
Conclusion:
Installing laminate flooring is an exciting and rewarding DIY project that can significantly enhance the beauty and value of your home. By following this beginner's guide and taking the time to prepare, plan, and execute each step with care, you'll achieve professional-looking results. Remember to gather all the necessary materials, prepare the subfloor, install the underlayment, and plan the layout before beginning the installation. Take your time, use the proper tools, and pay attention to detail to ensure a successful and visually appealing outcome.
With a little patience and determination, you'll be able to enjoy the beauty and durability of laminate flooring in your home. Whether you're transforming a single room or tackling the entire house, this DIY project allows you to create a stylish and comfortable space without breaking the bank. Embrace the process, and before you know it, you'll have a stunning floor that you can be proud of for years to come.
About the Creator
Keep reading
More stories from Eze Shedrack and writers in Humans and other communities.
Creating a Cozy Outdoor Living Space on a Budget
Title: Creating a Cozy Outdoor Living Space on a Budget Introduction: Transforming your outdoor space into a cozy and inviting retreat doesn't have to break the bank. With some creativity, resourcefulness, and a little DIY spirit, you can create a beautiful outdoor living area where you can relax, entertain, and enjoy the beauty of nature without spending a fortune. In this article, we'll explore some inspiring ideas and practical tips to help you create a cozy outdoor living space on a budget.
By Eze Shedrack3 years ago in Humans
The CEO of Everything
They say "jack of all trades, master of none," but they forgot to mention the part where the jack of all trades is also the camera woman, the makeup artist, and the person currently yelling at a tangled Wii microphone cable in a her own bathroom while recording herself singing and trying to make it look realistic and professional. (As professional as you can make it with nothing but a cell phone camera and a mic that doesn't work)
By Sara Wilson5 days ago in Humans
Unexpected Romantic Getaway
I was talking to a guy I instantly clicked with online for about a month. We had an instant connection. The kind of you see in the movies. If you imagine those old school music videos with two people sitting on the phone all night that was us. We would spend hours talking every single day. We never ran out of topics to talk about or to joke about. Our connection was so light and effortless and it felt right. I even once called him while he was with his grandparents and made an instant connection with them as well.
By Softly Unspoken3 days ago in Humans
How, Too
Many people wonder how, too. You are not alone, and I am an expert. I will teach you how, too! First, you need to remit a small application fee and fill out an application describing the nature of your financial situation and how often payments will be made, as this will have great bearing on how well I teach you how, too.
By Harper Lewis6 days ago in Fiction


Comments
There are no comments for this story
Be the first to respond and start the conversation.