
Santa's Favorite Christmas Cookie
and your family's new favorite too!


'Twas the night before Christmas, in the kitchen where all families gather, where smells of sweet and savory love begin to matter. As families come together to bake cookies for St. Nick, why don't you try this cookie recipe? It's light, easy, and quick.
Making cookies on Christmas Eve is a family tradition passed down for generations; bringing joy to any face who experiences them. Considering this year was full of many surprises and shocks, I thought there's no better time to share something that tastes so great and is fun for the whole family to make. Relax this Christmas with sweet cookie fun from my family to yours.
Candy Cane Cookie: You've never tasted anything, so butter, light, and crisp these sweet minty Christmas cookies will send you and Santa over the top this Christmas. This recipe is a special way for everyone in the family to get their hands dirty together. This recipe yields 32 servings and takes about 45 minutes from start to finish.
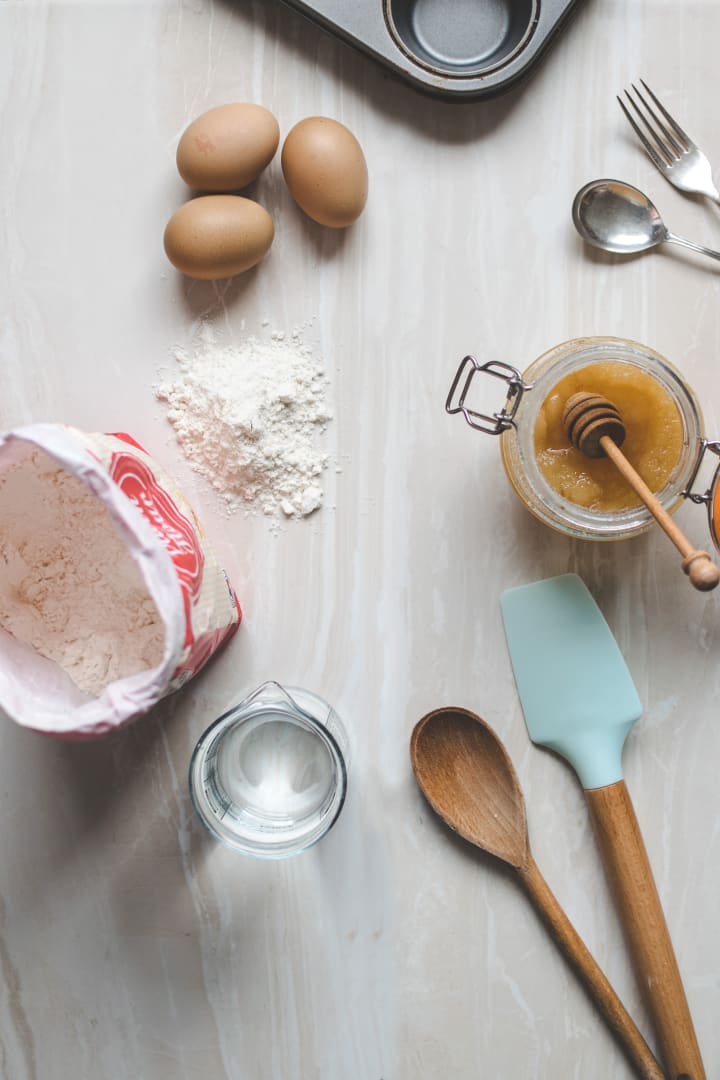
The recipe calls for:
- 1/2 teaspoon of salt
- 1/2 teaspoon of baking soda
- 2 1/2 cups of flour/ can substitute with gluten-free flour
- 1 cup of unsalted butter
- 1 cup of sugar/ can replace with any sugar as long as it's granulated
- One egg
- 1/2 teaspoon or 3/4 drops red food coloring
- One teaspoon vanilla extract
- Three regular-sized peppermints flavored candy canes equal about a 1/2 cup.
- Saran Wrap
- Non-stick cookie sheet pan

Instructions
Shortbread and Frosting: This cookie is the same base recipe for the candy cane cookie, the same light buttery cookie that will want to make Santa keep coming back for more. This recipe yields about 24 cookies and takes about 40 minutes from start to finish.
Shortbread Recipe:
- 3 cups all-purpose flour, plus more for dusting
- Two teaspoons baking powder
- ½ teaspoon kosher salt
- 16 tablespoons unsalted butter, cubed and chilled
- 1 cup of sugar
- One large egg
- One tablespoon vanilla extract
Icing Recipe:
- 2 cups powder sugar
- 1/4 cup of milk
- one teaspoon of vanilla extract
- food coloring (optional, frosting produces an ivory color)
Instructions:
- Preheat the oven to 350˚F
- Mix salt, baking soda, and flour in a bowl and set aside. Mix with a fork to make sure evenly combined
- In a separate bowl, beat together preferably with an electric mixer, butter, and sugar for 2-3 minutes until it takes a fluffy shape.
- Then add and combine egg and vanilla extract.
- After those ingredients form a mixture, begin to slowly, a little a time, add in the flour, baking soda, and salt mixture.
- Keep mixing until just combined. The dough should be kind of crumbly. Then you can move your shortbread cookie dough onto a sanitized floured countertop. With clean hands, knead your dough for 30 seconds. Make the dough into a disc-like shape, wrap it up and store it in the fridge for 10 minutes.
- While your dough is setting up, get your non-stick cookie tray. Some folks like to line theirs with parchment; either way, the best way to make sure your cookies don't crack or break is giving them enough time to cool off, which can be anywhere from 15-20 minutes and even longer if you want to frost them.
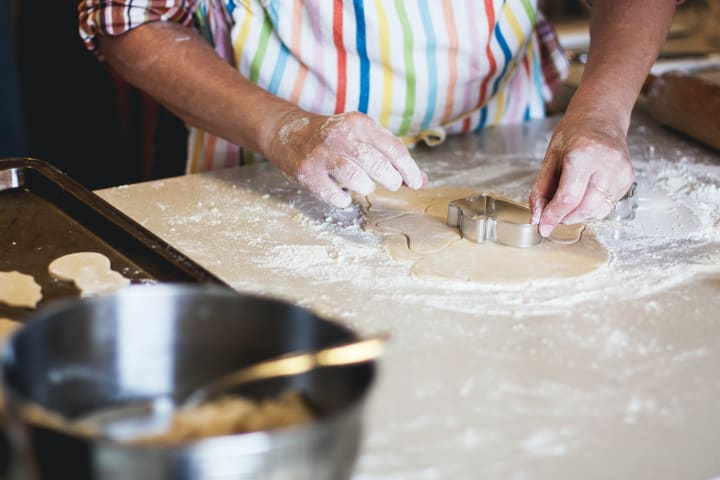
- We would roll out this dough because we want to make pretty shapes with cookie cutters or just circles. Remove dough from the fridge; while it's in that disc shape, gently press your palms in once or twice to warm it back up a little. Now grab a rolling pin, and roll the dough until it's even. It should be near 1/4 of an inch thick any thinner, and your cookies will be prone to cracks and breaks. You want to get an even amount of dough across so all your cookies cook evenly.
- After your dough is rolled out, if you have a cookie cutter or a drinking glass to get those perfect circles, you want to flour them a little to prevent any sticking between the dough and the cookie cutter and the dough and your cup. After you've got flour on your cutters, you can start cutting shapes into your dough. I always like to start at the edge of the dough and work my way toward the middle. This will reduce the number of times you have to reroll the dough to get more cookies.
- So in order, you cut all the shapes FIRST, then separate then access dough from the cookie. With a thin spatula, snatch up each cookie and place it on the baking tray. Place each cookie 1/4 inch apart. They shouldn't spread, so if they're a little bit closer, that's okay too.
- Bake for 8-10 minutes until the edges are golden brown. Then remove from oven and let cool for at least 25 minutes before you frost them, or the frosting will melt.

Icing:
- In a medium bowl, place confections sugar, milk, and vanilla extract. With a whisk or a fork, mix slowly until the ingredients until smooth. For more thickness, add 1/4 cup more confections sugar but beware as the sweetness level rises.
- For colors, divide the icing into separate bowls, add and mix in food coloring one or two drops a time until the desired color.
- For pipping designs on your cookie, you can get zip lock bags, fill bags with icing first, then cut a small hole at the corner of your zip lock bag for more precision. But if you have little ones or just going for some more abstract teaspoons, work just as well.

There's truly nothing like coming together as a family to make something that tastes amazing. Growing up with a big family and being the middle child, I know nothing is like family time during the holidays. Christmas and the holidays have always been about giving so this year give some time to your family and friends no matter how far they might be. Cooking together in the kitchen or over a zoom call will always be a to get everyone to learn something new and get there hands messy in dough for an hour or two and begin to make meaningful connections over delicious food or desserts.
About the Creator
Ari M
I write articles, 3 min reads that can be about almost anything lifestyle how to’s, environmental awareness, Physical and mental health or poetry
Born and raised in Queens,NY
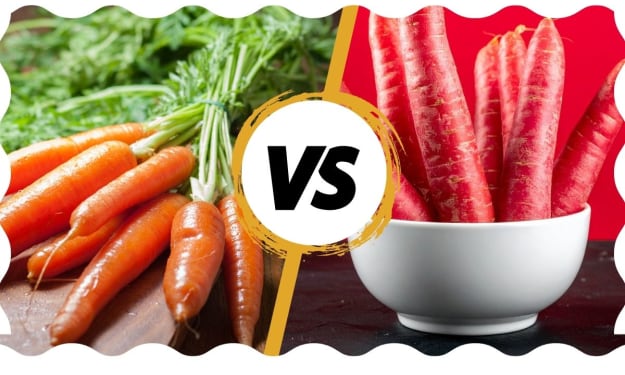
Orange vs Red Carrots
Carrots are among the most popular root vegetables around the world. They are widely appreciated for their natural sweetness, crunchy texture, and impressive nutritional value. While most people are familiar with orange carrots, many regions—especially in South Asia—also consume red carrots, particularly during winter. This often raises a common question: which carrot is better for health—orange or red?
By Stories Todayabout 12 hours ago in Feast


Comments
There are no comments for this story
Be the first to respond and start the conversation.