
A Sweet Fusion: Homemade Mexican Candy With a Twist
A Sweet Fusion: Homemade Mexican Candy With a Twist

There’s something magical about candy that tells a story especially when it’s rooted in culture and made by hand.
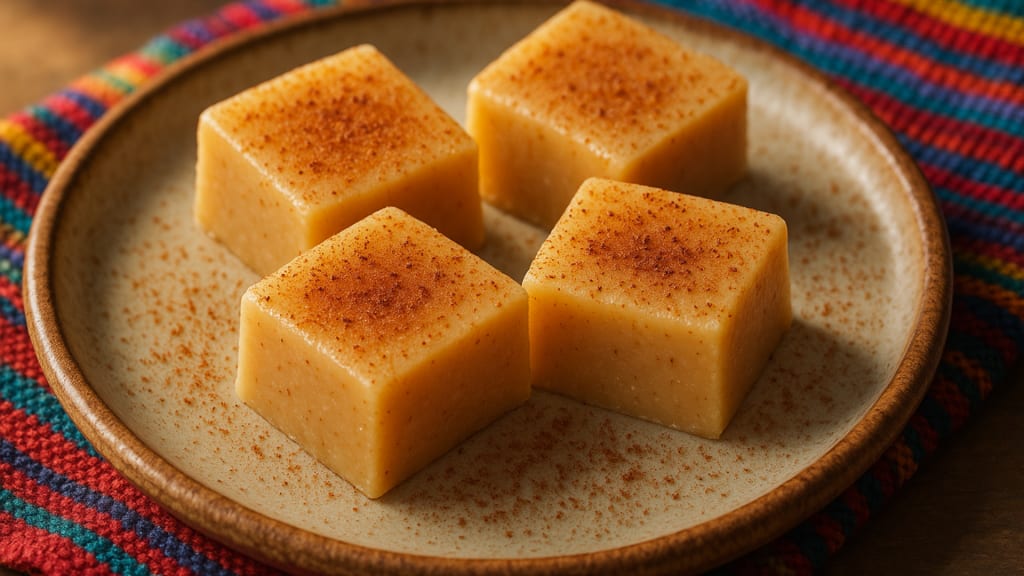
This recipe blends the nostalgic sweetness of Western style fudge with the bold, spicy sweet essence of traditional Mexican treats. Think cinnamon, vanilla, brown sugar... and just a hint of chili if you're feeling adventurous.
The best part You don’t need a candy thermometer, a pastry degree, or rare ingredients. Just a saucepan, a wooden spoon, and the desire to make something meaningful (and seriously delicious).
Why Mexican Inspired Candy?
Mexican candy dulces mexicanos has always stood out because it breaks all the rules in the best way. It’s not afraid of bold flavor combinations. Tamarind and chili. Mango and salt. Coconut and caramel.
This version channels that same spirit but softens it into something melt in your mouth creamy. The texture feels familiar like old school caramel fudge but the flavor tells a richer story.
It’s a perfect mashup of cultures, flavors, and feel good nostalgia.
What You’ll Need
Here’s the ingredient list short, sweet, and easy to personalize:
- 2 cups sugar (granulated or brown)
- ½ cup unsalted butter (or vegan substitute)
- ½ cup sweetened condensed milk (or coconut condensed milk)
- ¼ cup corn syrup (or agave/honey as a backup)
- 1 tsp ground cinnamon
- 1 tsp vanilla extract (Mexican vanilla if possible)
- Pinch of salt
Optional Add-Ons:
- Chili powder or Tajín for spice
- Toasted coconut flakes
- Instant espresso powder
- Citrus zest (orange or lime)
- Crushed pepitas or sunflower seeds
How to Make It Step by Step
Step 1: Melt the Base
In a saucepan over medium heat, combine the sugar, butter, and corn syrup. Stir constantly until fully dissolved and bubbling (about 4–6 minutes).
Step 2: Add the Flavor
Lower the heat, then stir in the condensed milk, vanilla, cinnamon, and salt. Blend well.
Step 3: Simmer to Perfection
Let the mixture cook gently for 10–12 minutes until it thickens and turns golden. Keep stirring especially near the end.
Step 4: Set the Candy
Pour into a parchment lined dish or silicone molds. Smooth it out and let it cool at room temperature for 1 hour.
Step 5: Cut & Store
Slice into small squares. Wrap in wax paper or keep in an airtight container for up to 2 weeks.
Flavor Variations You’ll Love
This recipe is a blank canvas for creativity. Some ideas:
- Spicy Mexican Kick: Dust the top with chili powder or Tajín before it cools.
- Mocha Vibe: Stir in 1 tsp espresso powder for a coffeehouse twist.
- Coconut Heaven: Top with toasted shredded coconut.
- Holiday Magic: Add orange zest and a dash of nutmeg.
Allergy-Friendly & Dietary Swaps
- Vegan Version: Use sweetened condensed coconut milk and plant-based butter.
- Gluten Free: All ingredients listed are naturally gluten-free just check labels.
- Lower Sugar: Try replacing half the sugar with coconut sugar or monk fruit, but expect a softer texture.
What Can Go Wrong (And How to Fix It)
Making candy is more forgiving than it sounds but here are a few common issues:
- Too Grainy? Sugar may have crystallized. Add a splash of water and reheat gently.
- Didn’t Set? It likely needed more simmer time. Reheat and stir longer.
- Too Hard? It overcooked. Break it up and use it as topping for ice cream or desserts.
- Sticky When Cutting? Wait longer to cool or grease your knife.
Why This Recipe Feels So Personal
It’s easy to forget how much emotion is baked into the things we cook.
This isn’t just about sugar and spice it’s about slowing down, tasting something real, and maybe even reconnecting with culture, memory, or family. Even if you’ve never had Mexican candy before, there’s something about the warm cinnamon, rich vanilla, and subtle kick of heat that feels universally comforting.
It’s the kind of recipe you’ll make once… and then think of ten reasons to make again.
Great for Gifting (or Keeping to Yourself)
These candies wrap beautifully in wax paper or cellophane and make fantastic gifts. Tuck them into a holiday tin, drop them in a thank-you bag, or pair them with a homemade card.
Or, you know… just stash them in a secret drawer and treat yourself all week.
Zero judgment.
Full Printable Recipe
If you want a clean, step by step printable version, here’s the original recipe source with more details and variations: →
About the Creator
Keep reading
More stories from Emily Quick and writers in Feast and other communities.
Why You Need to Try Mexican Spoon Candy This Week
A Spoonful of Comfort There’s something magical about desserts that don’t try too hard. You don’t need layers of sponge or a blowtorch to impress—sometimes, the best treats are the ones you stir slowly on the stove with nothing but a wooden spoon, a little patience, and a kitchen filled with the scent of sugar and memory.
By Emily Quick4 months ago in Feast
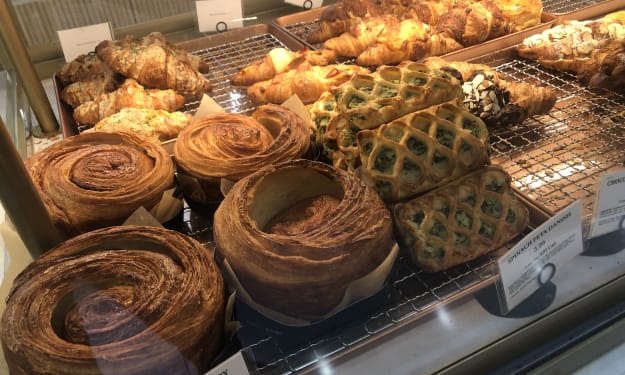
My Tous les Jours Trip
As someone who lives in a rural area, I don't get the chance to visit fancy restaurants or bakeries that often. So, when a friend told me about a French-Asian bakery that's less than an hour away, I knew I had to check it out and grab some pictures for social media. Tous les Jours ended up providing an immersive experience that went above and beyond my expectations--although I did leave with a few reservations.
By Kaitlin Shanks22 days ago in Feast
No-Recipe-Needed Dessert Tutorials
1. Basque Burnt Cheesecake Cream cheese, a few high-quality farm-fresh eggs, heavy cream, and sugar—just mix them together. Sift the mixture into a mold to remove air bubbles. Bake at 180°C (356°F), both top and bottom heat, for 40-50 minutes. Done! It must be completely chilled before slicing. One bite, and you'll be floating on cloud nine... This is so good! It has an incredibly rich, cheesy aroma and melts instantly in your mouth. The key is that this method is just too simple and unbeatable.
By yue . shuia day ago in Feast


Comments
There are no comments for this story
Be the first to respond and start the conversation.