

A few weeks ago, I had the opportunity to delve into the captivating world of paper quilling. This intricate art form, far from being a simple task, requires a unique set of skills and a touch of creativity.
1. Nimble fingers
2. Patience
3. Time
The History Of Paper Quilling
This intricate paper craft dates back to ancient times. There have been arguments about whether it was first established in Egypt or China. There have even been questions about whether it really took off during the Renaissance or Victorian periods.
Either way, this fine, detailed paper craft was used by many to decorate books, make jewelry, ladies' items, religious items, or home decor such as cribbage boxes. Nowadays, paper quilling is very popular for wedding invitations, greeting cards, and scrapbook pages.
References: PaperPapers and Wikipedia and Quilling Arts
What is Paper Quilling?
Paper quilling is the art of taking thin paper, rolling it, and shaping it to create a decorative design. This craft can create beautiful, eye-catching designs by using a needle tool and glue.
My First Exposure
I signed up for a class called pumpkin quilling. I had no idea what I was walking into. The teacher presented me with over 30 thin pieces of medium-thick construction paper in a variety of orange shades. Thankfully, the teacher had already created a pumpkin paper mold. All I had to do was make small orange swirls with the paper using the needle tool to create a pumpkin design.
At first, I made some of my paper quills way too tight, which only spurred the teacher to say to me, “Someone needs to loosen up a bit.” That caused a few chuckles from my fellow quilling friends.

It took me some getting used to making the right relaxed coil tension. So, with the twist of my fingers, I worked on finding the correct spiral to fit my pumpkin. After a few paper cuts, I eventually got the hang of it.
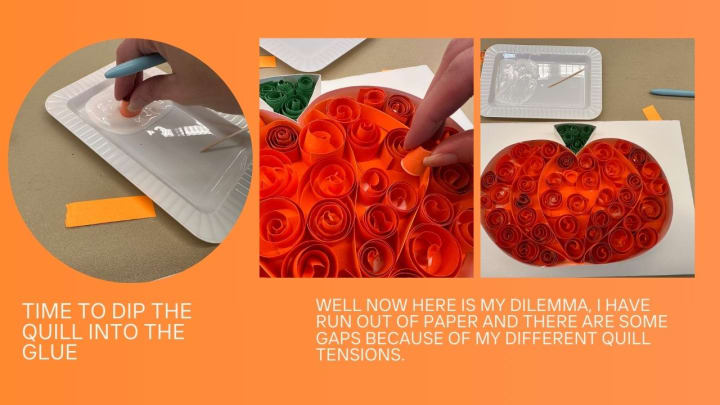
Then, my teacher instructed me to begin gluing my quills on my pumpkin mold foam sheet. With regular embers glue, I started the labor-intensive task. I didn't want to lose the design I had already laid down, so I had to carefully lift up my spirals, glue the edges, and then place them back down.
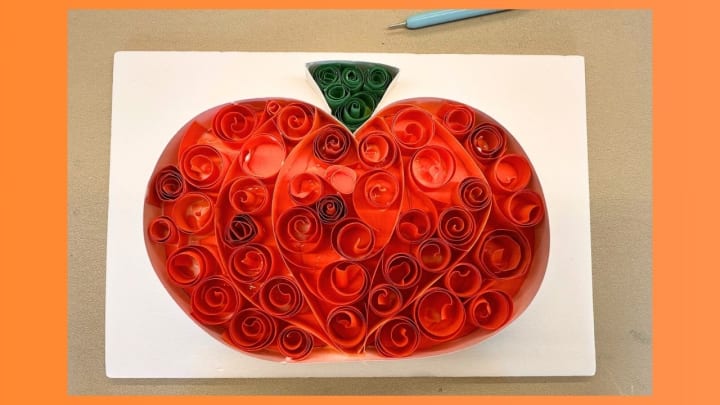
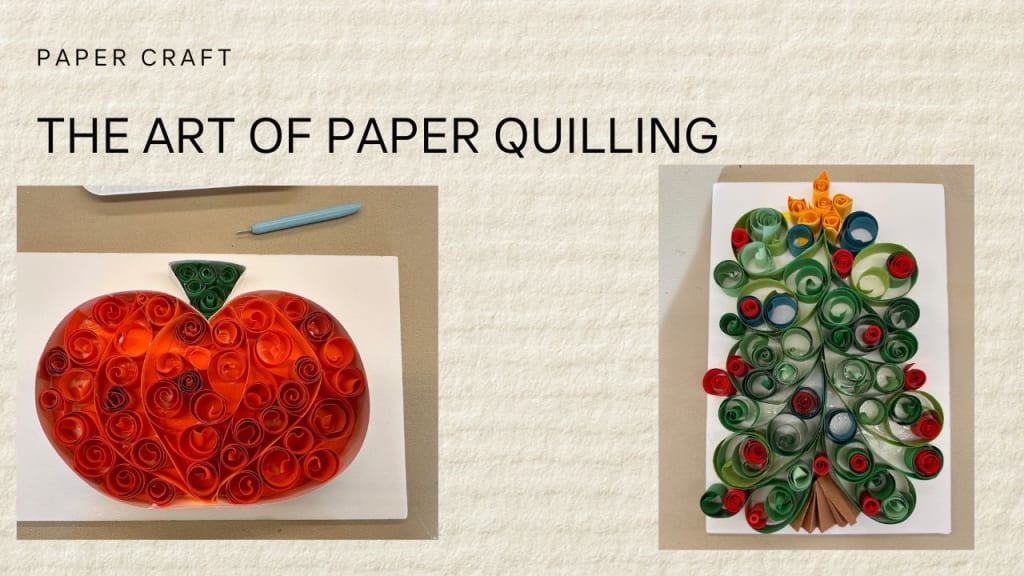
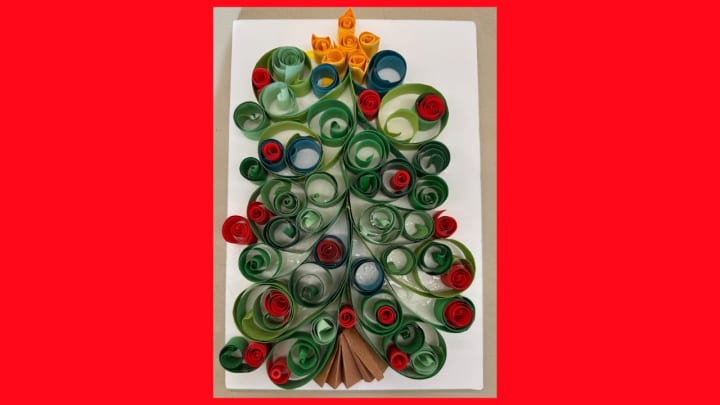
Here is the final design. I was proud of it enough that I put it up for all to see in the living room.
A few weeks later, tree quilling was advertised at the community center; I thought Christmas was coming; I had to give this a try to add to my pumpkin.
When I arrived at the class, the teacher showed excited students her beautiful Christmas tree. My creative brain took off, this will be easy!
Not so fast!
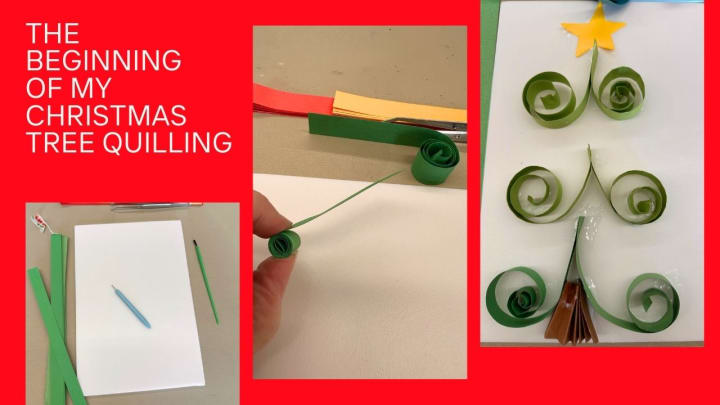
As I sat down at my station, I saw one white empty foam board with various green stripes of paper and a quilling needle. I raised my hand, “Excuse me, where is the Christmas tree mold?”
The bemused teacher answered, “This is an advanced quilling class, no mold for you.”
My heart dropped! This sucks, how the heck am I going to make a straight Christmas tree! Even with my watercolor, I would be lucky if my Christmas tree was straight, and I am a fairly experienced illustrator!
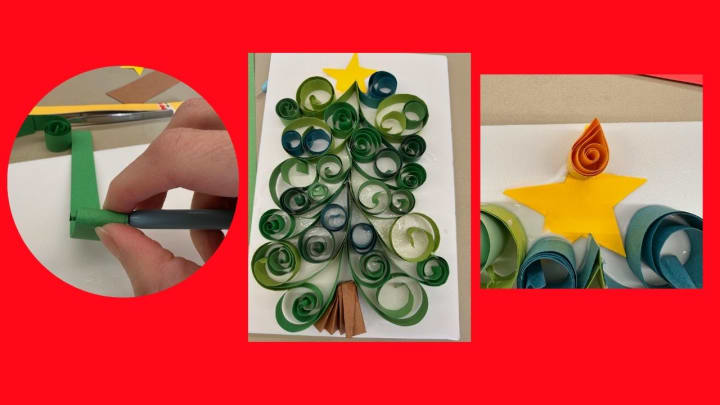
The teacher demonstrated me and other uncertain students, starting with loose dark green spirals that trailed off into a tail at the end of the paper. We were to glue these tails together, forming the tree truck and flowing into long branches, gradually shaping the tree structure.
Then, we were told to take the dark brown stripe of paper and fold it into an accordion for the tree truck. That was my undoing. Remember what I stated above patience. After I folded and glued it, I should have allowed it to dry before trying to glue it to my foam board.
I went back to making swirls and coils with different tensions. Using the teacher’s model, I worked on finding a visual design for my Christmas tree. I would joke to the other students that my tree was created on a windy day!
Finally, it was time to create the star. Holy smokes, that was not easy! I was instructed that this was the time to make tight, small swirls. Then came the red and blue ornaments, which got a little sloppy as my fingers were covered in glue!
The whole project took over an hour and a half. Did I feel relaxed and full of holiday cheer? No, I felt frustrated and fried.
Conclusion
Paper quilling is a gorgeous paper craft is a fun and a wonderful skill to have.
As a watercolor artist and illustrator, this was a craft that, if I feel like doing again, I will go to Nightcafe and type in what I would like.
About the Creator
'Till Death We Do Art
There would be nothing divine in this world without art. Nature may surpass the divine to all intents and purposes, but like everything it absorbs and is absorbed by, it remains here, stuck on the surface of this world, ever-present, physically bound to the universe.
By Avocado Nunzella BSc (Psych) -- M.A.P 24 days ago in Art
The Great Museum Scandal: Half of the Artworks in French Museums Found to Be Fake
France is home to some of the most famous museums in the world, attracting millions of visitors each year who come to admire priceless works of art and historical artifacts. However, a recent investigation has sent shockwaves through the art world after suggesting that a significant number of artworks displayed in certain French museums may actually be fake.
By Irshad Abbasi 3 days ago in Art


Comments (6)
I think both pieces turned out beautifully! Thank you for sharing this. I love learning about new crafts.
Oh wowww, those are soooo beautiful! I just don't have the patience for it, lol
You do great work in whatever you do craft wise. In elementary school during art, I think we did something similar to this.
Very clever art craft, thank you for sharing.
That is a beautiful and very creative craft!🌿 Thanks for sharing this Daphne!✨💕
This is amazing. You truly are an expert craftswoman, Daphne!