
HOW TO CROCHET FOR ABSOLUTE BEGINNERS | EPISODE ONE
Crochet for Beginners

Hi, and welcome to my channel. Today will be the first time that I've learnt how to crochet for complete beginners. If you're already a crocheter and simply need a refresher, this set of tutorials is also an excellent resource.
going to show you all you need to know to get started, so let's get started right away. In this episode, you will learn how to prepare your yarn, how to make a slip knot, and how to start a chain stitch.
Naturally, you will need a few supplies to begin how to crochet, so your yarn will be the first item you'll need. Since I'm using this paintbox yarn in Simply Aran, I suggest utilising an aran and adding a note hop to
weight yarn or a DK, which stands for double knits. Additionally, when you look at your yarn, the label will indicate the size crochet hook you need; for this specific one, it instructs you to use
Once you've determined which size hook you need for your yarn, you should proceed to prepare your crochet hook. I have a selection here because they do come in all different shapes and sizes.
If you're looking for a 5 millimetre hook, it says 8 USA in the middle, and then a 6 UK. This is because the terms vary depending on what you're using.
the entire aluminium crochet hook, followed by this one with a plastic handle, but as I mentioned before, there are a lot more available. I would advise you to start with something that has an aluminium head, like this one or these
Two, you will also need a pair of scissors because it is much easier to work with initially. . that time comes, a darning needle to tie up your ends will be quite helpful, although it's not always necessary .
You're just getting started. I've included links to all the locations where you can get any of these yarn-making supplies in the description box below. You wish to unravel some yarn after first removing your yarn band, so
that working with it is pleasant and simple. You can work from the edge of the yarn ball or from the centre; it's entirely up to you, but be sure to unravel enough because this will aid when it comes to
Your stress How the slipknot is performed with order to perform a slipknot, wrap the end of your yarn around your finger and draw it forward to create an X pinch. Then, grab the attached yarn with your holding hand.
to the ball, wrap it around your finger, pinch it between your finger and thumb once more, take the back loop, and bring it over the front loop. This will give you your slipknot. Next, we'll take our
There are several ways to hold your crochet hook as you put it into the slip knot and draw down on the connecting piece of yarn to begin your chain. I would advise you to experiment in many methods in order to find a
the manner that works best for you I use what's known as a knife hold, which is similar to how you would use a knife while eating. There is also a pencil hold, which is similar to how you would hold a pencil. You should then get used to using it the way I do.
retaining your yarn I usually wrap it around my little finger and my index finger in this manner, but please experiment a bit since it will vary from person to person. After that, you should take your
To produce tension for your project, pinch just beneath the slipknot with your finger and thumb. Then, when I'm ready to make a chain, you'll wrap your yarn around the hook where the tension has been created. You should then grip the yarn with your
crochet hook, then bring it across to you and through the chain loop. I'll demonstrate that you should circle the yarn once more, then grab it and pull it through when you
Let's look at what we have done so far. We have made a number of chains, which you can see as you wrap your yarn around the hook. This technique, known as yarn over, is utilised in many different crocheting styles.
Chains always look like this, so we have one, two, three, and four. In the next video, we'll make ten so that we can begin building stitches on top of this. Let's do some more yarn over pull through, which makes five, which makes six. You'll note how I'm moving my fingers up.
As I go along the chain, this helps with your tension yarn over pull through seven, eight, nine, and ten. With ten chains now, we're only
The chain has a top loop and a bottom loop, and if I twist it over, you'll notice a number of bumps along the back. Let's examine this chain and familiarise yourself with some of the terminology used in crochet.
They are referred to as the back bumps. Some common errors include crocheting too tightly, which results in too much tension when you pull through and prevents you from getting your hook through. In this scenario, you should just
Before we actually begin stitching, I would strongly advise you to practise this repeatedly until you have the technique perfected. Another mistake is to do it too loosely, which causes you to tug on the hook and break your chain.
In this series' upcoming , we'll learn how to double crochet.
About the Creator
Keep reading
More stories from writers in Art and other communities.
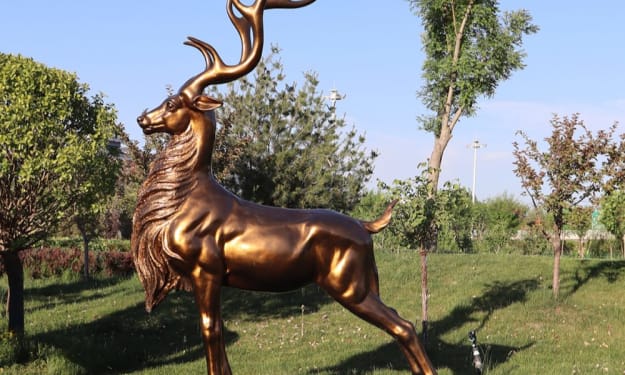
Fiberglass sculpture:realistic and affordable custom bronze-like solutions
When people think of bronze sculptures, they often associate them with weight, cost, and long-term durability. Traditional bronze works are valued for their metallic texture and aged visual character, but they are not always practical for every project. In many commercial and public installations, fiberglass sculptures are used instead to reproduce a bronze-like appearance while reducing structural load and production cost. Through controlled surface treatment and layered finishing methods, fiberglass can achieve a convincing bronze effect.
By Shenzhen Ruiheng Craftsabout 23 hours ago in Art


Comments
There are no comments for this story
Be the first to respond and start the conversation.