
How To Build A DIY Custom CNC Metal Sign
Unleash Your Creativity: Build Your Own DIY CNC Metal Sign with Ease


If you’re looking to add a personal touch to your space, a DIY custom CNC metal sign is a fantastic project. Whether you want to create a unique piece for your home, a business, or as a gift, crafting a custom metal sign can be both fun and rewarding. Plus, with the precision of a CNC (Computer Numerical Control) machine, you can achieve professional results even as a DIYer. Here’s a step-by-step guide to help you build your very own custom CNC metal sign.
Plan Your Design
Before diving into the project, take some time to plan your design. The beauty of creating a custom signs metal project is that you can make it completely personal. Here are some things to consider:
Size: How big do you want the sign to be? A small, minimalist design can be as striking as a larger, bold sign.
Text and Graphics: Choose fonts and images that reflect the message you want to convey. A motivational quote, a business logo, or a custom graphic all work well.
Theme: Consider the setting where the sign will be displayed. Will it fit with the space's overall theme? If it's for your home, you might choose a rustic design. If it’s for a business, you might want something sleek and professional.
Once you’ve got your design, it’s time to move on to creating the actual file for the CNC machine.
Create the Design File
Now, you need to create a vector file that your CNC machine can read. You’ll need software like Adobe Illustrator, CorelDRAW, or a free alternative like Inkscape to create vector graphics. Here’s how to proceed:
Create Your Design: Draw your sign, keeping in mind that CNC machines work best with clean, simple lines. Avoid overly intricate designs unless you have a high-resolution CNC machine.
Convert to Vector Format: If you’ve started with a raster image (like a photo), convert it into a vector file. This ensures that the CNC machine can scale the design without losing quality.
Prepare for CNC: Export your design in the format compatible with your CNC machine (like DXF, SVG, or G-code).
Choose the Right Material
When it comes to custom signs metal, there are several types of metal you can choose from, each offering a different aesthetic and functionality. Some popular options include:
Steel: A durable and robust option, perfect for a strong, industrial look.
Aluminum: Lightweight and resistant to rust, aluminum is great for both indoor and outdoor use.
Copper: Adds a touch of elegance and warmth, making it ideal for a vintage or rustic design.
You can purchase metal sheets from local suppliers or online stores. Ensure that the thickness of the metal matches the intended use of your sign.
Set Up Your CNC Machine
Now that you have your design file and material, it’s time to set up your CNC machine. Follow the manufacturer’s instructions carefully. Here’s what you typically need to do:
Secure the Metal Sheet: Mount the metal securely onto the CNC machine bed. Use clamps or a vice to make sure it doesn’t move during the cutting process.
Load the Design: Upload your design file into the CNC machine software. Double-check the settings for cut depth and speed.
Select the Right Tool: Depending on your design, choose the appropriate CNC cutting tool, like a laser cutter or a milling tool, that matches your material and the intricacy of the design.
Cut the Metal Sign
Now comes the exciting part – cutting your custom sign! Start the CNC machine and allow it to follow the design. Keep an eye on the machine to ensure everything is running smoothly. This process can take anywhere from a few minutes to several hours, depending on the complexity of the design and the size of the sign.
Finishing Touches
Once the CNC machine has done its work, you’ll be left with a beautiful custom metal sign. But it’s not quite finished yet. Here’s how to add those final touches:
Sanding and Polishing: Depending on the finish you want, you may want to sand down any rough edges and polish the surface for a sleek shine. If you’re going for a more rustic look, leave some of the natural imperfections for added character.
Painting or Coating: If desired, apply paint, clear coat, or patina to your metal sign. Paint can add a pop of color, while a clear coat helps protect the surface from rust and wear.
Mount Your Sign
Once you’re happy with your custom signs metal, it’s time to display it! Depending on the size and weight of your sign, you can mount it to the wall using screws, adhesive strips, or hang it from chains for an industrial look.
Conclusion
Building your own custom CNC metal sign is a fun and creative project that lets you express your personal style. Whether you’re creating a sign for your home or a business, this DIY project will give you a unique piece of art that will stand out. By following these simple steps, you can create a high-quality, custom metal sign that’s both durable and visually stunning. So grab your tools, fire up the CNC machine, and get ready to add some personality to your space!
About the Creator
Nova Pro Signs
At Nova Pro Signs, we don’t just make signs—we build brand identities. From a small workshop to an industry leader, we set new standards in quality, creativity, and innovation, delivering impactful signage solutions.
Keep reading
More stories from Nova Pro Signs and writers in Art and other communities.
Acrylic Boards & Signs To Showcase Your Logos & Brand
The best approach to brand these days is with acrylic boards and signs that are sleek, polished, and well made. They provide your brand the shine and visibility it requires, whether it's for offices, retail, or trade events. They are a great choice for businesses that want to make a strong first impression because they endure a long time and look shiny.
By Nova Pro Signs5 months ago in Art
'Till Death We Do Art
There would be nothing divine in this world without art. Nature may surpass the divine to all intents and purposes, but like everything it absorbs and is absorbed by, it remains here, stuck on the surface of this world, ever-present, physically bound to the universe.
By Avocado Nunzella BSc (Psych) -- M.A.P 23 days ago in Art
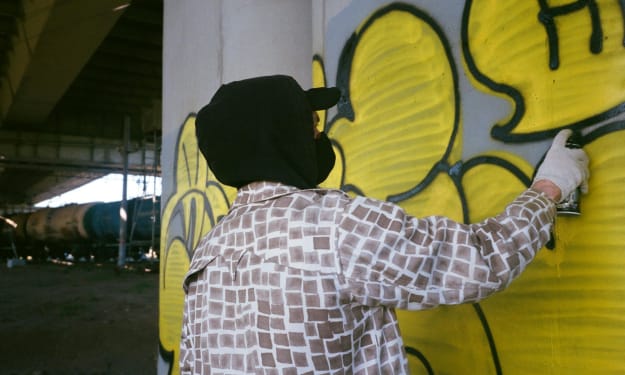
Urban Hieroglyphics: The High-Stakes Theater of Transit Art
The city breathes, but it also speaks. To the average commuter hurrying toward a subway platform or stuck in gridlock on a concrete overpass, the vibrant streaks of aerosol paint across a train car or the jagged lettering on a bridge pillar are often dismissed as "visual noise." However, to a clandestine global network of artists, these are not mere marks of defiance; they are a sophisticated, high-stakes language of reclamation. The phenomenon of painting on trains and public infrastructure is perhaps the most enduring and controversial art movement of the modern era, a persistent shadow that refuses to be erased.
By yusuf selho3 days ago in Art


Comments
There are no comments for this story
Be the first to respond and start the conversation.