
A Complete DIY Tutorial on Photographing Shoes
Simple Techniques to Showcase Your Footwear Collection with Stunning Results

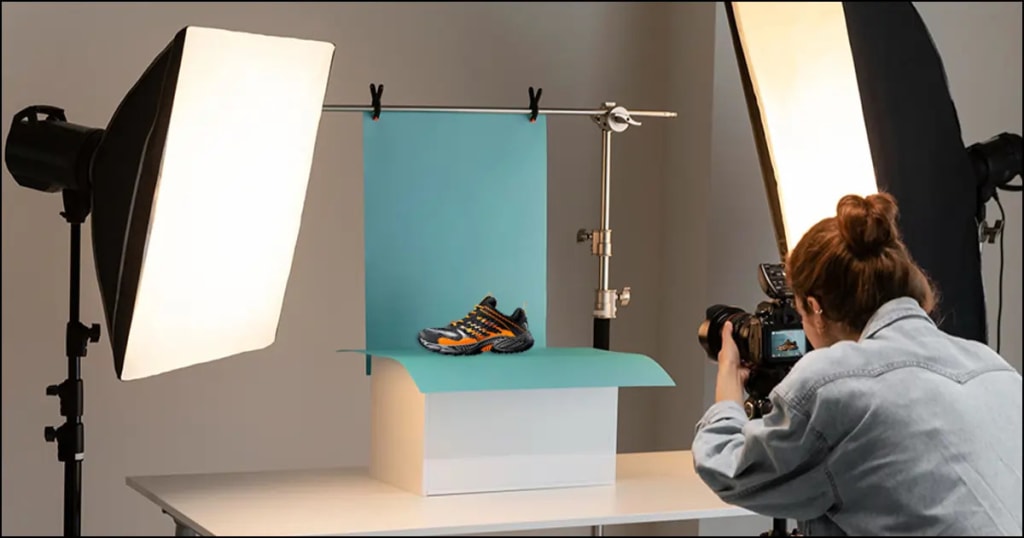
Capturing stunning photographs of shoes can make a world of difference in showcasing your footwear collection, whether for an online store, social media, or personal enjoyment. With a few simple techniques and some basic equipment, you can take professional-looking shoe photos from the comfort of your home. Here’s a comprehensive DIY tutorial to help you get started.
1. Gather Your Equipment
Before you begin, ensure you have the following items:
Camera: A DSLR, mirrorless camera, or a smartphone with a good camera.
Lighting: Natural light is ideal, but you can use softbox lights or ring lights if shooting indoors.
Tripod: To keep your camera steady and achieve sharp images.
Backdrop: A clean, non-distracting surface. White or neutral-colored backgrounds work best.
Props: Optional, but can add context or style to your photos. Think about including items like shoe boxes, flowers, or fabric.
2. Prepare Your Shoes
Make sure your shoes are clean and in good condition. Here’s how to prep them:
Clean the Shoes: Wipe off any dust, dirt, or scuffs. A clean shoe looks more appealing and professional.
Stuff the Shoes: Use tissue paper or shoe trees to give them shape and ensure they look their best.
Check Laces and Details: Ensure laces are neat, and any embellishments are in place.
3. Set Up Your Shooting Area
Choosing the right location and setup is crucial for great photos:
Natural Light: If possible, shoot near a window with plenty of natural light. Avoid direct sunlight to prevent harsh shadows.
Artificial Light: If using artificial lights, position them to create soft, even lighting. Use diffusers to soften the light.
Backdrop: Place your backdrop behind the shoes. A seamless background can make your shoes stand out.
4. Position Your Camera
Camera angles and positioning can dramatically affect the outcome:
Tripod: Mount your camera on a tripod to avoid blurry images.
Angles: Experiment with different angles. Popular ones include:
Eye-Level: Directly in front of the shoes.
Side View: Showcasing the profile of the shoe.
Top-Down: Capturing the shoe from above.
Three-Quarter View: A diagonal angle to highlight depth and dimension.
5. Adjust Your Camera Settings
Optimal camera settings will depend on your lighting and desired effect:
Aperture: Use a higher f-stop (e.g., f/8 to f/11) for a greater depth of field to keep the entire shoe in focus.
Shutter Speed: Use a slower shutter speed if you’re in low light but ensure your camera is stable.
ISO: Keep ISO low (e.g., 100-200) to avoid grainy images.
White Balance: Adjust to ensure colors are true to life. Use the white balance presets or set a custom white balance.
6. Take the Photos
Now that everything is set, it’s time to shoot:
Focus: Ensure your camera is focused on the shoe. Use manual focus for precision if needed.
Multiple Shots: Take multiple shots from various angles. This will give you plenty of options to choose from.
Details: Don’t forget to capture close-ups of unique details, such as stitching, logos, or textures.
7. Edit Your Photos
Editing can enhance your images and make them look even more professional:
Crop and Straighten: Adjust the composition and alignment of your photos.
Brightness and Contrast: Enhance the overall look by adjusting these settings.
Color Correction: Ensure the colors of the shoes are accurate.
Sharpness: Add a bit of sharpness to make details pop.
8. Showcase Your Photos
Finally, share your stunning shoe photos:
Social Media: Platforms like Instagram, Facebook, and Pinterest are great for showcasing your work.
Online Store: High-quality photos can significantly improve the appeal of your product listings.
Portfolio: Create a portfolio if you’re looking to showcase your photography skills professionally.
Conclusion
Taking great pictures of shoes is all about attention to detail, proper lighting, and experimenting with angles. With this DIY tutorial, you can capture stunning footwear photographs that highlight the beauty and craftsmanship of each pair. Happy shooting!
About the Creator
Perfect Retouching
Perfect Retouching offers the best solution for all photo retouching services. We provide Jewellery, Product, Beauty, and Headshot Retouching Services by our expert team at budget price.
Visit here- https://www.perfectretouching.com/
Keep reading
More stories from Perfect Retouching and writers in Art and other communities.
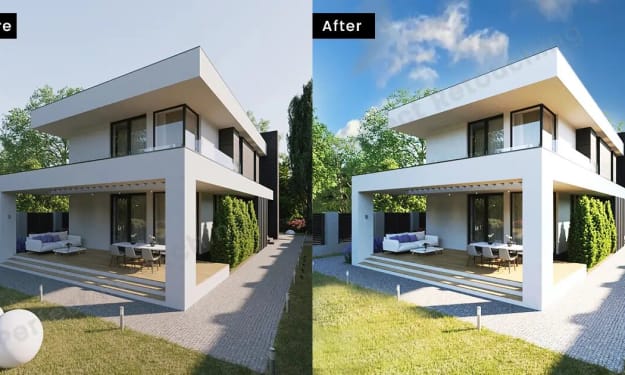
Real Estate Photo Editing: A 12-Step Guide to Stunning Property Images
In the competitive world of real estate, high-quality photographs can make all the difference. Professional photos can attract more potential buyers and create a lasting impression. Here's a step-by-step guide on how to edit real estate photos professionally to make properties look their best.
By Perfect Retouching2 years ago in Art
Dog Shoes for Small Dogs and Puppy Shoes A Practical, Paw-Friendly Guide
Small dogs and puppies may look tough, but their paws often need more protection than people realize. Their bodies are lighter, their paws are smaller, and many of them spend a lot of time on surfaces that were never designed for delicate paw pads. Add cold sidewalks, hot pavement, rough gravel, wet grass, or even slippery indoor floors, and you start to see why dog footwear has become more than just a cute trend.
By aliyashahzadi4 days ago in Art


Comments
There are no comments for this story
Be the first to respond and start the conversation.