
Visa Applications Without the Stress: My Step-by-Step Guide
How planning, structure, and patience can turn a chaotic process into a smooth journey

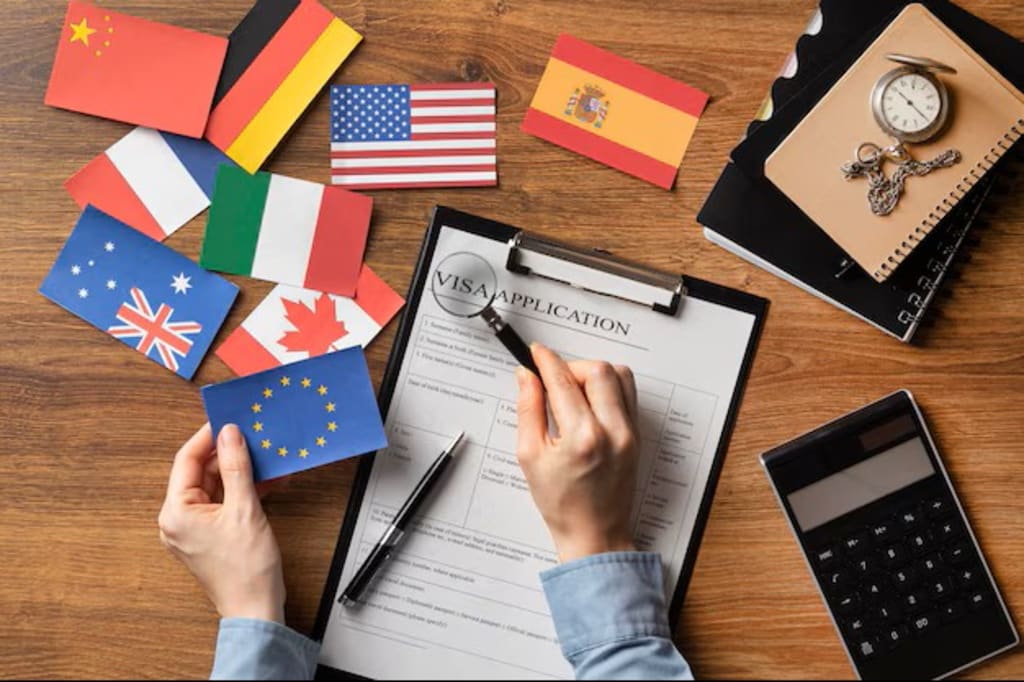
If you have ever applied for a travel visa, you already know the emotional roller coaster that comes with it. One moment, you are excited about your upcoming trip, imagining markets, mountains, museums, and new experiences. The next moment, you are knee-deep in paperwork, refreshing embassy websites, and wondering why they need a bank statement, a photo, and your firstborn child just to let you walk on their soil.
When I first started traveling internationally, visa applications were the part I feared the most. I would procrastinate, panic, and eventually rush the whole process. Missing documents, last-minute printing, and sleepless nights became a predictable routine. Over time, however, I learned something important: visas do not have to be stressful. They simply require structure, patience, and preparation.
Today, I have a calm system that I follow every time. It has saved me money, time, and many headaches. If you want a smoother, less emotional experience, here is my personal guide to applying for visas without losing your sanity.
Step 1: Research Early and Triple-Check Requirements
Every visa starts with information. Not just basic information, but accurate and updated information. Many people rely on blogs written years ago or third-party websites that only summarize official rules. That is how you end up missing critical details.
My golden rule is simple: start early and always begin with the official embassy or consulate website. These sites are not always beautifully designed, but they are the only source that actually matters. If an embassy changes requirements tomorrow, only their website will tell you.
I usually check these things first:
- Required documents
- Passport validity period
- Processing time
- Entry requirements (single vs multiple)
- Photo specifications
- Biometrics or interview requirements
- Whether physical copies are needed
- Required insurance
Then I check again a few days later, especially if my trip is months away. Governments update rules quietly, so it is safer to double-check than to assume.
I create a simple checklist of everything I need. Some visas require documents that take time to acquire, like official birth certificates, criminal background checks, or proof of address. Those can take days or weeks, so the earlier you begin, the better.
Starting early avoids the rush and gives you enough time to respond to surprises.
Step 2: Gather Documents Like a Pro
Your ticket to peace of mind during a visa application is organization. I treat each visa like a mini project. First, I create two folders: one physical and one digital. Everything goes into both places.
My digital folder has:
- Scans of my passport
- Bank statements
- Travel itinerary
- Insurance confirmation
- Employer or freelance letters
- Accommodation proof
I label each file clearly. If a document is missing, I add a placeholder note so I know what remains.
For physical copies, I keep them in order according to embassy instructions. I learned the importance of this the hard way. Once, an embassy misplaced a document I had given them. Luckily, I still had copies. Since then, I have always brought duplicates.
Think of documents as currency. They are the gatekeepers to your trip. Keeping them safe, labeled, and tidy helps you feel calm and prepared.
Step 3: Fill Out Application Forms Slowly and Carefully
Application forms look harmless, but one small mistake can delay your visa by weeks. I speak from experience. I once ticked the wrong box on a form. Instead of “tourist,” I marked “student.” The embassy flagged it as inconsistent with my itinerary, and my entire application went into review. I missed my original travel dates, and my flight credit never got refunded.
Since then, I have learned to slow down. I fill out applications in a quiet space. I read each section twice. If it is an online form, I save drafts. Never rush.
If you are unsure about a question, email the embassy or call their help desk. A two-minute check can save you from days of waiting.
Step 4: Secure Proof of Funds and Accommodation
Most visas require proof that you can support yourself financially. This usually includes:
- Bank statements from the past three to six months
- Proof of income
- Letter from employer
- Savings account balances
Do not wait until the last minute to download your bank statements. Some banks take days to issue official statements or letters.
Accommodation is another requirement that sometimes trips travelers up. Embassies want to know where you will stay. If you are planning a flexible trip, book hotels with free cancellation. Sites like Booking.com make this easy. Once your visa is approved, you can adjust your plans without losing money.
I also keep a list of possible addresses. Sometimes one embassy wants a full itinerary, even if you plan to visit multiple places. Having at least a temporary plan gives the process structure.
Step 5: Schedule Your Appointment Early
Visa appointments can fill up quickly, especially during peak travel seasons. I always check availability as soon as I know when I want to travel. Sometimes, the earliest appointment is weeks away, which is why early research is critical.
Once the appointment is booked, I print:
- Confirmation email
- Checklist
- Application form
- Required documents
On the day of the appointment, I arrive thirty minutes early. Embassies are strict about timing. I dress simply and professionally. It sets a respectful tone.
Step 6: Prepare for the Interview (If Required)
Not all visas require interviews, but when they do, preparation helps. Think of the interview as a conversation to confirm your purpose. The officer just wants to verify:
- Why you are traveling
- How long you will stay
- Whether you can support yourself
- Whether you plan to return home
I answer questions honestly and calmly. Short and clear answers are best.
The interviewer is not there to intimidate you. They are doing their job. If you know your intentions are honest, there is no need to worry.
Step 7: Track Your Application and Stay Calm
The hardest part of any visa application is the waiting. Some visas take days. Others take months. During this time, refreshing tracking pages is tempting but rarely helpful.
If online tracking is available, I check it once every few days. If not, I expect silence until the approval arrives.
This is where flexible travel planning matters. I avoid booking non-refundable flights until my visa is approved. If I must book in advance, I choose refundable or changeable fares.
Staying calm during the wait is an important skill. Patience saves stress.
Step 8: Have a Backup Plan
Despite careful planning, delays and denials happen. Visas are not guaranteed. I learned to keep alternatives in mind. If a visa is delayed, I explore visa-free countries nearby.
Some long-term travelers apply for multi-entry visas to regions they visit often. For example, a long-term Schengen visa can unlock dozens of European countries. Southeast Asia also has regional passes that make border-hopping easier.
A backup plan keeps disappointment from ruining your travel momentum.
What I Learned Along the Way
After applying for many visas, I discovered that the difference between a smooth process and a stressful one usually comes down to preparation. These are lessons that changed my experience for the better:
1. Preparation saves you from panic.
2. Organized documents make everything easier.
3. Refusing to rush prevents mistakes.
4. Backup plans offer peace of mind.
5. Early research eliminates surprises.
6. Patience is necessary. Visas take time.
Now I treat visa applications like packing my bags. They are just part of the journey.
Final Thoughts
Visa applications can feel intimidating, but they do not have to control your emotions. They are simply administrative steps between you and the world waiting on the other side.
If you start early, stay organized, and prepare calmly, the process becomes manageable. The moment you hold that approved visa in your hands, all the effort pays off. Because that little sticker or stamp is more than a document. It is a key. It opens doors to new landscapes, new flavors, new friendships, and new versions of yourself.
So when your next adventure calls, remember: preparation is your passport to peace. Everything else will fall into place.
Safe travels.
About the Creator
Jasmine Bowen
I’m a digital nomad with a love for history, hidden corners, and real connections. From bustling cities to quiet villages, I share stories that uncover the authentic side of travel, the kind you won’t find in guidebooks.
Keep reading
More stories from Jasmine Bowen and writers in Writers and other communities.
Breaking Down My Monthly Nomad Budget (Every Dollar Counted)
The Truth About Nomadic Freedom When I first imagined becoming a digital nomad, my dreams looked like a highlight reel: endless beaches, coconut drinks, and a laptop perched on a sunlit balcony. I saw myself working anywhere, spending less, and living more.
By Jasmine Bowen5 months ago in Writers
Writing To Succeed
If you want to find something that will help readers find your writing, possibly expand your audience, and maybe even get you noticed for other things, then you’re not alone. But how can you get it done in a world full of want-to-be writers? Look less at what you’re writing now, and more at what other writers have used to boost their views and reads.
By Jason Ray Morton a day ago in Writers
Understanding the Engineering Excellence Behind Aerospace Component Manufacturing
The aerospace industry represents one of the most technically demanding sectors in the world. Every aircraft, satellite, and defense system relies on highly engineered components designed to operate under extreme pressure, temperature variations, vibration, and aerodynamic stress. Understanding the engineering excellence behind aerospace component manufacturing provides insight into how safety, performance, and reliability are consistently achieved.
By Beckett Dowhan7 days ago in Writers
The BAFTA Awards
By now, in a stunning departure from recent years, most of the world is aware of what happened at the BAFTA film awards. Social Media Headlines will tell you the bare bones: that John Davidson, a Tourette's Syndrome advocate, shouted a racial slur at two Actors of Colour, Michael B Jordan and Delroy Lindo.
By Natasja Rose5 days ago in Psyche


Comments
There are no comments for this story
Be the first to respond and start the conversation.