
Transform Your Macro Photos With This Side Lighting Technique
Essential Guide to Macro Lighting

I wanted to share a lighting technique that has completely transformed my macro photography, particularly when capturing texture-rich subjects that demand attention to detail. This simple but effective approach has elevated the quality of my images, allowing me to showcase intricate details and bring out the unique characteristics of each subject.
Most photographers instinctively light their macro subjects from the front or slightly above. While this method works for basic documentation, it often creates flat, uninspiring images that fail to evoke the depth and complexity of the subject. The result is a photo that might be technically correct but lacks the drama and impact that make an image truly compelling. This is especially true when photographing subjects with rich textures, like flower petals, fabric, or natural surfaces like bark or stone.
The secret to revealing stunning textures lies in the angle of your light. By adjusting the direction and positioning of your light source, you can create depth, contrast, and a sense of dimensionality that makes your subject come alive. This technique not only highlights subtle textures but also enhances the interplay of shadows and highlights, which can give your images a more dynamic and professional feel.
Here's what you can do instead:
Position your light source at more extreme angles relative to your subject. For subjects with subtle textures, such as the delicate veins of a flower petal, the weave of silk fabric, or the surface of a seashell, try using a more dramatic angle—almost parallel to the surface. This approach accentuates every ridge, groove, and imperfection, turning what might have been an ordinary capture into a masterpiece full of depth and character.
For even more control, experiment with the distance of your light source and its intensity. A softer light, diffused through a reflector or softbox, can create gentle transitions between highlights and shadows, while a more focused, direct light can add bold contrast. Don't hesitate to move your light source around the subject, testing different angles to see how the textures respond. Sometimes, just a few degrees of adjustment can dramatically change the mood of your photograph.
This technique isn't limited to still subjects either. It works wonderfully for macro photography involving insects, water droplets, or other elements in nature. Side lighting can highlight the fine details of a butterfly's wing or the iridescence of a soap bubble, creating a magical, almost otherworldly effect.
By taking the time to play with light angles, you can elevate your macro photography from ordinary to extraordinary. Your images will not only showcase your subject but also tell a story—one that draws viewers in and invites them to appreciate the beauty of the tiny worlds around us. Give it a try, and you might just discover a whole new dimension to your photography.

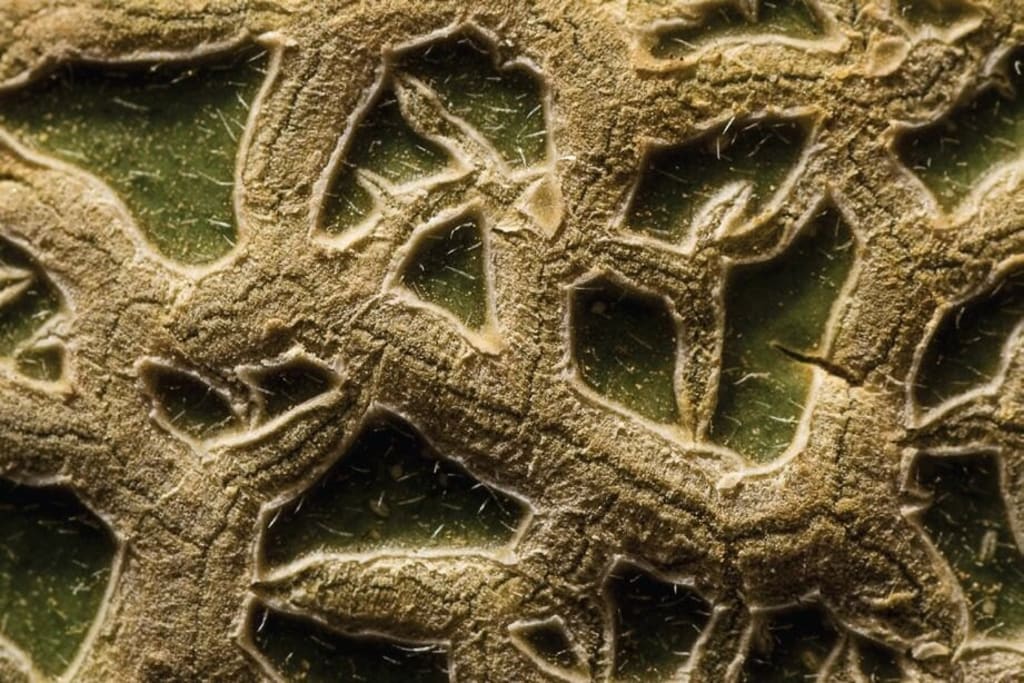
This photograph of cantaloupe fruit skin demonstrates this perfectly. Being able to see the dips and ridges adds to its 3-dimensionality. Its subtle texture is highlighted by the strength and position of the light.
For subjects with pronounced textures, like tree bark or rough metals, a moderate angle often works better. The key is experimentation - move your light around until the shadows start revealing the texture you're after.
Don't forget to experiment with height too - sometimes raising or lowering your light source can reveal textures you didn't even know were there.
This approach works equally well with natural light or flash. With flash, start with your light at 45 degrees and adjust from there.
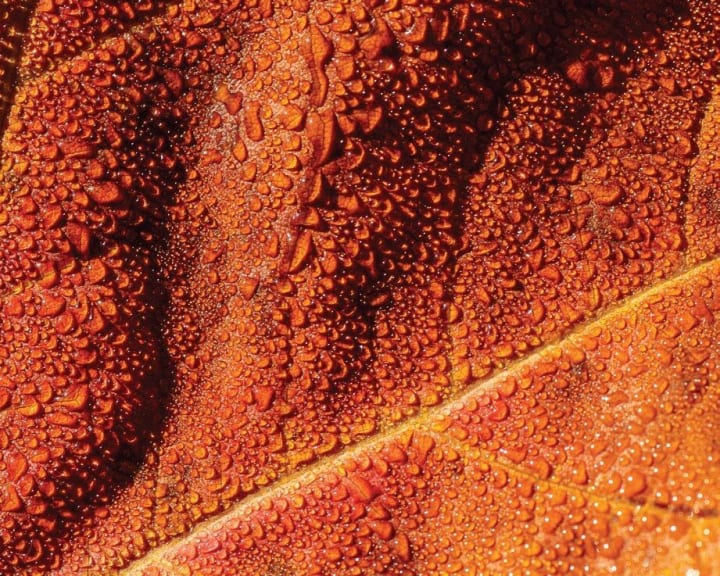
If you're using natural light, try shooting during golden hour when the sun's angle is lower. Just like in this shot of a droplet-covered leaf in early morning light.
When utilizing side lighting, don’t overlook the benefit of a great backlight.
Sometimes experimenting with backlighting for subjects with interesting edge textures can create surprisingly dramatic results. Take the photo below, for example.

The fine hairs on the geranium flower are highlighted by the backlight.
You can create your own backlight with a flash or seek out places and times when your subject is positioned between your natural light source and your camera.
The next time you’re shooting macros, do give the above ideas a try. Would love to see what you create with this technique!
If you’d like to gain a complete mastery over lighting for macro photography with practical tips like those shared above, do take a look at Leanne Cleaveley’s Essential Guide to Macro camera - it's 139 pages of step-by-step instructions and lessons that will truly take your macro photography to the next level.
About the Creator
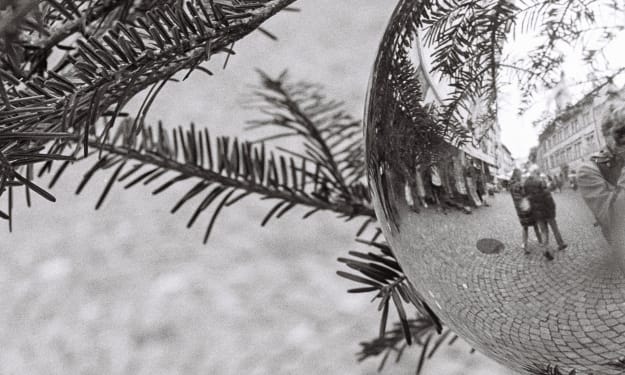
Neil Burnell
Neil Burnell est un photographe plusieurs fois primé (notamment en tant que photographe amateur de l'année 2018) originaire du Devon, Photographiant la côte et la lande spectaculaires et expert en photogrpahie en noir et blanc.
Keep reading
More stories from writers in Photography and other communities.
My Year, in Prattling and Photos
It's been a year since... last year. Ironically, it seems I've found myself a new tradition of getting sick during the New Year holidays. At least, this year (that is, this inter-year period remarkable for its shiny decorations in the streets and houses, and closed supermarkets and pretty much everything), I'm doubtlessly doing better: I've managed to come visit my friends in Germany for Christmas (which I failed to do last year) and—after having some good quality time eating machanka, playing Munchkin and swinging machetes (the last one obviously crept into this checklist only for the sake of the phonological form)—I came back home via proverbial Deutche Bahn and probably less known Schweizerische Bundesbahnen, my body hosting a family of viruses, virions and who knows what other tiny critters somewhere inside my chest.
By Andrei Z.15 days ago in Photography
How to Capture Photos That Reflect the Soul of the Moment and Preserve Timeless Memories
How to Capture Photos That Reflect the Soul of the Moment and Preserve Timeless Memories In a world flooded with images, truly meaningful photographs are rare. Millions of photos are taken every minute, yet only a handful manage to evoke emotion, tell a story, and preserve the soul of a moment. This is the real challenge modern photographers face—not how to take photos, but how to create images that matter. Whether you are a beginner photographer, a passionate hobbyist, or a professional looking to elevate your work, learning how to capture photos that feel alive is the ultimate goal. This guide will walk you through the mindset, techniques, and storytelling principles that separate ordinary images from unforgettable ones. Why Most Photos Feel Empty (And How to Fix It) One of the biggest pain points photographers search for online is: “Why do my photos look technically good but feel lifeless?” The answer is simple: emotion is missing. Great photography is not about expensive cameras, perfect sharpness, or trendy presets. It’s about: Emotion Timing Story Human connection People don’t remember perfect exposure — they remember how a photo made them feel. 1. Shift Your Mindset: Photograph Emotion, Not Objects Before touching your camera, ask yourself: What am I feeling right now? What emotion does this scene carry? What story is unfolding in front of me? When photographing: A couple → focus on connection, not poses A street scene → capture tension, joy, or chaos A landscape → reveal mood, light, and atmosphere Emotion-first photography is what audiences crave and actively search for. 2. Master the Art of Observing Moments Professional photographers don’t chase moments — they anticipate them. How to Train Your Eye: Watch people’s body language Notice subtle changes in light Observe interactions before they peak Stay still and patient Moments happen between actions: A laugh right after a joke A deep breath before tears A glance that lasts one second These are the images that go viral, get shared, and live forever. 3. Use Light to Shape Emotion Light is the emotional language of photography. Emotional Impact of Light: Soft light → intimacy, calm, nostalgia Hard light → drama, tension, power Backlight → mystery, warmth, romance Shadows → depth, story, emotion Search trends show users constantly look for: “how to use natural light photography” “golden hour photography tips” “moody lighting photography” Learn to feel light, not just measure it. 4. Composition That Tells a Story Composition is not about rules — it’s about guiding emotion. Powerful Storytelling Techniques: Frame within a frame Use leading lines to guide attention Leave negative space for emotional breathing Crop distractions aggressively A strong composition makes viewers pause, zoom in, and stay longer — which search engines love. 5. Capture Authentic Moments (Not Poses) The Western audience is tired of fake smiles and stiff poses. What they search for: “candid photography tips” “how to take natural portraits” “authentic photography style” How to Get Real Moments: Talk instead of directing Let silence work Shoot between poses Keep shooting after “the shot” Real moments beat perfection every time. 6. The Power of Imperfection Some of the most powerful photos are: Slightly blurry Crooked Grainy Imperfectly exposed Why? Because they feel real. Emotion beats technical perfection in every algorithm and every heart. 7. Tell a Complete Visual Story One strong photo is good. A series of photos is unforgettable. Think like a filmmaker: Establishing shot Medium shot Close-up Detail shot This storytelling approach increases: Time on page Pinterest saves Social shares SEO ranking 8. Edit to Enhance Mood, Not Destroy It Editing should support the emotion, not overpower it. Editing Principles: Consistent tones Natural skin colors Soft contrast Mood-driven color grading Search data shows massive demand for: “lightroom editing style” “moody photography presets” “film look photography” 9. Create Photos That Trigger Memory The strongest images: Smell like rain Sound like laughter Feel like warmth Ask yourself: If someone sees this photo in 10 years, what will they remember? That question alone will change your photography forever. 10. Why These Photos Perform Better Online Photos with emotion: Get saved on Pinterest Rank higher on Google Images Perform better on blogs Attract backlinks Increase session duration This is exactly how photography blogs reach millions of monthly views. Final Thoughts Photography is not about freezing time. It’s about giving moments a soul. If you focus on emotion, storytelling, and authenticity, your photos will: Stand out Get shared Rank higher Be remembered And that’s how memories become timeless.
By Ahmed aldeabella6 days ago in Photography
Silver Screen Magic with Mae West
American actress and singer Mae West became a popular film actress during the Great Depression. She started entertaining in vaudeville, then performed on Broadway, and finally went to Hollywood. She signed up with Paramount Pictures and made her debut in the 1932 film “Night After Night.” She also starred in musicals, comedies, and crime dramas. The American Film Institute named her one of the best classic Hollywood actresses.
By Rasma Raisters3 days ago in Geeks


Comments
There are no comments for this story
Be the first to respond and start the conversation.