

Hello, fellow starving artists! Today, we're going to dive into a whole other level of photography you may never have even known to exist before. But, believe! You see, I'm not a photographer. I'm an animator.
Ever wonder "How do they do that?" Cartoon characters in the real world, explosions and things crashing through walls, things falling from the sky and smashing up the ground, and giant monster robots fighting, barely missing their human counterparts in a slow motion near miss can all be done one of many ways, each having it's own focus, advantages, and limitations. The end goal is always the same, of course. Making it look convincing. We're going to dive into the poor man's Maya, RenderMan, or 3D Max... Blender.
Why do I use Blender? There's many reasons to give it a go.
First of all it's free, and not just royalty free. Free, free. You can save thousands and start up a studio on a budget. I mean, you'll need a decent workstation class computer, but that's true of all data crunching software. If you are running a Linux operating system, Blender is natively at home with it. There's a 99% chance it's in the repositories of your flavor, and can be installed with a few clicks. That'll save you many thousands of dollars. Don't worry, there are Windows and Mac versions on their website, as well!
Secondly, do not confuse free with generic. It's not the software that makes the end result work, but the artist's skills at using it. It's power is all but unlimited and it can duke it out with the best of the best, thanks to, quite literally, the entire world working on it. After all, it's open source! Think it's not professional quality? Then you haven't seen a Marvel movie. I know for a fact that a Marvel studio artist does work in Blender, and also recommends it. He gives seminars on the topic. (Personally, I highly recommend version 2.79.)
There are many other reasons, including, and certainly not limited to, an animation studio in one package, but you're not here for that. So, let's get down to the reason you actually are here. What can it do for photography? You'd be surprised.
What can Blender do for you? You can create a scene impossible to shoot in real life. You can set up a background that is too large to set up in your studio. You can add things that do not exist in the real world without having to spend the time and money to make a physical model of. You can change the angle anytime you want without starting over. Remember when I said "all but unlimited?" Now your brain is churning up ideas, isn't it?
While there are a great many options for photo enhancement, we'll focus on making it appear something out of this world is actually in this world. Put away your green screen from the 1950's. You will not need it today. (However, doing a video clip for Bill and Ted 3, I can attest at how "Excellent!" it does with green screens! I thought "This set up is terrible!," but it proved me wrong! Blender is quite forgiving.)
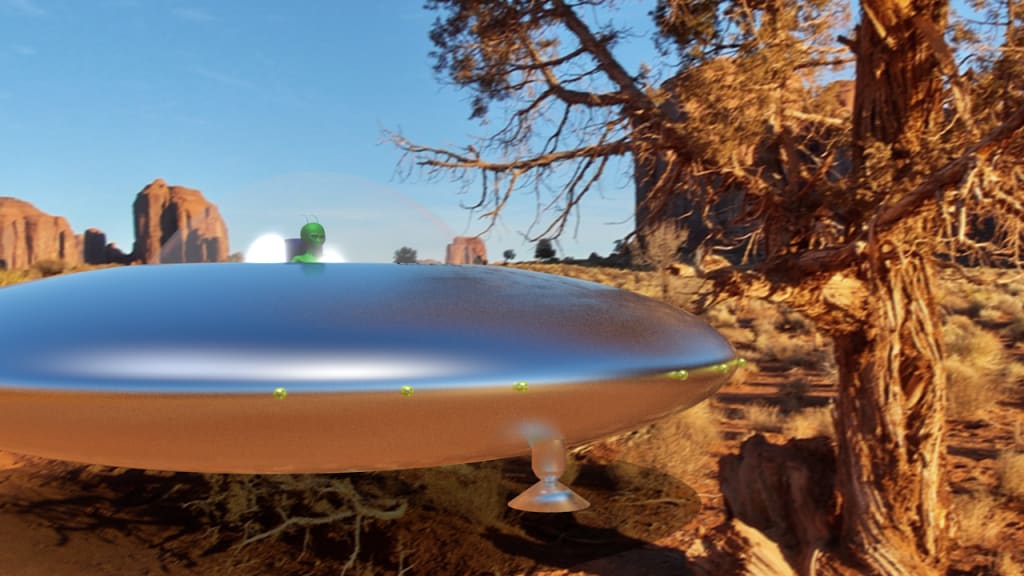
I won't be going over this, but if the object you intend to place into a shot has a reflective surface, and you want it to really look like it's there, you would want to learn about HDRI images. Think chrome or mirrors. It's a snap to set up an HDRI scene, as well! The HDRI will not only be used as the lighting, but they will reflect from the surfaces of the object, making it look like it really is there. Such as the image at the start of this article. This, however, will be for another day. Food for thought, though.
I want to teach you another method. Actually, there are two methods, but they use the same mathematical principals. The first one is a Blender add-on called BLAM, installed in less than 5 clicks, and the second one is fSpy. We'll be using fSpy for this, but BLAM is just as valid of a way. You can get it here: https://fspy.io/
Let's start with our image and goal. The goal is to get an object to interact with the photograph. Once you learn how it can be done, you'll be certain to come up with a great many effects. In this case, it will be a small UFO flying under a bridge.
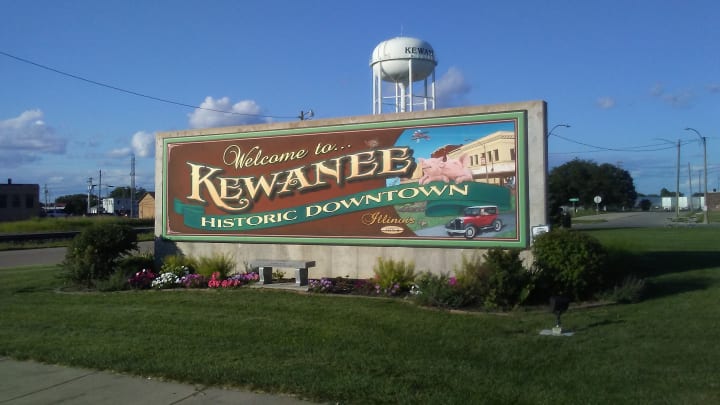
Here's the photograph we'll work with today.

The UFO and alien character shown in the example are a simple model that I designed for my animated series. There are many free models that you can use on-line if you do not wish to make your own, or wish to use one for learning purposes. They are often under the Creative Commons license and good for personal use. Of course, you can just use the default cube.
When you open Blender, you'll be met with an overwhelming display of crazy looking menus and a large gray space. Don't worry, you'll learn to love it. No, really. Get used to the idea of right clicking rather than left, and get comfortable with the keyboard shortcuts and you'll be just fine. I'm going to let you go through a YouTube video on the basics, as this tutorial will go over the method of adding objects to photos only. This isn't a tutorial for the newbies, but it won't take long for you to get back with the needed skills. Blender is quite intuitive, and my not-the-smartest-kid-on-the-block friend learned the needed skills in under 15 minutes.
*Waits until the reader gets back.*
Here's what you need to know in order to make BLAM or fSpy work on your photographs. There must be two parallel lines going towards a vanishing point and a line to establish the vertical or horizontal, or two sets of parallel lines at a 90 degree angle to one another. Super secret? A sidewalk square, brick on a wall, or tile on a floor will all work. Buildings are great as well, which we will use here.
To line up the virtual camera with the real world camera, fSpy needs a few key data points from you. You load the image into fSpy and drag the points to establish the reference lines. You may wish to untick the "Dim image" box. I've no idea why this is the default, but it is. To fine tune your lines you simply hold the "Shift" key down to zoom in. While not entirely necessary, it's recommended to plug in your focal length as well. My example looks like:
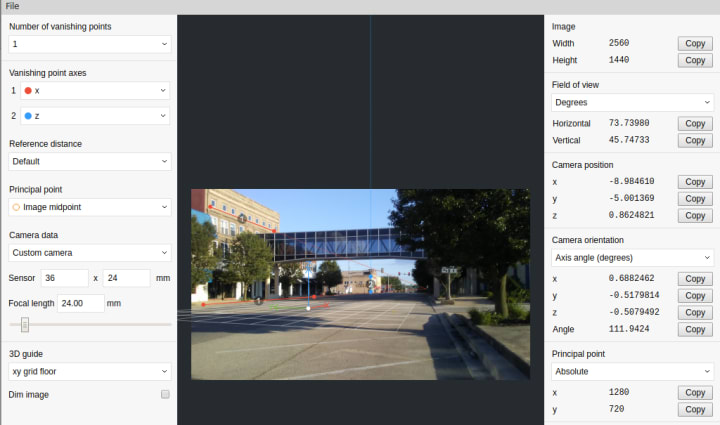
That was easy, wasn't it?
Now, if you do not know the focal length information of your camera, fret not. Blender will handle it. To import your fSpy set up, you need to go to "File... User Settings... Click the Add-ons Tab" and type fSpy in the search box. Tick the box and save. All set! Now go to "File... Import... fSpy" and select your set up. Nothing to it. Just note that in Blender you need not double-click. A single click does it. Type the letter 'n' to open the menu, scroll your mouse wheel to go through the menu, and you can brighten up the image by adjusting the "Opacity" setting. Here's where we fix the camera if you did not know the focal length earlier. You'll want to set the world settings to "Metric" or "Imperial" under the Scene settings for this next step. Select the camera and then type 'g', followed by "z" twice. Watch the "Z Location" in the menu as you move the mouse forward or backward. Holding "Shift" will slow the movement down. When you reach the correct height the camera was at (I'm guessing at your eye level?) you'll be all set. To set up lighting an outdoor scene, add the "Sun Position" add-on and you can set the date and time. Poof. The main light is perfect! Adding two additional suns at different angles with different intensity levels will look much more life like. I suggest a light blue for them, or a yellow tinge for indoor set ups. Also, make sure only the main sun has the Ray Shadow turned on! Setting some planes on the ground will become "shadow catchers" if you tick the "Shadows Only" check box in the material tab. Editing the shape for stairs and buildings will add to the realism and complete the set up.
Almost. You must either create or import an object, but you knew that. "File.... Append" should do it. Finally, there's one more thing to do before you are ready to play the best April Fool's day hoax of all time.
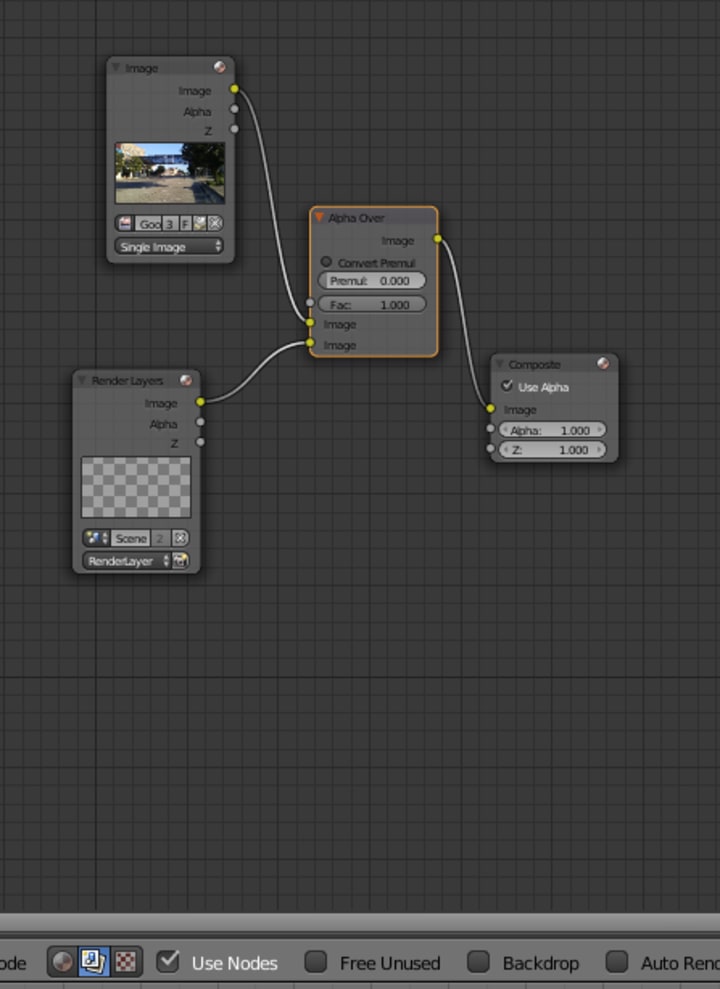
You need to switch the 3D view port to the Node Editor view. On the bottom menu you must select the compositing button, which looks like a couple of photographs. I know, I know, why did't you just say "Click the photo thingy?" Duly noted. Tick the check box next to "Use Nodes" to activate them. Press "Shift" + A to bring up the "Add" menu, and under "Input" select "Image." Next to the "Open" button, just to the left, there's an image select button. Select your fSpy set up. Bring up the Add menu again, go to "Color", and add an "Alpha Over" control. Now, you must drag the output into the "Alpha Over" input. The "Render Result" goes to the bottom input. That output goes to the "Composite" node.
So, you want to make it even better? Sure thing. You can add "Shadow Catchers" on the bridge. Make sure they line up from the point of view of the camera, and are at or nearly vertical to match the bridge. The trick here is that the shadow catcher also acts as a mask! If it is between the object and the camera from the camera's point of view it will disappear behind it. Also, for even more fun, you can put a mostly transparent material with a mirror effect on a plane to make a glass effect. Objects can reflect off of real world windows! This will also catch lights as well. I mean, what's a UFO without blinking lights, anyway? Just make sure that your shadow catchers do not cast a shadow of their own.
Oh, before I forget, under the Render settings, make sure to select "Transparent" just under the Ray Tracing check box, before you bash your head into the desk trying to figure out why it doesn't work.
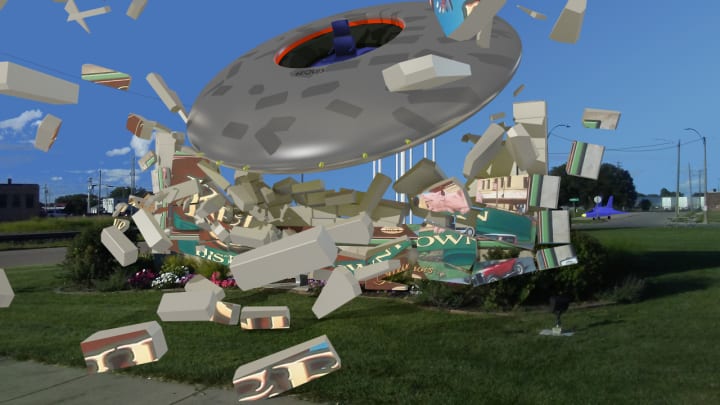
F12 to render! Now, report to the local news station there's a runaway UFO flying around town. They gotta believe you now!

Once you get that down, there's no stopping you. Destroy a landmark? Sure. No problem. No grenade launcher desired or required. Using a few more tricks, including physics simulations, you can go all the way out of your head. Observe...
About the Creator
Voltmayer Munchonian
Is this where I'm supposed to pretend to be from this planet? I'm stuck here, and I need money for tacos.
Keep reading
More stories from Voltmayer Munchonian and writers in Photography and other communities.
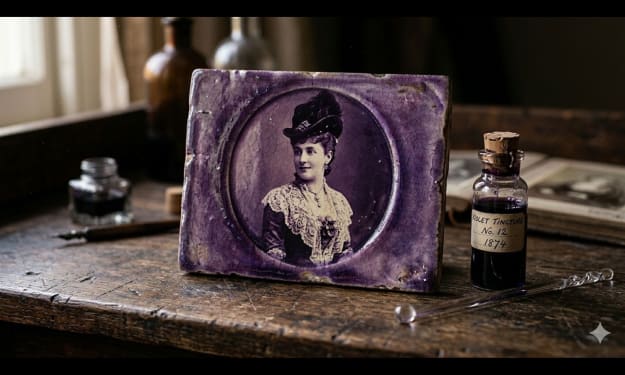
Gold Chrysotype Photography Is Back and the Colours Are Breathtaking
There is a moment when a chrysotype print is lifted from its chemical bath and held up to the light stops people mid-breath. The colours that bloom across the surface — soft dusty pinks fading into deep magenta, rich cyans pooling at the edges, velvety blacks settling into the grain of the paper — look less like a photograph and more like something pulled from a dream.
By CurlsAndCommas4 days ago in Photography
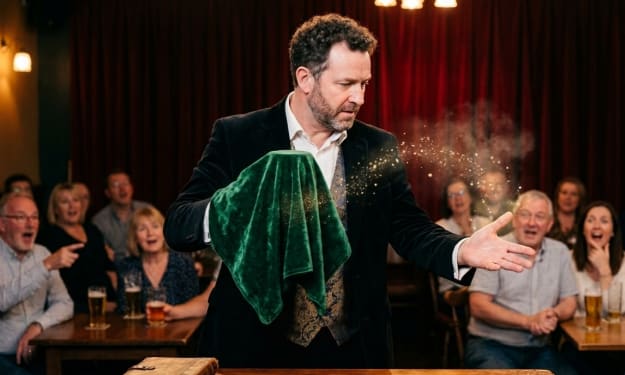
Top tipple tricks
Been thinking a lot about drinking, lately. Not least because of a recent episode of over-indulgence and the inevitable after effects. Some readers may recall the earlier articles I wrote about beating the booze. Here I set out an experiment in techniques for cutting down on my alcohol intake. The experiment was successful, the techniques worked, and I have armed myself with an arsenal of weapons in the war against the demon drink. I have yet to fire the first round however. It's all a question of timing (perhaps procrastination).
By Raymond G. Taylor7 days ago in Psyche


Comments
There are no comments for this story
Be the first to respond and start the conversation.