
How to Rotate Photos on iPhone & iPad, Change Photo Background, and More
How to Rotate Photos on iPhone & iPad, Change Photo Background, and More

In the modern-day digital revolution, smartphones and tablets act as the most effective tools for managing and editing photos. It brings memories captured during holidays or events, a collage of photographs for social media, or even a simple snapshot for personal use; it can bring all these into creative possibilities, opens up with knowing how to edit and manipulate images on your device. This article reveals how to rotate photos, change photo backgrounds, have transparent backgrounds, avoid QR code blurriness, and even maintain privacy on Instagram with special emphasis on one of the powerful apps, PhotoCut.
Read everything you need to know about Twitter Banners.
How to Rotate Photos on iPhone & iPad
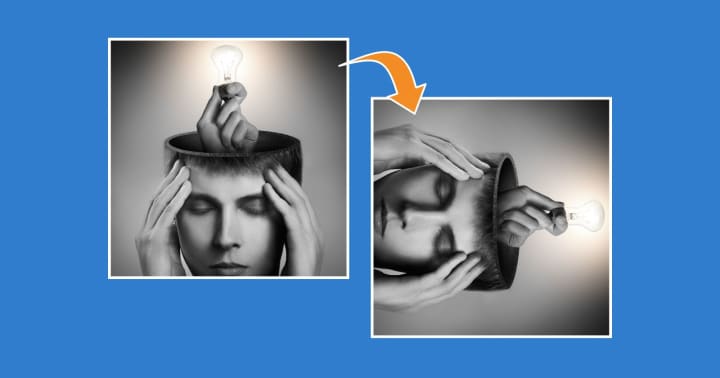
Rotating pictures is the simplest yet most necessary photo-editing tool someone could use while taking pictures on an iPhone or iPad. Sometimes the picture is taken in the wrong orientation, or needs to be altered for artistic intentions. Fortunately, rotating a photo on an iOS device is as easy as a few taps and you're done.
Step-by-Step Guide to Rotate Photos on iPhone & iPad
- To start, you must open the Photos application on your iPhone or iPad. This is where all your photos are stored by default.
- Scroll through your photo library and locate and select the specific image you want to rotate.
- Tap on the Edit button. It is at the top right side.
- While in editing mode, there are several icons at the bottom of the screen. Tap on the crop icon, which looks like a square having arrows around it.
- To rotate the image, tap the rotate icon (a square with an arrow in the top-left corner). Each tap will rotate the photo 90 degrees clockwise. You may tap the rotate icon for as much as you want until you get the right orientation of your photo.
- Once you're happy with the rotation, press Done to save your changes.
It is simple and fast, correcting awkward photographs or trying different photography styles, which is all it takes.
How to Change Photo Background on iPhone
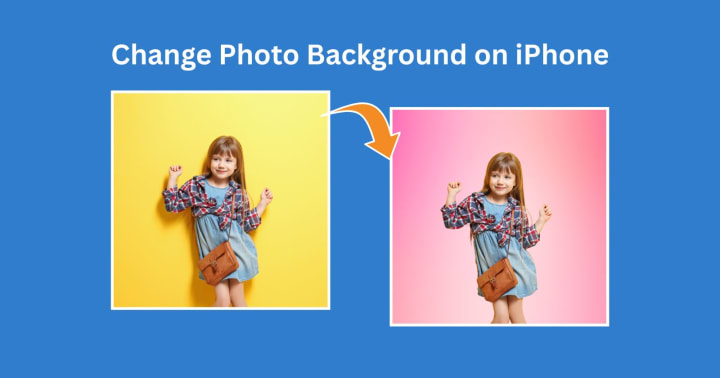
Changing the background of a photo can convert an average image to something quite extraordinary. Either opting to change cluttered backgrounds into clean ones or putting a subject into a more creative place, many more apps on iPhone make such a task simpler.
PhotoCut is the most reliable app for changing the background of a photo. It has a built-in elegance in its intuitive tools for the complete session of cut and background replacement, making its user proficient in creating professional photos without the sounds of being a higher level of knowledge in graphic design.
Using PhotoCut to Change the Background of a Photo
PhotoCut is a simple yet highly useful photo editing application that is intended to cut out the background of your photos and replace it with a new image. Here's how you can change the background of a photo:
- Install PhotoCut from any App Store. After that, open the app.
- To modify a picture from your gallery, choose it by using the "Select Photo" button.
- After choosing your image, utilize the app's automated background removal feature or manually wipe the background. PhotoCut makes it simple to precisely erase or improve edges for superior cut-outs.
- After removing the background, you can add a new one. PhotoCut has several background pictures to choose from or you can upload your own. Choose one that fits best with your picture.
- Resize, position, and tweak other aspects of the new background so that your subject fits well into the new scene. You can apply some extra filters and effects to make more customization.
- Satisfied with all the changes? Tap "Save" to save your edited photo to your device.
This is an easy way in a few steps to replace the background of any image and create something that is more artfully acceptable.
Learn the simplest ways to convert images to JPEG format.
How to Make a Transparent Background with GIMP
More than GIMP (GNU Image Manipulation Program) as a free and open-source alternative to Photoshop, it is especially suited for transparent backdrop creation, greatly demanded in logo creation, product photo retouching, or any designs that require crisp and clean edges.
Step-by-Step Guide to Create a Transparent Background in GIMP
- Download GIMP from the main page if you haven't already. Please install the software after downloading it.
- Launch GIMP. To modify a picture, select "File" > "Open."
- You add transparency to the image using an alpha channel. Go to "Layers" and then select "Transparency" > "Add Alpha Channel." This step is very crucial since, should you forget it, the transparent portions will be filled with white.
- To make things easier, you can select the backdrop with the "Fuzzy Select Tool" (Magic Wand Tool) in the tool. Click on the background area you require to become transparent. You should adjust the threshold so it picks only the background and not any parts of the subject.
- When you have selected the background, hit the "Delete" button on your keyboard. This will remove the background and render it transparent, checkered by default.
- There may be pieces of leftover background or jagged edges that cut into the subject. Use the "Eraser Tool" to clean them up.
- To export the image with a transparent background, head to "File" > "Export As" and save in PNG format, as PNG allows transparency and JPG does not.
You may simply use this method to generate translucent backdrops for photos used in logos, design work, and so on.
Create tattoo designs with PhotoCut’s AI Tattoo Generator.
How to Avoid QR Code Blurriness
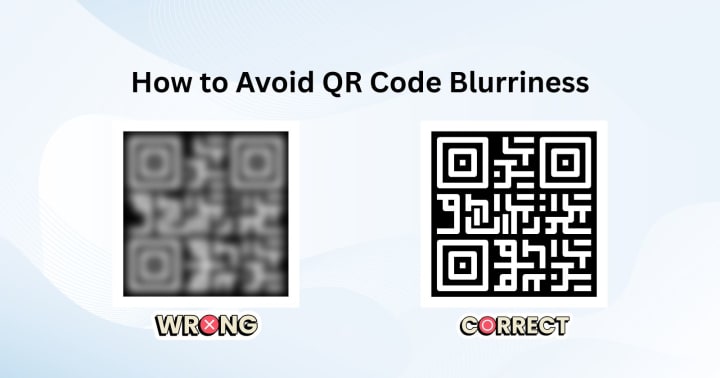
QR codes have become commonplace in our digital world, providing a simple method to browse a website, download an application, or communicate information. However, fuzzy QR codes are hard to scan and cause mistakes. So here are some tips to stay away from QR code blur:
Tips for Creating Clear QR Codes
- Use a high resolution for the QR code. Low-resolution images can cause pixelation and thus compromise scanning by different devices.
- QR codes must always exhibit high contrast—black on the QR code and white as the background. QR codes with colors that blend with the background will severely decrease readability.
- Test your QR code with a QR code scanner app before you print or otherwise share it. The purpose of this is to help ascertain that the code is scannable and clear.
- Always resize the QR code while maintaining the aspect ratio. Stretching or distorting the code will result in an unreadable image.
- While placing a QR code over an image or document, ensure that the background is not too complicated or colorful, as it may create interference in the scanning process.
Through making sure your QR codes are high resolution, have great contrast, and have been tested, they will ultimately be sharp and easy to scan.
Create your own AI girls with PhotoCut’s AI Girl Generator.
How to Keep Your Instagram Followers Private
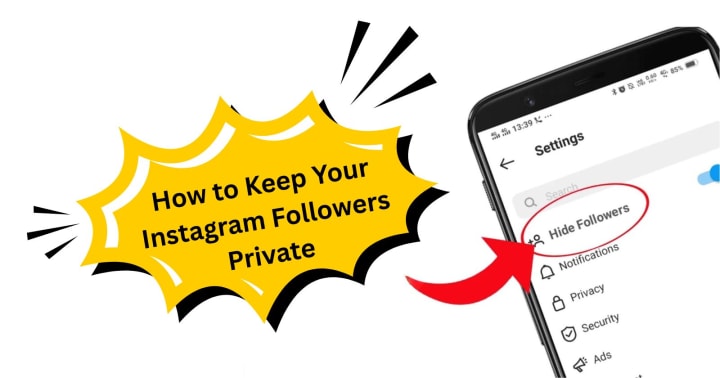
Instagram is a prominent social media avenue that allows people to share photographs, stories, and videos. But not everyone loves their activity being visible to the public. In that spirit, if you are privacy-conscious and wish to limit who sees your posts and followers, here are some tips on keeping your Instagram followers private:
Steps to Make Your Instagram Account Private
- Launch the Instagram application on your mobile phone and navigate to your profile page. Tap the three horizontal lines in the top-right corner to open the menu, and then select "Settings."
- In Settings, go under Privacy. The "Private Account" toggle should now switch on. When your account is private, only users who follow you will be able to see your posts, stories, and followers.
- You may also manually approve or deny followers. Go to your follower list and choose to approve or disapprove those who request to follow you.
- To set the audience for your stories on your Instagram, head to your profile and tap the three dots on the upper right. Click on "Story Settings" and choose your audience.
- To achieve a more private and controlled Instagram experience, you may also block some people from commenting and messaging you.
Following these steps gives you additional control over anything regarding privacy on Instagram, ensuring that only those you approve can view the content and followers.
Conclusion
Technological advancements in photo editing have prevailed ever since smartphones and apps like PhotoCut have graced society; changes to the image from rotation on iPhone and iPad, background changes, and transparent-making on GIMP are endless in image corrections. Instagram keeping private, and avoiding blurriness in QR code, are also serious matters concerning your digital privacy and security. You'll have a far greater chance of improving and controlling your internet presence if you grasp these tools and approaches.
Create amazing portraits using PhotoCut’s AI Portrait Generator.
FAQs
Q1. Is it feasible to rotate a picture at an angle greater than 180°?
Ans. Yes. Simply press the "Rotate" instruction until it is oriented as desired.
Q2. Does rotating a photo reduce its quality?
Ans. Rotating within the Photos app is generally lossless. It doesn't significantly degrade the image quality.
Q3. Is it possible to change the background of a photo directly on my iPhone?
Ans. Not directly within the native Photos app. You'll need to use a third-party app.
Q4. Once I remove the background, how do I add a new one?
Ans. After removing the background, you'll usually have an option to:
Choose a background from the app's library.
Use a solid color as the background.
Upload a photo from your camera roll as the background.
Q5. Why should I export as PNG?
Ans. Transparent areas would fill to a solid color (usually white or black); therefore the JPEG format does not support transparency. PNG is now the standard format of images that allow transparency.
Q6. The edges look serrated after I removed the background. How can I alleviate this problem?
Ans. Here is the process:
With the Eraser Tool, I take a very small, soft brush and gently erase the remaining background pixels around the edges.
Try using the Smudge Tool to slightly smooth the edges; it may help with blending into the background.
Q7. What is the way to avoid blurry scans of QR codes?
Ans. Here are some methods:
Be quiet: It is best to remain as still as possible, with both the phone and the QR code.
Tap to Focus: While the QR code is displayed on your phone, tap the screen to force' the camera focus on it.
Brighten Up: Provide illumination; if it is still too dark, switch on a flashlight or relocate to a spot that has more light.
Adjust Distance: Come closer to the code, or move somewhat farther away until you can focus clearly on the screen.
Lens Cleaning: Clean the camera lens with a clean, soft cloth.
QR Code Scanner Applications: Some specific QR Code scanning applications may focus better and process images more optimally than the inbuilt camera app.
Check the code size: If the QR code is too small, it would be challenging to scan, even if the conditions are optimal.
Q8. My phone has trouble focusing on close-up QR codes. What can I do?
Ans. Try moving the phone slightly further away. Many cameras have a minimum focus distance. Sometimes, backing up a bit helps the camera lock focus.
Q9. What happens when I switch my account to private?
Ans. Here’s what happens when you switch your account to private:
New Followers: People will have to send you a follow request, which you must approve before they can see your content.
Existing Followers: Your current followers will still be able to see your content unless you remove them.
Hashtags & Explore Page: Your posts will no longer appear in hashtag searches or on the Explore page for people who aren't following you.
Profile Visibility: People who don't follow you will only see your profile picture, username, name, and bio, along with a message saying your account is private.
Mention: Non-followers can still mention your profile but will not be able to see your posts.
Q10. Can someone still find my account if it's private?
Ans. Yes. People can still search for your username on Instagram. They just won't be able to see your posts or followers/following list unless you approve their follow request.
About the Creator
PhotoCut
AI Photo Editing Tool - Remove or Change your Background & Enhance Product Photos
Keep reading
More stories from PhotoCut and writers in Photography and other communities.
The Ultimate AI Tool for Image Editing and Enhancement
Today, more than ever, image editing tools are becoming more important in most people's work lives, while others use them at their convenience. Such tools are important for photographers, content creators, marketers, or anyone looking to improve their images. Currently, one of the best tools on the market is PhotoCut, an AI-powered image-editing website with great features for both newbie and experienced users.
By PhotoCut9 months ago in Photography
My Year, in Prattling and Photos
It's been a year since... last year. Ironically, it seems I've found myself a new tradition of getting sick during the New Year holidays. At least, this year (that is, this inter-year period remarkable for its shiny decorations in the streets and houses, and closed supermarkets and pretty much everything), I'm doubtlessly doing better: I've managed to come visit my friends in Germany for Christmas (which I failed to do last year) and—after having some good quality time eating machanka, playing Munchkin and swinging machetes (the last one obviously crept into this checklist only for the sake of the phonological form)—I came back home via proverbial Deutche Bahn and probably less known Schweizerische Bundesbahnen, my body hosting a family of viruses, virions and who knows what other tiny critters somewhere inside my chest.
By Andrei Z.18 days ago in Photography


Comments (1)
Interesting article.