
A Complete Guide to Resizing, Printing, and Sharing Photos with PhotoCut
A Complete Guide to Resizing, Printing, and Sharing Photos with PhotoCut

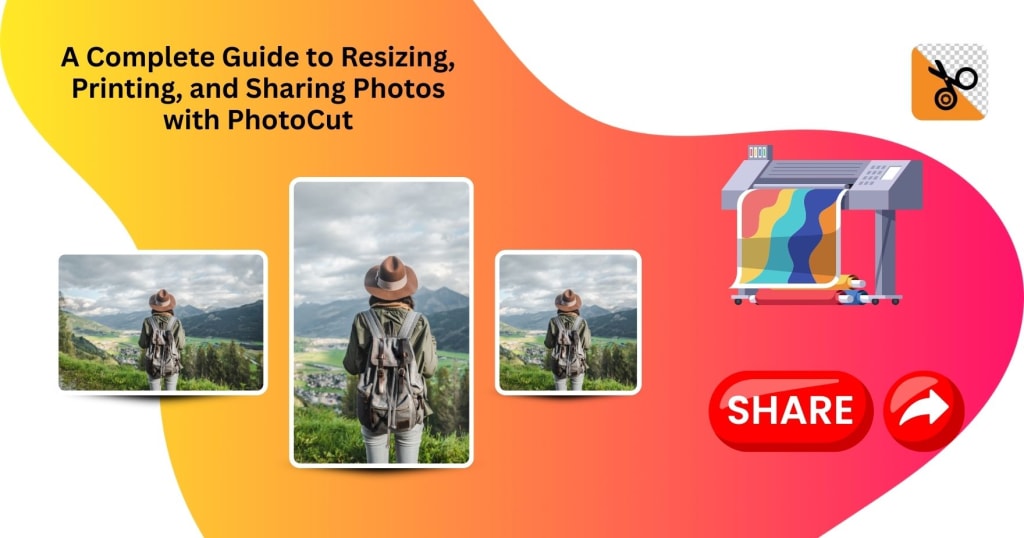
Photography dimensions are foremost in its application in communication, social media, and a storehouse of memories in every digital world today. Supplies are therefore mandatory for printing or posting, or maintaining a photo library. Different purposes would call for different photo sizes. For example, you might want to know how large a 4x6, 5x7, or 8x10 photo should be for printing, or how to make an image seem its best on Instagram or another site. More often than not, resizing and editing will be required to get your shots just right on social media or cropped to the various measurements needed. This article explains how to fit photographs on Instagram Stories, use PhotoCut to resize and modify photos, and the measurements of typical photo sizes.
Read about the Nude color and use it in your designs.
1. How Big is a 4x6 Photo?
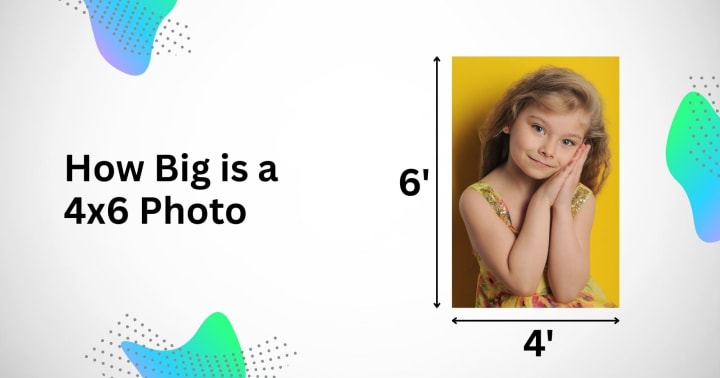
The 4x6 picture is among the most widely used photo-size prints, especially when it comes to printing. Be it photo albums, frames, or even gifts, the 4x6 is a standard for a physical print.
Dimensions of a 4x6 Photo
- Inches: 4 inches by 6 inches
- Centimeters: 10.2 cm by 15.2 cm
- Pixels: The pixel dimensions of a 4x6 photo largely rely on resolution. A high-quality resolution for printing is generally accepted to be 300 DPI (dots per inch). Thus, the pixel dimensions of a 4x6 photo would be:
1200 pixels by 1800 pixels (length x breadth) at 300 DPI.
The size of the photo would be suitable for producing small-sized print pictures of good quality and can easily fit in normal-sized photo frames. But if you are looking for lower resolution prints (maybe for a digital slideshow or casual prints), you might lower the DPI value, but then the image clarity would blur.
How to Resize a 4x6 Photo Using PhotoCut
For your needs, PhotoCut could be a nice app to crop or resize an image into the 4x6 format. To achieve the image resizing with PhotoCut:
- Open PhotoCut and import your photo.
- Choose the “Crop” tool and set the aspect ratio to 4x6 (or 3:2).
- Adjust the cropping area accordingly so that the focal point of your image stays inside the framing.
- Save the image, and it's now all set for printing in the 4x6 standard.
The tool also enables you to adjust your picture quality, enhance it, or apply filters to improve the printed version. Whether printing at home or via an online photo-printing company, any kind of resizing must be done correctly so that the prints come out nice and crisp.
2. How Big is a 5x7 Photo?
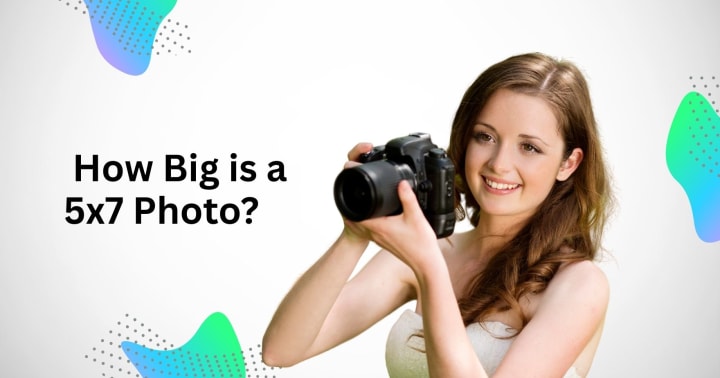
5x7 is another somewhat common photo size usually used for portraits, family photos, and other special occasions. It is a bit larger than the 4x6, thus providing a lovely decor for an office desk or mantel.
Dimensions of a 5x7 Photo
- Inches: 5 inches by 7 inches
- Centimeters: 12.7 cm by 17.8 cm
- Pixels: A 5x7 photo for a high-quality print at 300 DPI would be:
1500 pixels by 2100 pixels (width x height).
The larger 5x7 photo size gives more detail than a 4x6 size, but can still be considered a standard size for photo printing. It is used for printing wedding pictures, portraits, and other treasured memories, which are usually framed in medium-sized frames.
How to Resize a 5x7 Photo Using PhotoCut
You should ensure a good resolution when resizing to a 5x7, so the photo does not go pixelated. For this purpose, the cropping tool in PhotoCut would be needed. Follow these steps:
- Open your image in the PhotoCut application.
- Choose the "Crop" icon and set the aspect ratio to 5x7 (or 5:7).
- Crop and adjust the photo to center the image on the most important area of the photo.
- Save that photo, and it's ready to either print or share.
If you want to personalize the portrait or family photo more, you can do so directly for printing by adding text and overlays using PhotoCut or even removing the background you don't want.
Remove unwanted elements from your photos with PhotoCut’s AI Image Cleaner.
3. How Big is an 8x10 Photo?
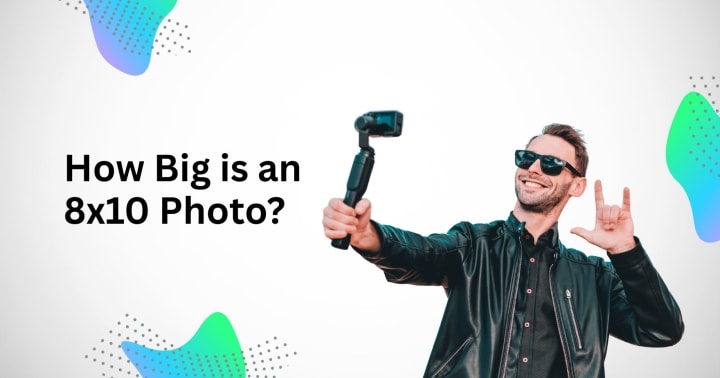
As for large prints being put up in some sort of major way in lots of places, living rooms, galleries, or even an office, the 8x10 size is quite popular indeed. This size allows for more detail and is typically used for portraits, high-quality prints, or professional photography.
Dimensions of an 8x10 Photo
- Inches: 8 inches by 10 inches.
- Centimeters: 20.3 cm by 25.4 cm
- Pixels: For a high-quality print at 300 DPI, an 8-by-10 photo would be:
2400 pixels by 3000 pixels (width x height).
This size is an excellent display size for wall-mounted photos and is widely used among professional portraiture, art printing, and family-enlarged photo work. There is ample room for high-resolution, crisp images to represent fine detail.
How to Resize an 8x10 Photo Using PhotoCut
PhotoCut makes it very easy to resize an image to an 8x10 size. Here is how you can resize your photo for 8x10 printing:
- Start PhotoCut and open the photo you want to resize.
- Press "Crop," and adjust the aspect ratio to 8x10, or 4:5.
- Crop the image, showing the areas of interest, which might also need zooming in or out; now adjust the frame.
- Then, save that version of the image, and it is all the more ready for printing.
More flexibility and space for more detail and larger prints for framing or special occasions can be easily offered through its larger size.
Blend two images online for free with PhotoCut’s Photo Blender.
4. How to Use Common Photo Sizes
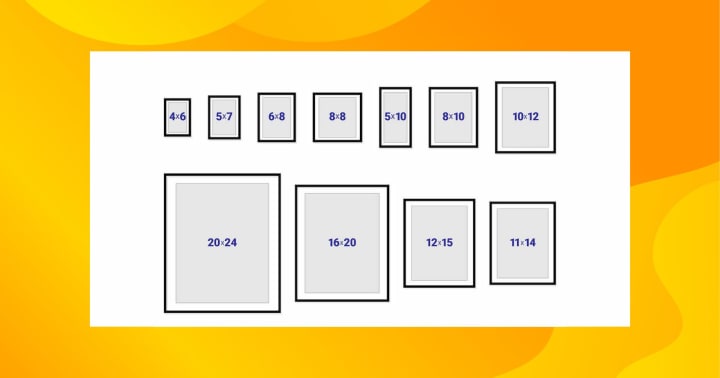
Fitting images into the required sizes will help you maximize results for a given project. Be it printing, framing, or displaying images online, knowing common photo sizes is the crux.
Standard Photo Sizes Used for Printing
- 4x6 inches: The classic choice for every use, and snapshots go quite well in this size for small frames.
- 5x7 inches: Ideal for framing or gifting photos.
- 8x10 inches: Popular for larger prints and exhibitions.
- 11x14 and 16x20 inches: Mostly seen posters, promotional material, or gallery-quality prints.
Common Resolutions for Digital Use
- 72 DPI: The standard resolution for images shown online.
- 300 DPI: A favored resolution for print-quality images.
How to Resize Images Using PhotoCut
Should you want to resize items quickly with ease, then PhotoCut is a great tool for resizing your pictures to the desired size. For either print or digital passing, images are simply resized and cropped in PhotoCut without losing any quality.
The right photo size makes sure that your picture is clear and well-formatted, looking its best. Having an understanding of standard photo sizes and the use of applications like PhotoCut is a time-saver for you in achieving great results.
Change your eye color in images with PhotoCut’s Eye Color Changer.
5. How to Fit Photos on Instagram Story
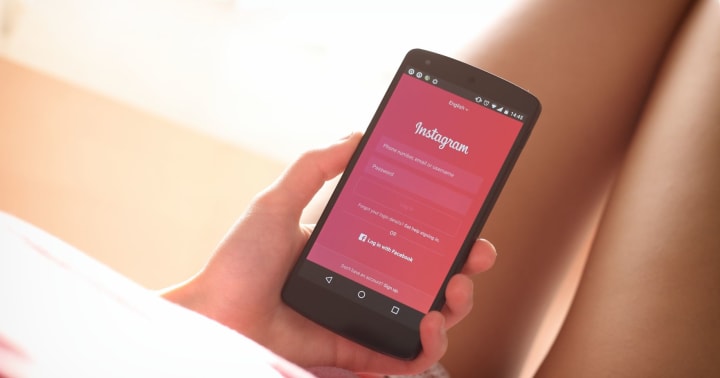
Digital Stories from Instagram are valuable forms of sharing special moments with other followers. Knowing how to have perfectly fit photos in an Instagram Story could be critical for providing a glamorous and professional touch. Also, Instagram Stories will typically be in a display ratio of 9:16, so it would be wise to crop or resize any specific image such that it fits this ratio.
Ideal Instagram Story Size
- Aspect Ratio: 9:16
- Dimensions: 1080 pixels by 1920 pixels (width x height)
- Inches: Approximately 6.2 inches by 11 inches (for standard phone screens)
If the photo does not fit this quotation, then you need to make some kind of cropping or adjustment to it. These are where PhotoCut comes in handy. PhotoCut is a simple tool to help you easily crop your photo based on the required aspect ratio to fit in Instagram Stories.
How to Fit Photos on Instagram Story Using PhotoCut
- Open the app PhotoCut and import the photo that you are gonna use for your Instagram Story.
- Choose the Crop option and select the 9:16 aspect ratio (Instagram story size).
- Let's adjust the photo to fill the screen, taking care that essential parts of the image are not getting cut off.
- Perfect, and when you are satisfied with how the photo fits, save it and upload it directly to your Instagram Story.
As an option, adding text, stickers, or other cool elements to create an engaging Instagram Story can also be done through the PhotoCut app.
Conclusion
Whether you resize photos for prints (for example, 4x6, 5x7, or 8x10), use tools to resize images for Instagram Stories, or learn how to use PhotoCut for resizing and editing, image dimensions, and managing them, will always be the heart of effective photo management. This application is indeed a perfect tool for photographers, social media enthusiasts, and anyone creating high-quality, custom images to fit their specific needs. The wonderful thing is that PhotoCut has very user-friendly cropping options as well as resizing tools that can assist you in optimizing your photos for both print and digital use, hence ensuring that your photos always look their best.
Remove red eyes from your photos for free using PhotoCut’s Red-Eye Remover.
FAQs
Q1. What does a 4x6 photo size mean?
Ans. This denotes a rectangular print that measures 4 inches in width and 6 inches in height, as a very common standard for prints nowadays.
Q2 How big is a 5x7 photo?
Ans. The picture's dimensions are 5 inches wide by 7 inches high. More formal or portrait printing usually uses a slightly bigger format than 4x6.
Q3 What measures an 8x10 photo?
Ans. An 8x10 measures 8 inches by 10 inches. It is the most widely used size in framing and posing materials when putting up photos on walls.
Q4. Why are those standard sizes so important when talking about photograph sizes?
Ans. Because they put the photographs in a place where it becomes very easy to get frames and albums.
Q5. Are these measurements exact?
Ans. Generally, it could be said so. Nevertheless, slight deviations in size (for example, a fraction of an inch) might occur through the printing procedures or when using the aspect ratio of your original digital image.
Q6. What is a photo sizer or photo resizer?
Ans. A picture sizer, often known as a resizer, is a software program or web tool that lets you change the digital photo's dimensions (height and width) or file size.
Q7. Why would I need to use a photo sizer?
Ans. Common reasons include:
- Reducing file size for faster uploading to websites or social media.
- Resizing an image to fit a specific frame or print size.
- Optimizing images for email attachments.
- Changing the dimensions to match a website’s or app's requirements.
Q8. What happens if my photo is a different size or aspect ratio?
Ans. Instagram will either:
- Crop your photo: Parts of your image will be cut off to fit the 9:16 ratio. This is often undesirable.
- Adding black bars (letterboxing): If your picture is wider than the screen, Instagram will apply black bars at the top and bottom to fill in the extra space, thus making your picture look rather small and less significant.
- Zooming up: Instagram may automatically zoom in towards your photo to make it fill the space available on-screen, which at the same time would also cause important portions of your photo to get cropped.
Q9. How do I fit a photo into an Instagram Story without cropping or black bars?
Ans. Here are a couple of other ways:
- Resize/Crop your photo before uploading: Use any photo-editing application or online utility to crop or resize your photo to a 9:16 aspect ratio (1080 x 1920 px). You will then have all the power over what gets shown.
- Use Instagram's Zoom/Pinch Function: While adding a photo to your Story, the screen can be pinched to zoom out and hopefully show more of the image, but this might create black bars.
- Background: Some colored backgrounds can be added to the photo on Instagram Stories. You can select a color from the pen tool on the screen and then tap and hold to fill it. After that, place your photo above the background color that fills the screen. This tends to make the view of black bars much less.
- Layout Apps: Apps like Canva or Unfold were made for creating Instagram Stories, with templates and tools that make resizing or formatting your photos easier.
Q10. What's the best way to guarantee professional-looking Instagram Stories?
Ans. Here's the best way to guarantee professional-looking Instagram Stories:
- Use only high-resolution photos: You want to avoid blurry or pixelated images.
- Keep with overall style: Use similar filters, fonts, and colors to create a cohesive brand.
- Limit text and graphics: Don't put too much into your Story.
- Think about composition: Ensure your pictures speak the design language.
- Compare across devices: Check how your Story looks on multiple phone screens, so you can be sure that everything is aligned perfectly.
About the Creator
PhotoCut
AI Photo Editing Tool - Remove or Change your Background & Enhance Product Photos
Keep reading
More stories from PhotoCut and writers in Photography and other communities.
Mastering Image Editing, Compression, and Customization on Your iPhone
Today, images are a vital part of everyday life in a digital structure. Social media posts are filled with images or even personal memories that often talk about them, all of which depend on images. However, effective management and personalization become inevitable with the diverse content that continues to be created, edited, and stored. Whether converting an image file to JPEG format, creating fantastic collages, compressing an image without losing quality, or changing your Google background, available tools and techniques are up to the task. This article will discuss these topics in detail, providing practical solutions, tips, and recommendations.
By PhotoCut9 months ago in Photography
My Year, in Prattling and Photos
It's been a year since... last year. Ironically, it seems I've found myself a new tradition of getting sick during the New Year holidays. At least, this year (that is, this inter-year period remarkable for its shiny decorations in the streets and houses, and closed supermarkets and pretty much everything), I'm doubtlessly doing better: I've managed to come visit my friends in Germany for Christmas (which I failed to do last year) and—after having some good quality time eating machanka, playing Munchkin and swinging machetes (the last one obviously crept into this checklist only for the sake of the phonological form)—I came back home via proverbial Deutche Bahn and probably less known Schweizerische Bundesbahnen, my body hosting a family of viruses, virions and who knows what other tiny critters somewhere inside my chest.
By Andrei Z.17 days ago in Photography
The People We Meet on Vacation: Moments, Connections, and Lasting Impressions
The People We Meet on Vacation: Moments, Connections, and Lasting Impressions Vacations are more than a break from daily routines. They are a unique social experience where people from different backgrounds cross paths in unexpected ways. The people we meet during a holiday often leave strong impressions, even if the interaction lasts only a few minutes. These encounters can shape memories, influence perspectives, and sometimes turn into lifelong friendships. Understanding who we meet on vacation helps explain why travel feels so meaningful to many people.
By America today 6 days ago in Photography


Comments
There are no comments for this story
Be the first to respond and start the conversation.