
Why People Are Stockpiling Beef Tallow
And How They’re Storing It


Cooked-down, ultra-pure fat from steaks, ribs, rump roasts, or any other cow's meat cut is called beef tallow. I used leaf fat from my neighborhood butcher shop because it's the fat that surrounds all the vital organs in the chest and belly cavities. However, with the main technique we'll be covering today, you can use any kind of fat. I do recommend beef leaf fat, as the flavor is unmatched, and once all the impurities are removed, it's silky smooth.
Tallow has incredible versatility. It has been used as a lubricant for working with wood, leather, and metal, as well as for cooking, soap making, candle making, and skin care products. Pie crust with real tallow is my favorite use, however!
In the past, tallow was used to create lanterns, tapers, and dips for street lighting, such as the first ones in London. Up until 1990, McDonald's cooked their fries with tallow.
Tallow is essential for any homesteader out there because it has so many uses. Tallow is high in calories and nutrients. Tallow has 12 grams of fat and 110 calories per tablespoon. Tallow has a shelf life of just over a year if stored correctly and at room temperature. Just be careful to sniff it to check whether it has gone rotten.
How to Prepare Your Own Tallow
To produce tallow, all you need is a kitchen sieve, a knife, a muslin cloth, beef fat, and table salt.
Three pounds of leaf fat from my neighborhood butcher store will be my starting point. It yields two quarts of tallow and costs me $4.95.
Step 1: The fat will be chopped into cubes roughly the size of an inch. First, we're going to use the dry rendering method, which involves boiling the fat by itself. The fat will be cooked on low for six hours, stirring often, in a crockpot or on the stovetop.
Step 2: The rendered fat and solids are now all that are left. We now have cracklings as the leftover solids! Take these solid pieces out and search for your favorite crackling recipe. They are DELICIOUS! Drain the fat liquids from the fat particles into a mixing dish.
Step 3: Our first render will be allowed to firm over night. After that, we'll remove the tallow cake from the bowl and remove any particles or discoloration from the bottom.
Step 4: We'll wet render this now. Adding salt and water to render helps extract as much impurity as possible. The tallow will last longer and be purer the more we render it.
We're going to cut up the fat and add it, along with two cups of water and half a cup of table salt, to the pot on the stovetop.
It must be simmered on low heat for a minimum of three hours. When it's done, we'll transfer it to a fresh, uncontaminated mixing bowl and put it back in the refrigerator to solidify for an additional night.
Step 5: We will now remove the tallow cake in the same manner as previously, but this time you will be able to observe how the fat and water separated and drew contaminants into the water.
• For our third render, we're going to give it another scrape and do the wet render once more. Depending on how many impurities you receive with each render, you might need to make additional renders.
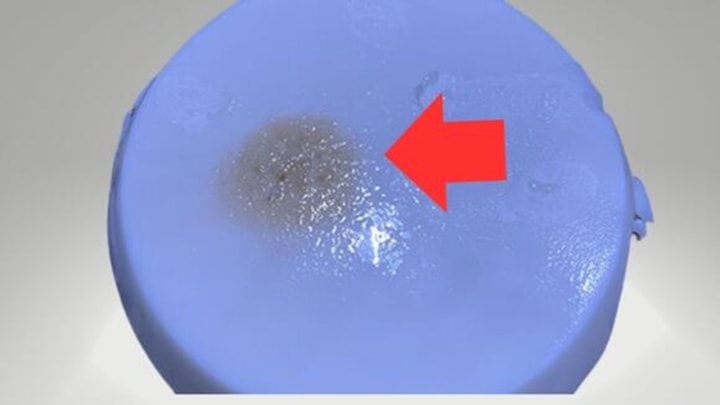
• When I scrape out a few contaminants and the water becomes clear, I know this batch is finished and the tallow is ready to can.
• I'm chopping mine up to double-check for contaminants and putting it into the cans, but you can reheat it and pour it into the jars.
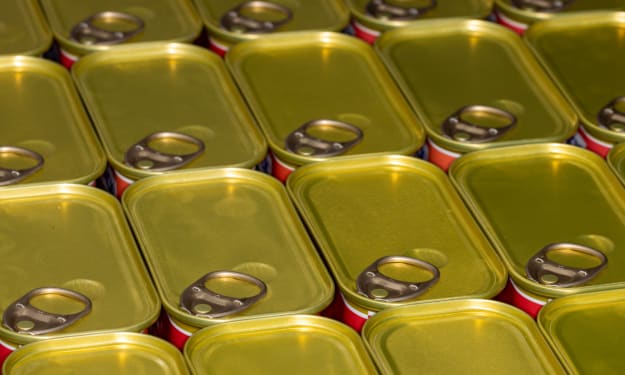
Canning Tallow Under Pressure
To preserve our tallow, we're going to use the pressure canning method. There is no other safe way to preserve low-acid foods except by pressure canning.
Meats, poultry, fish, and vegetables are examples of low-acid foods. Pressurized steam produces the necessary temperature of 240 degrees Fahrenheit or higher, which kills the microorganisms in the tallow.
• Step 1: Add three inches of boiling water to your pressure canner. (CONSULT YOUR CANNERS MANUFACTURING DIRECTIONS) The jars do not need to be completely covered, in contrast to the water bath approach. Maintaining a sufficient water level is essential to avoid harming your pressure canner.
• Step 2: Place your jars on the rack that is located at the bottom of the pressure canner. I suggest using jar tongs to prevent burns and jar drops because the fat will be hot.
• Step 3: Set your stove's temperature to high. Secure your lid.
• Step 4: Set the timer for ten minutes after the vent begins to steam.
• Step 5: After the venting time is up, put the weighted gauge on the canner with an oven mitt.

• Step 6: Lower the heat on the stove. Process for 25 minutes at 10 pounds of pressure in a pressure canner. (CHECK YOUR ALTITUDE)
• Step 7: Turn off the heat, and let the pressure canner depressurize naturally. Do not touch anything, as it's incredibly hot and under pressure. Carefully remove the lid. Using jar tongs, carefully remove the jars and set them aside to cool. Listen for all the "pops" from the jar lids. Once cool and properly sealed, take the rings off your jars to store.
Tallow is great for a fire starter, lube for all sorts of applications and tools, candle and soap making, and many other useful jobs. It can be a significant source of calories and nourishment if there is a shortage of food. Above all, it makes the tastiest pie crust, which helps you boost morale in any circumstance.
About the Creator
Rootbound Homestead
Rootbound Homestead is a community bound by roots. Leaving our old comfy life in FL to move to NY to start living cleaner, more simply, and with purpose. Garden hacks, tips and tricks, natural medicine, healing, animals, recipes and more!
Keep reading
More stories from Rootbound Homestead and writers in Lifehack and other communities.
Items To Stockpile If Society Continues To Lose The Plot
Indeed, the past few years have demonstrated the extreme plausibility of a societal collapse. The year 2020 alone resulted in supply chain disruptions that we are still grappling with, and it swiftly plunged our nation into a recession. I think we all remember that toilet paper crisis!
By Rootbound Homestead12 months ago in Lifehack
Energy Sources Preppers Should Look Into
Preppers debate alternative energy sources. There is always going to be a debate over which one is best, as it depends on the specific needs of the prepper and the environment they are in: You need to look at what you have available when deciding on which energy source is the best for you. However, don’t be trapped by a false binary situation: You can select multiple energy sources, depending on your environment and financial situation. Also, bear in mind that, if you want to be completely self-sufficient, then there is a learning curve as you will need to learn how the technology works.
By Jamais Jochim7 days ago in Lifehack


Comments
There are no comments for this story
Be the first to respond and start the conversation.