
Laying the Groundwork: Essential Preparations Before Installing a Resin Bound Surface
Resin Bound Surface
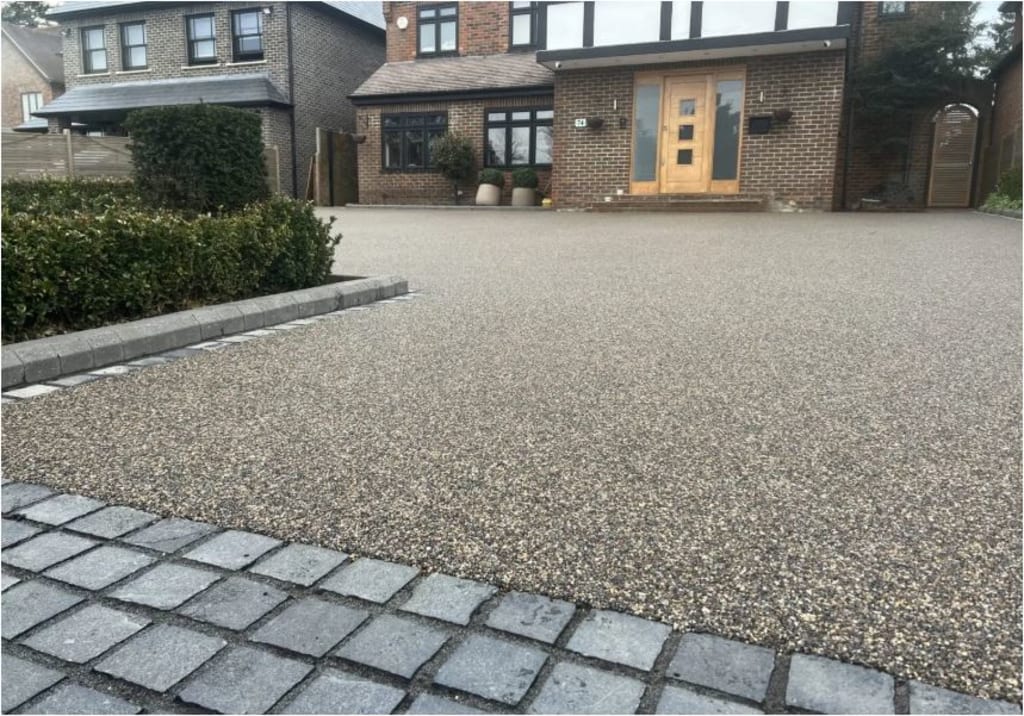
Resin bound surfaces offer a beautiful, durable, and low-maintenance solution for driveways, patios, and pathways. However, the longevity and aesthetic appeal of your resin bound surface heavily depend on the quality of the preparation work done beforehand. Getting this stage right is crucial for a flawless finish and a surface that stands the test of time.
Assess the Existing Sub-Base
The foundation is everything. Before installing a resin bound surface, you must thoroughly assess the existing sub-base. This is the layer beneath the surface that provides structural support.
• Existing Concrete or Asphalt: If you have an existing concrete or asphalt surface, check for cracks, potholes, and any signs of deterioration. Minor cracks can often be repaired, but severely damaged surfaces may require replacement.
• Hardcore Sub-Base: If you're installing on a hardcore sub-base, ensure it's compacted, level, and free from any loose materials or debris. Poor compaction can lead to sinking or unevenness in your resin bound surface.
• Drainage: Proper drainage is essential to prevent waterlogging and damage to your resin bound surface. Check for any areas where water pools and address any drainage issues before installation.
Repair or Replace Damaged Areas
Any existing damage to the sub-base must be repaired before installing the resin bound surface.
• Concrete Repairs: Fill cracks and potholes with a suitable concrete repair mortar. Allow the repairs to cure completely before proceeding.
• Asphalt Repairs: Patch any damaged areas with asphalt repair compound. Ensure the patches are level with the surrounding surface.
• Sub-Base Leveling: If the sub-base is uneven, use a leveling compound or additional hardcore to create a level surface. Compact the leveling material thoroughly.
Create a Suitable Edge Restraint
An edge restraint is crucial to contain the resin bound surface and provide a clean, finished edge.
• Existing Edging: If you have existing kerbs or edging, ensure they are sturdy and level.
• New Edging: If you need to install new edging, use materials such as concrete kerbs, brick pavers, or steel edging. Ensure the edging is securely installed and level with the desired surface height.
Clean the Sub-Base Thoroughly
A clean sub-base is essential for proper adhesion of the resin bound surface.
• Remove Debris: Sweep away any loose materials, dirt, or debris from the sub-base.
• Power Washing: Power wash the sub-base to remove any oil, grease, or other contaminants.
• Allow to Dry: Ensure the sub-base is completely dry before proceeding with the installation.
Consider Weather Conditions
Weather conditions can significantly impact the installation of a resin bound surface.
• Dry Conditions: Resin bound surfaces should be installed in dry weather conditions. Rain can interfere with the curing process and weaken the surface.
• Temperature: Avoid installing resin bound surfaces in extreme temperatures. Ideally, the temperature should be between 5°C and 25°C.
Prepare the Mixing Area
A designated mixing area is essential for efficient and consistent mixing of the resin and aggregate.
• Flat Surface: Choose a flat and stable surface for mixing.
• Protective Covering: Cover the mixing area with a protective sheet to prevent spills and stains.
• Mixing Equipment: Ensure you have the necessary mixing equipment, such as a forced action mixer, wheelbarrows, and trowels.
Prepare the Resin and Aggregate
• Correct Ratio: Ensure the resin and aggregate are mixed in the correct ratio as specified by the manufacturer.
• Quality Materials: Use high-quality resin and aggregate from a reputable supplier.
• Storage: Store the resin and aggregate in a cool, dry place away from direct sunlight.
FAQs
Q: Can I install a resin bound surface directly onto soil?
A: No, a resin bound surface requires a solid and stable sub-base, such as concrete, asphalt, or a compacted hardcore sub-base.
Q: How long does the preparation process take?
A: The preparation time will vary depending on the condition of the existing sub-base and the size of the area. It can take anywhere from a few hours to a few days.
Q: Can I repair minor cracks in my existing concrete sub-base myself?
A: Yes, minor cracks can be repaired using a suitable concrete repair mortar. However, for larger or more complex repairs, it's best to consult with a professional.
Q: What happens if the sub-base is not properly prepared?
A: Improper sub-base preparation can lead to various issues, such as sinking, unevenness, cracking, and premature failure of the resin bound surface.
Q: Do I need planning permission for a resin bound driveway?
A: Planning permission is generally not required for resin bound driveways, provided they are permeable and comply with local regulations. It's always best to check with your local planning authority to confirm.
By following these essential preparation steps, you can ensure a successful installation and a beautiful, long-lasting resin bound surface.
About the Creator
Neck Akila
My specialty is combining research-backed strategies to create marketing copy that resonates with readers and drives conversions
Keep reading
More stories from Neck Akila and writers in Lifehack and other communities.
Consult Lift Services: The Ultimate Guide to Choosing the Right Provider
Lifts are essential for mobility in modern buildings, offering convenience, accessibility, and efficiency. Whether for commercial or residential use, selecting the right lift service provider is crucial to ensure safety, durability, and compliance with regulations
By Neck Akila12 months ago in Lifehack
Bullies Suck
We’ve all had to deal with bullies. The problem is when the bullies become a problem at work. You need to figure out ways to deal with the problem, and to do so in such a way that the problem is dealt with permanently. No one deserves to be humiliated where they work or play, and if someone makes you feel like you are worth less than nothing then they need to be dealt with, preferably by the book. Hopefully, you’ll find a way to deal with your bully that removes them from the situation.
By Jamais Jochim6 days ago in Lifehack
Who is your "Person"?
It's important to recognize that you cannot go through life as easily on your own. My name is Elizabeth and I'm a survivor of child abuse and horrific trauma. Healing from trauma is not a quick fix and recognizing that it will take time, is part of the struggle.
By Elizabeth Woods3 days ago in Psyche


Comments
There are no comments for this story
Be the first to respond and start the conversation.