


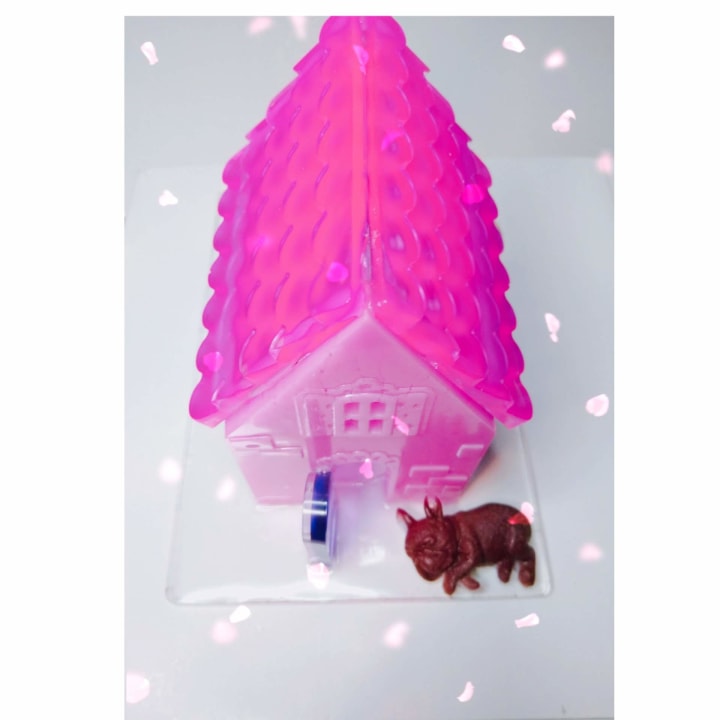
There are so many things that I can teach you about resin/epoxy. I keep reiterating "resin/epoxy" because technically they are one in the same and I have used both. There are an endless amount of things that you can do with them. You can create dolls, jewelry, doll houses, home decor, art, toy shaker for kids, key chains, night lights, and so much more. But here I will just teach you the basics to get you started on the road to becoming a pro.
Pro Tip #1-Must Haves:
The first thing you need is clear mixing cups. I used the plastic drinking cups, they run you about a dollar or two in the dollar store, and you can peel the resin out of the cup after it has cured. That way you are reusing the cup, and not throwing so much plastic back into the environment. But if you can afford it, the most eco-friendly thing you should get is a clear silicone cup that already has measurements on the side.
The second thing you’ll absolutely need is popsicle sticks or reusable utensils you can find online to mix the formulas. The popsicles sticks usually cost me a dollar for at least twenty, and I usually use them twice.
The third thing you may definitely want to start with is glitter, and lots of it. You can never go wrong with glitter in the crafting world. It is also best to mix with a base color, so resin dye or acrylic paint.

Pro Tip #3- Which Brand I Suggest?
The second step to resin/epoxy is figuring out what resin/epoxy formula you would like to work with. The resin/epoxy I've used is Ice Resin, Unicone Resin, Art N Glow, Pro Marine supplies, and Miraclekoo UV resin. First read a lot of the reviews before purchasing. But with today's times, so many people are paying for reviews. I am not getting endorsed for any of the following reviews of resin.
When I started in the resin game it was this product called “Ice resin”. I didn't look at any reviews and I almost think it was the only one on the market at the time. It yellowed really badly and burned with heat, which is the reason I think it is no longer produced. I only mentioned for the purpose of experience.
Art N Glow
Then I switched to "Art N Glow" which bubbled a lot. It was pretty clear but it just had a lot of bubbles in it. For that reason I kept searching, but I stuck with it until I found something else. Bubbles can also be released with heat. It also burned a little, at the time, when I used my lighter to get the bubbles out. At the same time when you stick with things longer you learn how to work with them. But for me at the time, it felt like I just couldn't get all the bubbles out.
Unicone Resin
In the meantime I tried "Unicone" Resin. Which was awesome. Barely had to use heat to get the bubbles out, it wasn't thick, and allowed me to be "the set it and forget it type of gal". Only issue was it was expensive and I wasn't able to provide my customers with more affordable prices. So I continued the journey with "Art N' Glow" for about a year or two, as I constantly researched.
Promarine Supplies
Then a friend suggested, "Promarine Supplies", and that it was more affordable. I was apprehensive at first on quality and whether the company was real, but I was like "what the heck". Furthermore, I was teaching the friend that had suggested it, so she was a beginner. But no the less, that is where my relationship with Promarine Supplies started.
So far I would say that Promarine Supplies is about an 8.5 out of 10. What I love about Pro- Marine supplies is that it is very affordable and the more you buy the more affordable it becomes. They have a two day shipping, but they don't ship to P.O. boxes. And most bubbles that tend to arise, go away on their own. So ya girl is back to mostly setting and forgetting. They also reward you for buying their product, and who doesn't love rewards. I haven't found a more affordable resin with this good of a quality in eight months.
The issues I have with "Promarine Supplies" is that Part A is thick and I have arthritis in my hands. When it is thick you are more likely to get bubbles when stirring. To solve this issue I've learned through research that you either have to keep it in a room that is usually 75 degrees or higher. Or pour Part A into a mixing cup, set the cup in a warm bowl of water for about 5 minutes, and then mix it with Bart B. You'll get a significant amount of less bubbles and be able to get rid of the few that are there quickly.
Miraclekoo UV Resin
I would say that the Miraclekoo UV resin is more for small projects or fixing some mistakes you may make with the resin quickly. It is also the most expensive product you'll find in resin, in my opinion You need a good UV lamp with it though. Most people use it for making jewelry. It usually cures in like five minutes. But within those five minutes, if you use too much, the resin bends/ buckles as it cures. So your best bet is to use it in small crafts. And you have to flip it to make sure both sides cure under the light, like it in a frying pan.
I'm not going to put instructions on how to mix because each formula is different. Just make sure you adhere to the product's instructions. The one thing that is universal is to take your time, don't stir fast, scrape the sides, and maybe get you one of those long lighters or heat guns. Most people prefer the heat gun. You have to be careful with heat in general as they can warp your silicone mold over time. And you may want to buy mold release, because constant "demolding" can add wear and tear to your silicone mold.
Pro Tip #3
Mistakes are masterpieces. You'll find that you'll often make "mistakes" or the pieces won't come out like you planned them, but everyone else will love them. So just experiment, experiment, and experiment and be patient with the process. I’ve been doing this for at least five years, and I feel I’m finally Pro status, and at times I still need help.
Pro Tip #4
I've also found parchment paper to be my best friend. You cannot confuse it with wax paper. Any amount of resin/epoxy spilled onto parchment paper pills off, protecting your work space at a more affordable price. Giving that resin and epoxy is oil based, and wax is oil based it adheres to wax paper and what you are working on. So it can get stuck to work spaces when using the wax paper.
Pro Tip #5
If you are working with multiple colors and don't want them to blend very much; Start with a base of clear resin, and subsequently pour in the color at different times while introducing a little clear resin each time if you are working in a deep space. If you are working in shallow space or horizontal you'll find that if you "focus pour" or "spot pour" you can manipulate or move the resin wear you would like for it to go
Final Words:
To find the molds you want to work with, research Etsy (the biggest handmade site I know) and see what's popular and go from there. I order most of my molds from Amazon, and Etsy, make sure to check the reviews thoroughly. The last most important key you'll learn is to stick with it, you'll be glad you did.
About the Creator
Doe's Crafte`
I've started a journey on self love and actualization. I've hit a milestone in my life where I've become more realistic and staying true to optimism. I like sharing my thoughts and helping others.
Keep reading
More stories from Doe's Crafte` and writers in Lifehack and other communities.
Forgiveness
I hear a lot of people wanting to mend a broken relationship but don't know where to start. Forgiveness is the first step to mending a broken relationship. Yeah, I know it's not that easy and what if they don't deserve forgiveness? I've had to do a lot of forgiving in my life, just as I've needed forgiveness from others. That doesn't matter forgiveness is for you. At the end of the day, it helps you feel better. And now you are like, how do I start forgiveness?
By Doe's Crafte`7 years ago in Humans
The 5 Morning Habits That Destroy Your Brain
Two years ago, I sat staring at my computer screen with a blank, heavy mind. My online business was tanking, my website traffic had flatlined, and I could barely string together a coherent sentence for my weekly newsletter. I was exhausted before the day even started.
By John Arthor4 days ago in Lifehack


Comments
There are no comments for this story
Be the first to respond and start the conversation.