
DIY Guide: How to Lay Tumbled Pavers Like a Pro
Step-by-Step Instructions for a Flawless Tumbled Paver Installation

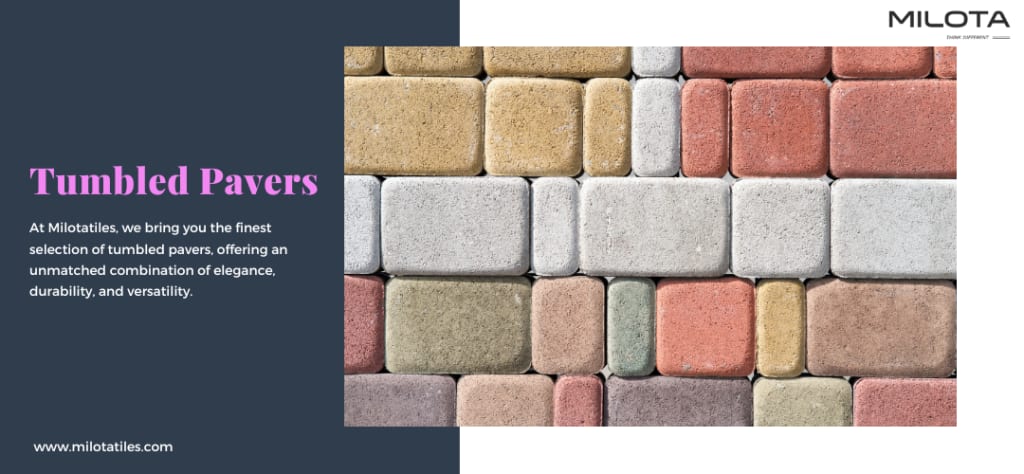
Tumbled pavers have become a go-to choice for homeowners and designers seeking timeless charm with a rustic finish. Their weathered look, soft edges, and textured surfaces make them perfect for patios, walkways, driveways, and garden paths. If you’re looking to add character and durability to your outdoor space, laying tumbled pavers yourself can be a rewarding and cost-effective project. In this comprehensive DIY guide, we’ll walk you through each step to ensure your installation looks clean, professional, and long-lasting.
What Are Tumbled Pavers?
Before diving into the installation process, it’s essential to understand what sets tumbled pavers apart. Tumbled pavers are concrete or natural stone pavers that undergo a mechanical tumbling process. This gives them an aged, weathered appearance, reminiscent of old European cobblestone streets.
Their softened edges and textured surface enhance slip resistance and make them ideal for both practical and aesthetic applications. Whether you’re aiming for a rustic garden path or an elegant courtyard, tumbled pavers offer the versatility and appeal needed for a standout outdoor design.
Tools and Materials You’ll Need
Before getting started, gather the following tools and materials:
Materials:
- Tumbled pavers (choose your preferred size and color)
- Paver base (crushed gravel or stone dust)
- Paver sand (coarse bedding sand)
- Edging restraints
- Polymeric sand (for joint locking)
Tools:
- Shovel
- Wheelbarrow
- Rake
- Plate compactor
- Rubber mallet
- Level
- String line and stakes
- Garden hose
- Broom
Step-by-Step Guide to Laying Tumbled Pavers
Step 1: Plan and Measure Your Space
Start by planning the layout of your project. Measure the area where you want to install the tumbled pavers and mark the perimeter using stakes and string lines. This will help you visualize the space and calculate how many pavers and materials you need.
Pro Tip: Always order 5–10% extra pavers to account for cuts and potential breakage.
Step 2: Excavate the Area
Use a shovel to excavate the marked area. For pedestrian paths, dig about 6–8 inches deep. For driveways, go at least 10–12 inches. This depth includes the base, bedding sand, and pavers.
Clear all debris, roots, and loose soil to create a clean, level foundation.
Step 3: Add the Base Material
Add about 4–6 inches of crushed gravel or paver base to the excavated area. Use a rake to spread it evenly. Compact the base using a plate compactor to ensure a solid foundation.
Important: The base should slope slightly away from any structures (a 1-inch drop every 4 feet) to promote proper drainage.
Step 4: Add Bedding Sand
Spread 1 inch of coarse sand over the compacted base. This layer will help stabilize and level the tumbled pavers. Use a long 2x4 board and two pipes or rails as guides to screed the sand evenly across the surface.
Avoid walking on the sand after screeding to prevent uneven areas.
Step 5: Lay the Tumbled Pavers
Begin laying your tumbled pavers in your desired pattern—whether it’s a running bond, herringbone, or random layout. Start from a corner or straight edge and work outward.
Place each paver carefully onto the sand bed, aligning it with the string line. Use a rubber mallet to gently tap the pavers into place and ensure they’re level.
Tip: Because tumbled pavers have irregular edges, minor gaps and slight variation are part of their charm—don’t stress perfection.
Step 6: Install Edge Restraints
Once all the pavers are in place, install edge restraints around the perimeter. This prevents the pavers from shifting over time.
Secure the edging with spikes or landscape nails, ensuring it sits tight against the outermost pavers.
Step 7: Compact the Surface
Run a plate compactor over the surface of the pavers to settle them into the sand bed. For tumbled pavers, use a rubber mat on the compactor to avoid damaging the textured surface.
This step helps ensure that the pavers are firmly set and creates an even, professional finish.
Step 8: Sweep in Joint Sand
Once the pavers are compacted, sweep polymeric sand into the joints. This specialized sand hardens when wet and helps lock the pavers in place while resisting weed growth and insect infestation.
Use a broom to ensure the sand fills all the joints. Then, lightly mist the entire surface with a garden hose to activate the polymeric binding agent. Be careful not to over-wet or wash away the sand.
Maintenance Tips for Tumbled Pavers
After your project is complete, proper maintenance will help preserve the appearance and durability of your tumbled pavers.
- Sweep regularly to remove debris.
- Reseal every few years to enhance color and prevent stains.
- Reapply polymeric sand if joint sand erodes over time.
- Clean with mild soap and water to maintain a fresh look.
Why Choose Tumbled Pavers for Your Next Project?
Tumbled pavers bring a unique combination of durability, beauty, and old-world character to any outdoor space. Unlike standard pavers, their aged look complements both traditional and modern landscapes. Whether you’re building a cozy backyard patio or a sophisticated entryway, tumbled pavers create a high-end look that’s built to last.
Here are some standout reasons to use tumbled pavers from MiloTa Tiles:
- Wide variety of natural stone finishes
- Precision tumbled for uniform texture and appearance
- Excellent resistance to weather and wear
- Slip-resistant surface perfect for walkways and patios
Conclusion
Laying tumbled pavers might seem like a big task, but with the right tools, preparation, and techniques, it’s a rewarding DIY project that adds long-lasting beauty to your property. Whether you’re revamping your driveway or crafting a charming backyard retreat, tumbled pavers deliver both form and function with timeless style.
For premium-grade tumbled pavers, explore the collection at MiloTa Tiles—your trusted source for high-quality stone products that bring professional results to DIY projects.
About the Creator
Milota Tiles
Milota Tile is a proud venture of the Milota Group, rapidly emerging as a leading name in the manufacturing, distribution, and export of premium ceramic and porcelain tiles under the MILOTA brand.
Keep reading
More stories from Milota Tiles and writers in FYI and other communities.
Mixing and Matching Moroccan Tiles for a Unique Aesthetic
Moroccan tiles are more than just surface coverings — they’re tiny pieces of art, steeped in centuries of craft, geometry, color, and story. Whether you’re renovating a kitchen, reinventing a bathroom, or adding an accent wall that stops guests mid-sentence, Moroccan tiles deliver an immediate sense of character and warmth. This guide walks you through everything you need to know to mix and match Moroccan tiles in ways that feel cohesive, fresh, and uniquely yours.
By Milota Tiles5 months ago in FYI
A More Human Vocal
When we launched Vocal nearly a decade ago, the world was a very different place. LLMs did not exist, and stories were created one at a time by people sitting down to write, revise, and share something personal. Many of our assumptions about publishing, trust, and participation were built for a world where effort and output were inseparable.
By Justin @ Vocal3 days ago in Resources


Comments
There are no comments for this story
Be the first to respond and start the conversation.