
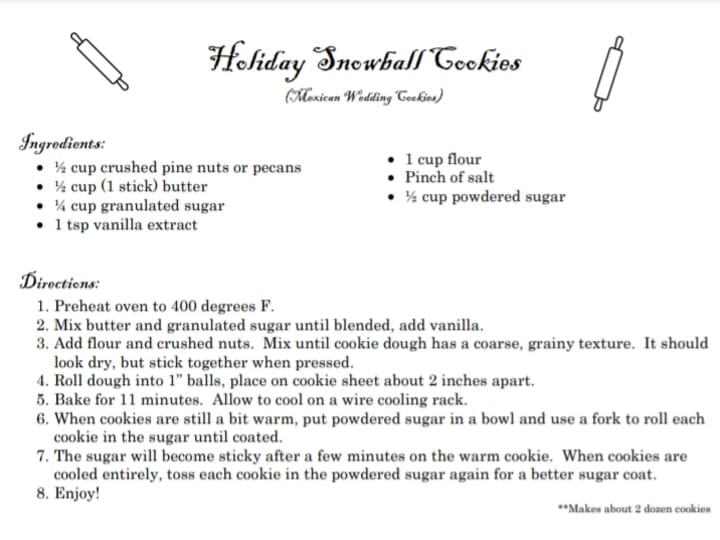
Holiday Snowball Cookies
An easy, delightful recipe to share.

Early this fall, my husband and I moved into our dream home! And then we discovered it was violently haunted.
Now I know what you’re thinking. Yes, we checked for all the regular abnormalities—faulty electrics, mold, structural damage, gas leaks, the works. Every home inspector and specialist insisted that the house was in perfect condition—a bargain for what we paid!
That left only one possible explanation for the strange moaning and slamming of doors, however. At first we considered turning around and reselling, but we just loved the new space so much. It’s a perfect home for entertaining, and in a wonderful school district. Reselling would only complicate things with our hard-won home loan, and who knows what would happen to our credit scores. Mine had only just recovered from daring to pay off my student loans last year.
We tried exorcism, smudging, and various sprinklings of holy water to no avail. If anything, the nightly door slamming, shrieking, and random drops in temperature only got worse. In the end, we decided to do our best to accommodate our new housemates. Ghosts are (were?) people too, after all.
Things were reaching a just bearable equilibrium then, as luck would have it, I discovered that our ghoulish guests positively LOVE my holiday snowball cookies! And I mean, who wouldn’t? These cookies are easy make, easy to adapt to for gluten or dairy free needs (substituting gluten-free flour, or vegan butter works just as well), and strangely soothing to wandering spirits (at least the ones in my new home).
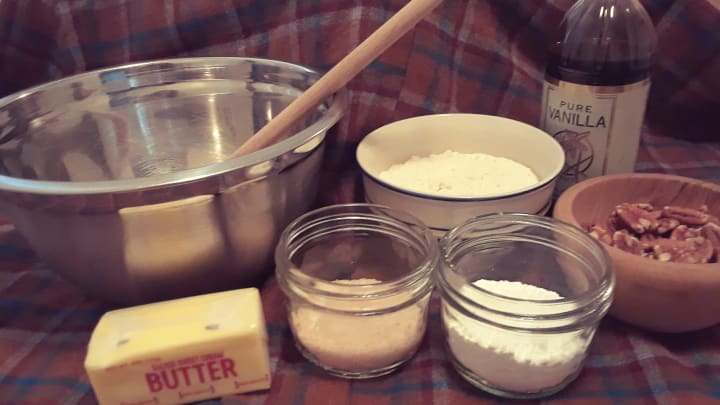
First we’re going to blend the butter and sugar until it’s nice and smooth, then add the vanilla. The recipe calls for one teaspoon, but the ghostly grandmother who occupies my kitchen believes in measuring with your heart, and always adds more. The floating bottle gave me quite the startle the first time, but I’m used to it now, and it really gives the flavor a boost!
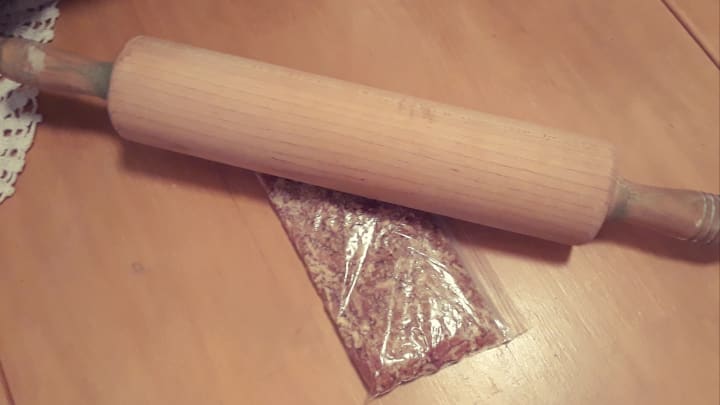
Once the wet ingredients are mixed, it’s time to add the flour, salt, and nuts. I usually use a rolling pin to gently crush the pecans in a sandwich bag, but one of our hauntings prefers using the rolling pin to violently smash the nuts into oblivion, so I just let them at it. The end result is crushed pecans, and that particular ghost gets to work out their need to pound and slam things, so they don’t keep us up at night. It’s a win-win!
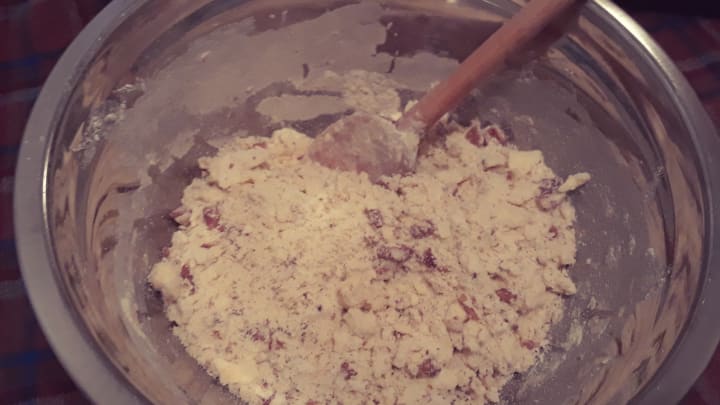
The dough will look grainy and coarse when it’s all combined. Check to make sure that it will stick together when you press it with your hands. If it’s too dry you might want to add a teaspoon of water (or another splash of vanilla).
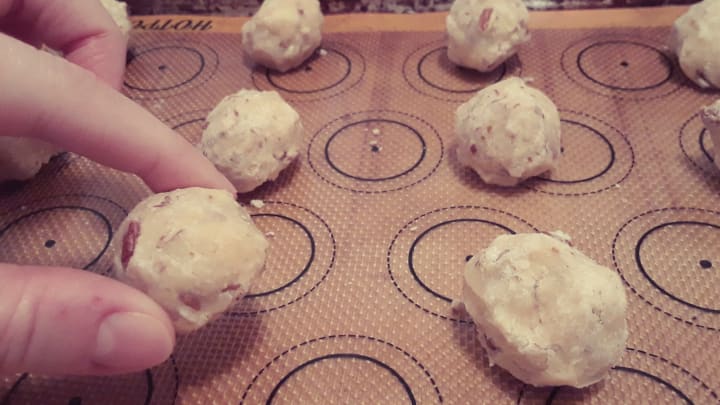
Next, using your hands, roll the dough into little balls about one inch in diameter, setting them about two inches apart from each other on the cookie sheet. If the butter has become too warm, your cookies might spread and melt in the oven, so you’ll want to pop them into the fridge for a few minutes before baking. Not a problem for me in the new kitchen! The bone-chilling air keeps everything nice and cool. It’s not the best in colder weather but we’re going to save a bundle on air conditioning next summer!
Bake your cookies at 400 degrees Fahrenheit for eleven minutes, until they’re golden brown, or until the staring Victorian child in your living room announces that they’re done. He’s surprisingly accurate!
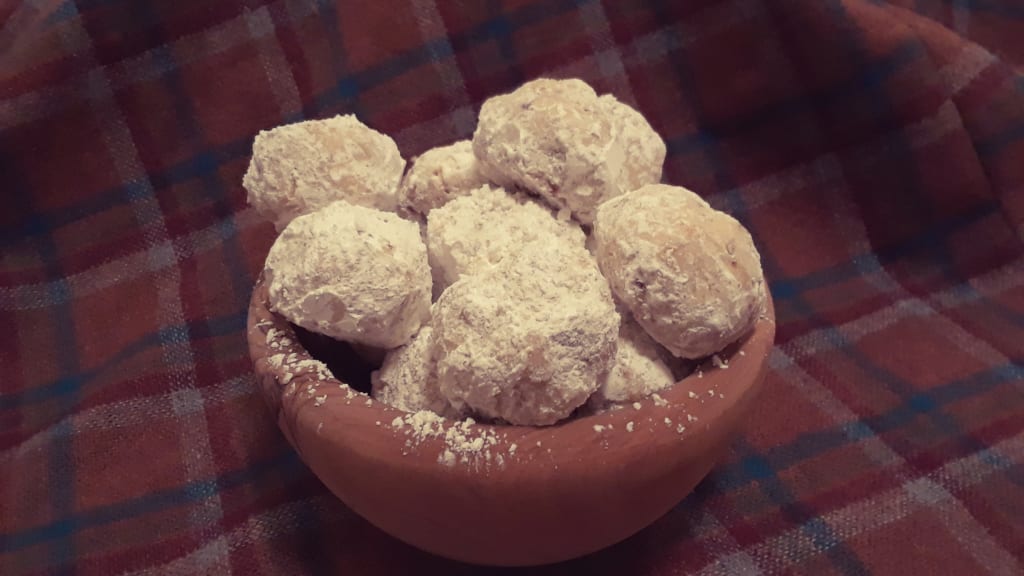
You’ll want to let your cookies cool for a bit when you take them out of the oven. Then, while they’re still warm, you can toss them in the powdered sugar to give them that classic ‘snowball’ look. This part gets a bit messy in my house because the ghost children like making the powdered sugar puff all over the place. That’s fine though, it keeps them from blowing the lights or drawing on the walls in blood.
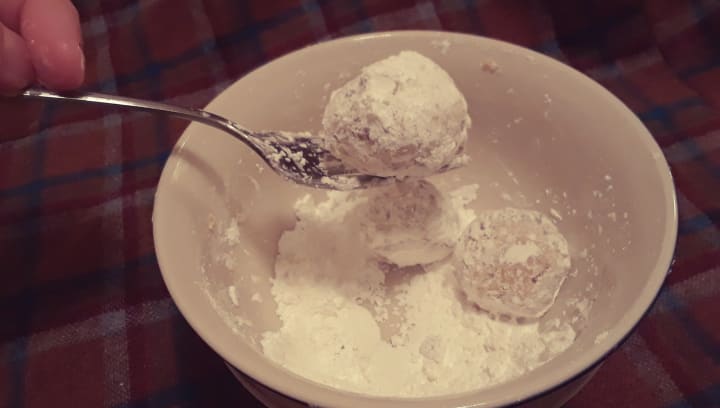
After the cookies have cooled completely, you can toss them in the powdered sugar again for a more thorough coating. The first layer tends to become sticky from sitting on the warm cookies, and makes a good base for a second layer.
There you have it! Delicious, easy-to-make snowball cookies, perfect for any holiday gathering (and for placating ghosts). If you want to share with your own dearly departed housemates, I recommend setting aside a separate plate for them to enjoy, it saves on clean up later.
About the Creator
Rena
Find me on Instagram @gingerbreadbookie
Find me on Twitter @namaenani86
Check my profile for short stories, fictional cooking blogs, and a fantasy/adventure serial!
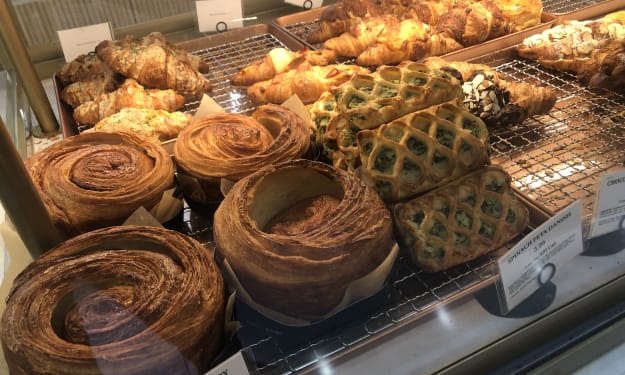
My Tous les Jours Trip
As someone who lives in a rural area, I don't get the chance to visit fancy restaurants or bakeries that often. So, when a friend told me about a French-Asian bakery that's less than an hour away, I knew I had to check it out and grab some pictures for social media. Tous les Jours ended up providing an immersive experience that went above and beyond my expectations--although I did leave with a few reservations.
By Kaitlin Shanks20 days ago in Feast
Guide to Choosing the Best Essential Kitchen Knives
Have you ever stood at the counter, staring at a pile of vegetables, wondering which knife would actually make the job easier? Many people assume they need a massive knife block filled with matching blades to cook well, but that’s rarely true.
By Chris Jones3 days ago in Feast


Comments
There are no comments for this story
Be the first to respond and start the conversation.