
Decorate Your Abyss: A Doll-Clothing Craft to Create Happiness in Your World
An easy, kid-friendly, no-sew craft

I was in a miserable, dark abyss. That’s how my therapist described the circumstances I was facing. I had been in an abusive marriage for 8 years already, and things began unravelling rapidly after the pandemic hit. I was depressed and anxious, and life seemed to keep throwing curveballs at me, one after another. All the people and places I had once found comfort in were crumbling away, revealing toxicity I had never noticed before.
My therapist told me those circumstances were like an abyss. I wasn’t sure how to climb out yet, I couldn’t see an end to the situation, and life felt cold and dark. But, she said, I could “decorate” the abyss. I could put up pictures, paint the walls, install comfy furniture, and light up the space. How could I do all that in my mind? By doing the things that made me happy.
Upon reflection, I realized that a lot of things make me happy. Simple pleasure, like singing around the house, reading books, walks in the rain, sunsets, empty prairie fields, writing, putting on makeup, cooking, baking, drawing, imagining, and more, are all things that make me happy and nourish my soul. Those were the things that would decorate my abyss.
I’ve always been a dreamer. My vivid imagination is one thing that has kept me going throughout all the struggles and hardships that we humans face day-to-day on this planet. Ever since I was a child, I wanted to build worlds, write stories, paint pictures, and explore possibilities. I wrote my first story when I was in Kindergarten, and my parents still have it framed somewhere in their home.
One thing I enjoyed doing as a child was creating furniture and clothes for my toys. My sister and I especially enjoyed collecting Playmobil® sets. We would sprawl the pieces out across the whole basement, letting our imaginations run wild as we turned bookshelves into dream homes, or empty tissue boxes into classrooms.
I would grab facial tissues and use markers to create items like blankets or dresses for those little toys. Back then, I wasn’t allowed to use a sharp pair of scissors, so I used whatever my mother had lying around the house. Sometimes, that was a scarf I wrapped around a Barbie® doll and tied up with thread to make a dress. Sometimes it was leftover scraps of wrapping paper and tissue paper and, if all else failed, facial tissues or toilet paper. Those bits and pieces found around the house could turn into anything I dreamed up.
I was not limited by how things looked in reality. I used my paper clothes and blankets and tents and toilet roll couches however I wanted, and the magic of the mind is what made them look perfect in my eyes. When I was creating, I was in perfect flow, and completely happy.
Now I’ve grown, and some of the problems of every day life have crept in, slowly overtaking my moments of creative peace. Over the years of living through my abusive marriage, I slowly lost the desire and energy needed for my creativity to breathe. My happiness dwindled and my abyss got darker. I still used my imagination to dream up possibilities for the future, often as I walked through nature. My daughter handing me a bouquet of dandelions brought back the memory of a smile to my face. But I had lost sight of the world’s magic over time, and my inclination to create things had faded.
Finally, 2 months ago, I got the courage to leave that relationship. I realized my worth, I took back my power, and I broke free of the miserable chains that had kept my mind imprisoned for so many years. The abyss I was in was no longer endless. It was filled with light!
Slowly but surely, the magic began to return to my soul. I felt the power of creative inspiration flowing through me again. I had poems and songs entering my mind. I was imaging all kinds of things I could create again! I had left everything of my former life behind. I owned nothing, but the force of imagination crept back into my brain and I rose up again in joy.
Recently, I remembered making all of those doll items, as a child, out of paper and scraps. I decided I wanted to start enjoying a creative space again. I have my daughter with me now, too. She’s probably even more creative than I ever was. She just turned 6 years old, and I started thinking, “This is the perfect thing to do together!”
I wanted to include my sweet daughter in this creative process. She loves to do crafts as well, and to spend quality time with me, her mama. So we set to work.
This time, I gave myself permission to use some scissors. But, just like when I was a child, I didn’t have much around me that I could use to create with. I didn’t have money to go out and buy new crafting materials. I had access to the scraps around my parents’ house again, and that was it.
When I left my house as part of my escape, I had taken a lot of my clothing with me. Most of it was tossed quickly into black trash bags and I hadn’t even had time to sort through or examine what I’d brought along. A number of years ago, I had gone through a leggings phase. So, as I searched through my resources, I discovered several pairs of leggings that I hadn’t worn in ages. I pulled those pairs out and chose them for our fabric.
I asked my daughter to choose which pairs of leggings she wanted us to cut up and use for fabric. It was time to get to work!
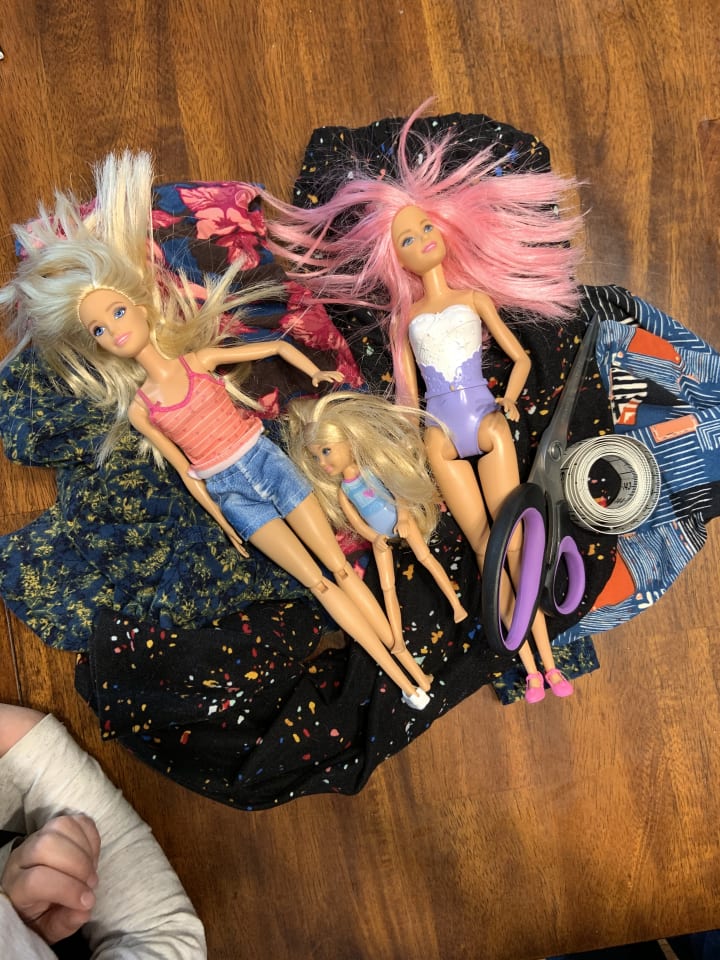
My daughter had brought 3 Barbie® dolls with her from the house when we left. We were going to use those old leggings to have some fun and dress up the dolls.
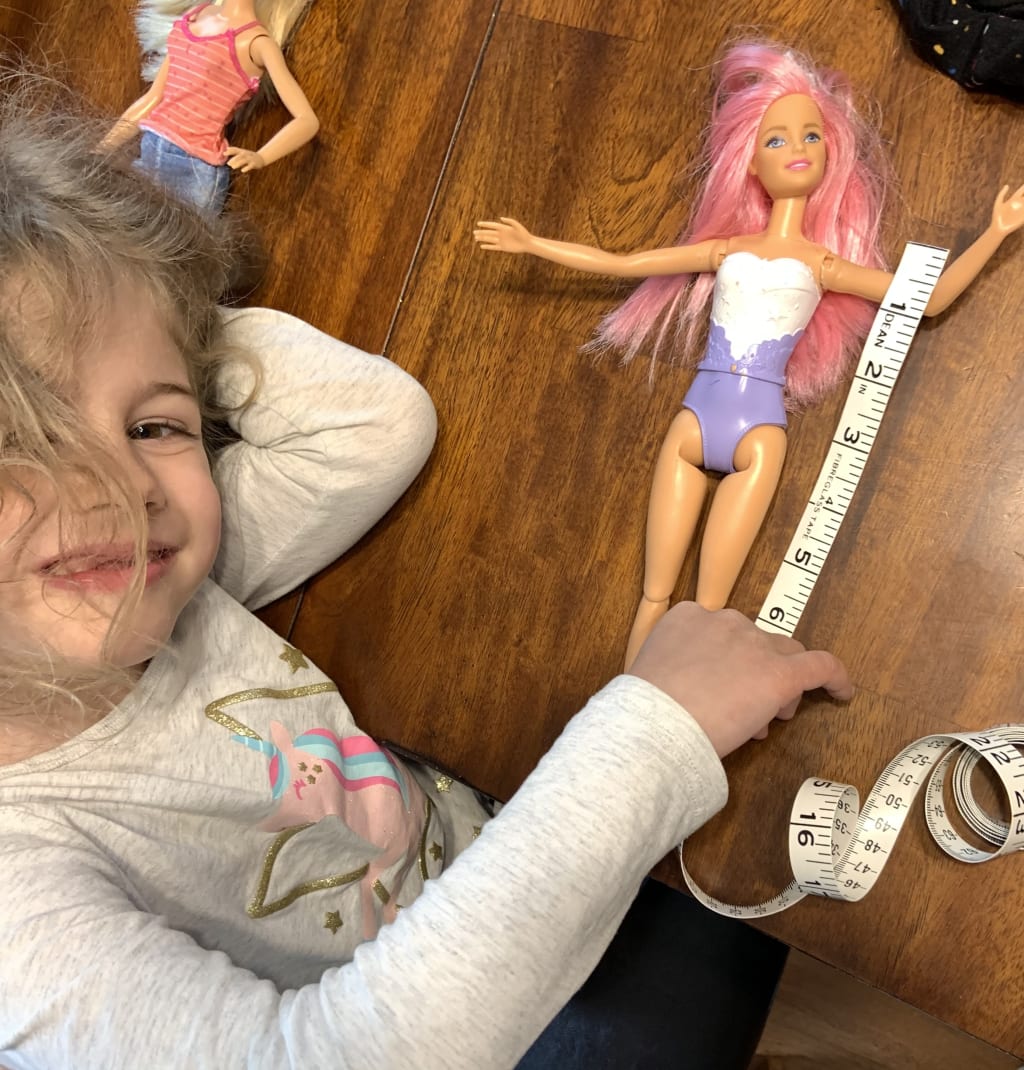
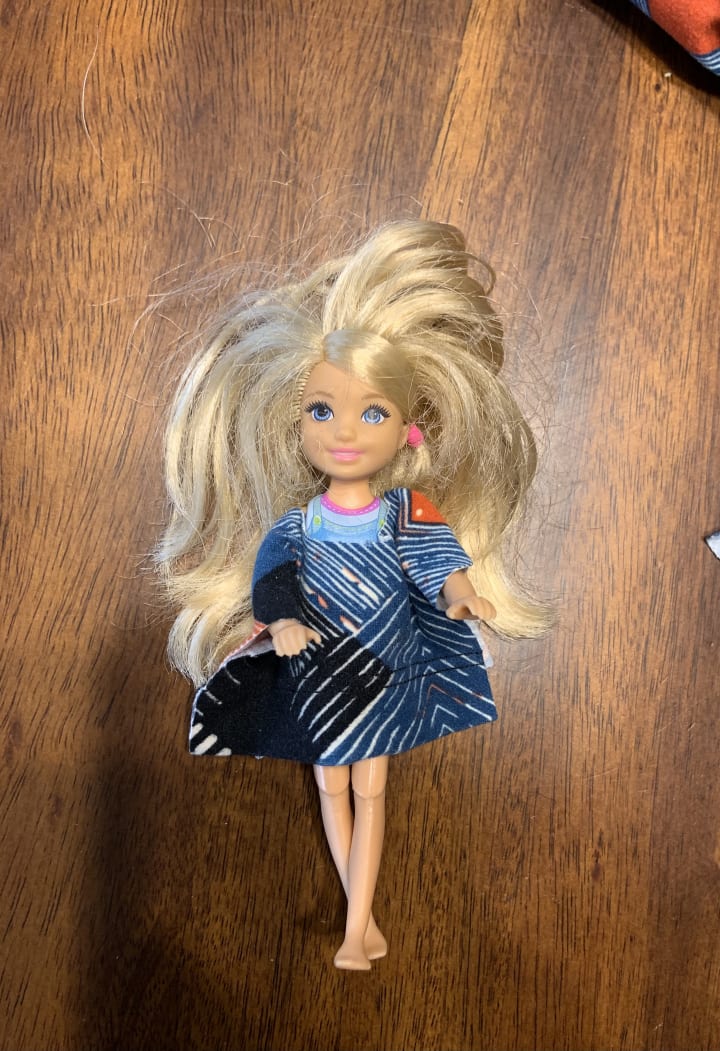
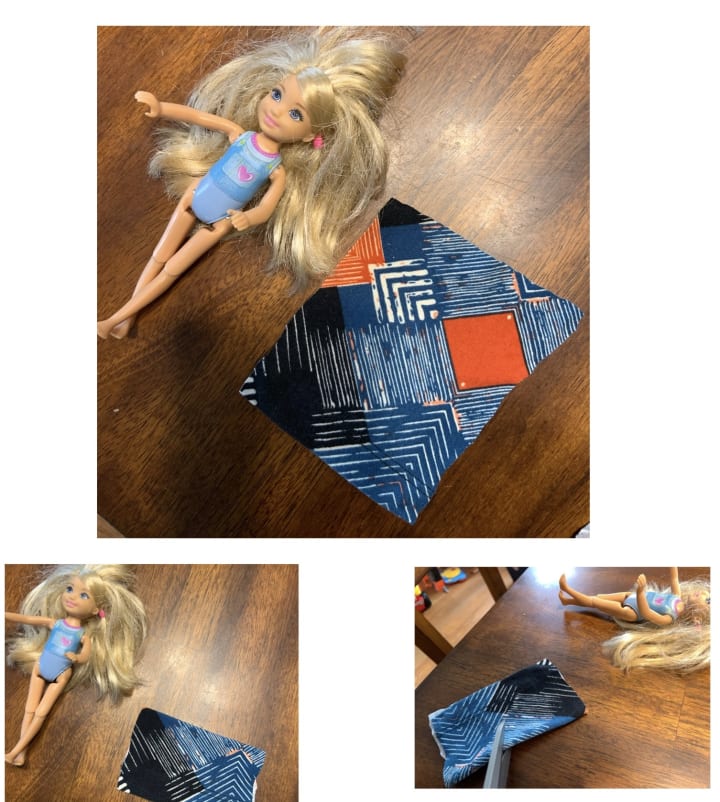
For the smaller Chelsea™ doll, my daughter chose this colourful block print fabric. My mom let me borrow her sewing scissors and my daughter helped me measure from the doll’s shoulder to her knees. Then, we cut out a square from the cloth. My little one is just learning about measuring things, as well as reading numbers, so this was also a great opportunity to talk about measuring and give her a chance to put her new skills to use in the real world.
We cut a little head hole at the top, and pulled the fabric over the doll’s head, using fabric glue to seal the sides together. I have never been much for sewing. The fine, detailed work isn’t really for me. Besides, I didn’t have a needle and thread to use. So, glue worked well for our purposes. All we really wanted was to have fun together and be creative. We didn’t need the clothes to be the perfect quality. Our imaginative minds could make the clothes look as amazing as we wanted, even if the real life objects didn’t have evenly-cut edges or quality stitching!
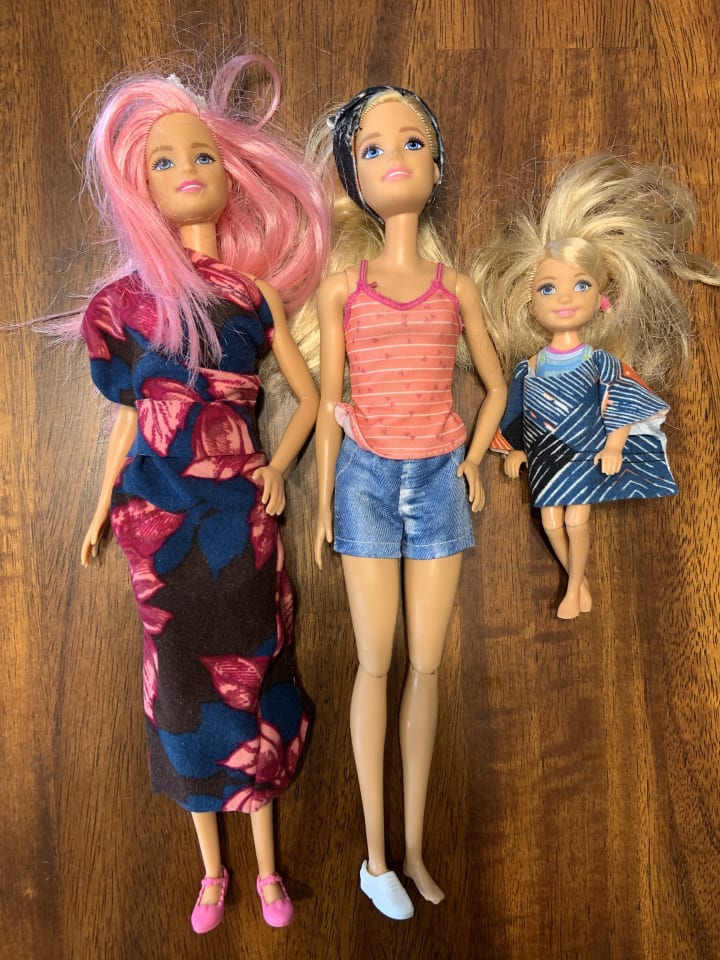
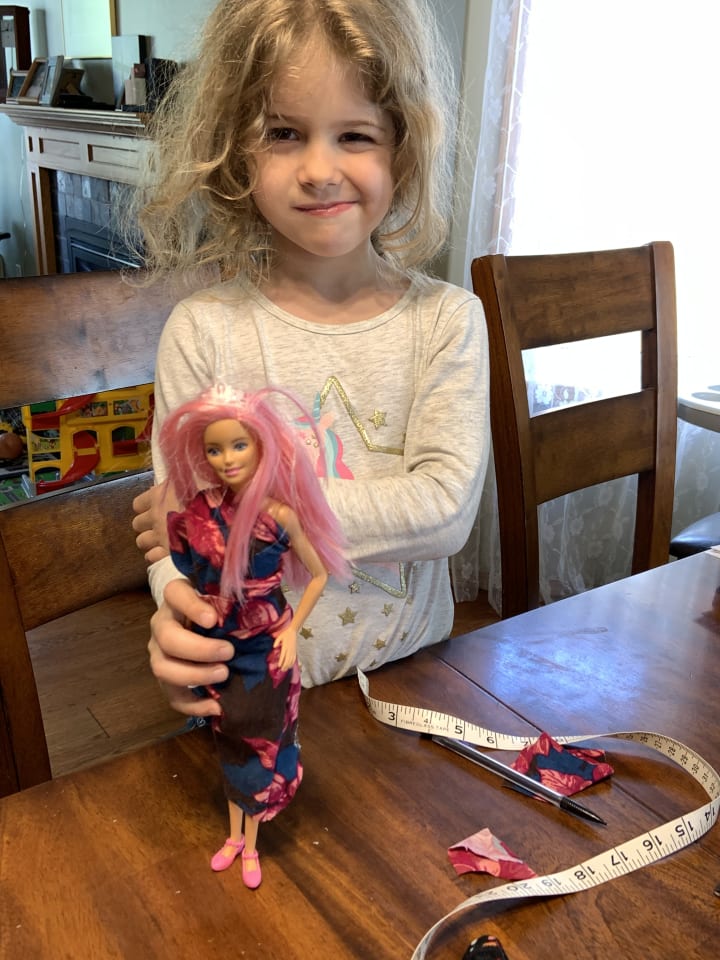
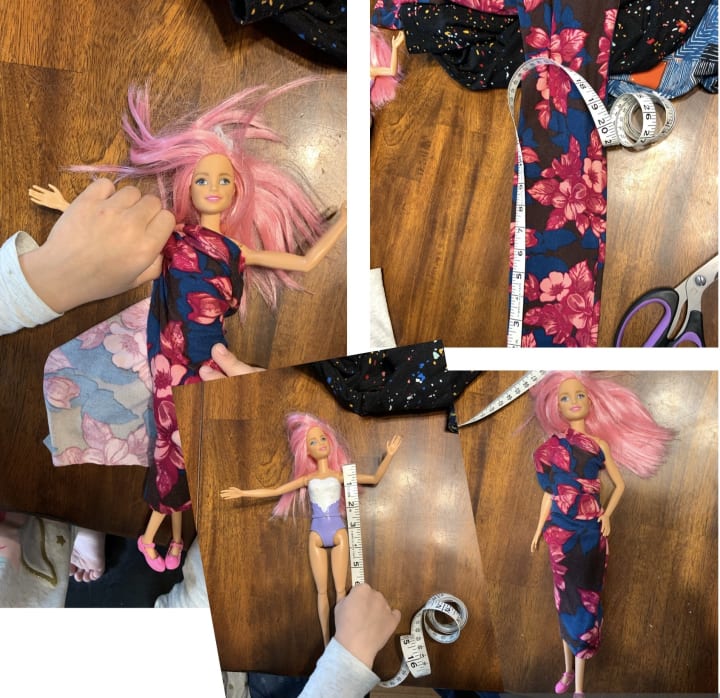
For the pink-haired doll, we made an off-the-shoulder dress with a belt. My daughter had gotten a mermaid necklace-making kit for her birthday. We had made some of the jewelry together, but the first necklace fell apart pretty quickly. There wasn’t much left of it, so we decided to use a remaining starfish bead as a belt clasp! We were finding all kinds of materials to use by being resourceful and creative. Once again, fabric glue did the trick to fasten the bead onto the belt.
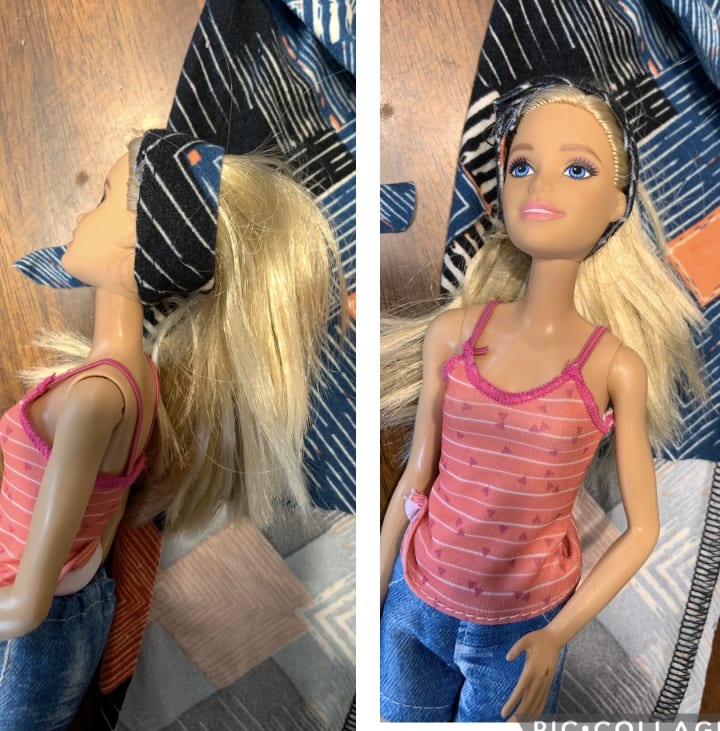
The third Barbie® already had an outfit. The other two dolls had long ago lost their clothing. I don’t know what it is about kids and Barbies®, but they (at least mine) seem to love to remove their outfits, and I don’t know where those outfits walk off to, but they’re usually never seen again. So we didn’t need to make a whole new outfit for Barbie® number three. Instead, we chose to use the hem from the unused piece of fabric we had cut earlier, and make a headband for this doll! This was the quickest fashion item yet, and it had an additional benefit of helping protect the doll’s hair from getting wrecked so quickly.
My little girl and I had the best time making these items together. We created memories, and we experienced the joy of creating. It is just one more thing we can do together, and I’m so grateful for the rays of sunshine this project shone into my previously dark abyss. The shadows are slowly disappearing as the light overpowers the dark.
Below are the instructions for the three clothing items we made. The beauty of them is that you don’t need to follow the instructions exactly, or even make the exact same outfits that we did. All you need is something to use as fabric, a pair of scissors, some fabric or craft glue, and your imagination. There are no limits. I hope you get as much happiness from this craft as we did from making ours.
Chelsea™ doll’s shirt:
Materials:
Scissors
4” fabric square
Fabric glue or tape
Directions:
Find whatever material you are going to use for your doll’s shirt/tunic. If you have a larger doll than the one we used, you will need to measure the size yourself. We measured from her shoulder to just above her knees, then cut that out in a square.
Measure and mark your fabric or other material (you can use wrapping paper or anything else you want if you prefer!)
Cut out the fabric square with your scissors (or a rotary cutter, if that’s what you prefer), and then fold the square in half.
Hold the doll’s head up to the square and mark the fabric close to her head. Cut out a small semi-circle from the folded fabric. You can cut the semi-circle slightly smaller than the doll’s head if your material has some stretch to it. This will vary by the materials you are using.
Pull the material over the doll’s head. This shirt has oversized, flowy sleeves. Keep her arms out straight to the sides and pinch the fabric together below her arms. Put a line of fabric glue on either side of the shirt and glue the seams shut. We added a little glue to the bottom “hem” as well so that it would stay together better.
Wait until the glue has fully dried before you remove the shirt! Now she has a cute, oversized tunic to wear any time, and it’s easy to put on! No worries about losing it because you can always make another one in just a few minutes!
Off-the-Shoulder Dress with Belt
Materials:
Scissors
9” length of fabric, about 6” wide
A small, 1” wide and 5” long strip of additional fabric
A bead or button.
Fabric glue.
Directions:
Measure and cut your fabric or other material. If your doll is a different size from the one we used, you may want to do your own measurements. Remember, these do not need to be precise in order for the dress to work. We measured from the doll’s shoulder down to her ankle. Then we measured around her waist and bust.
Place the fabric on top of the doll. Gather up one side over the shoulder and the other side beneath the armpit. Glue the “strap” to the back of the dress as you wrap it around the back of the doll.
Turn the doll face down. Pull the rest of the material together into a seam running from about the waistline and down to the bottom of the dress. Glue that seam together.
Wait for the glue to dry completely before adding the belt. To make the belt, cut out the additional strip of fabric and glue your bead or button onto one end. Use your scissors to cut a small slit in the other end of the fabric strip. Once the glue behind the bead or button has dried, you can close the belt around the waist of the dress!
Headband:
Materials:
Scissors
3-4” of fabric about 3/4” wide
Fabric glue
Directions:
This is so easy you don’t even really need directions! Measure around the doll’s head from under her hair and up across the top of her head. That will be the length you need from your fabric strip or other material.
Cut out the fabric, and wrap it around Barbie’s head like a headband.
Glue the ends together. Be careful not to get glue in the doll’s hair! Wait for the glue to dry fully. Now you have a headband.
About the Creator
A.M. Harte
A.M. Harte has dreamed of being a published author ever since she was a little girl. She lives on the Canadian prairies and writes poems and stories inspired by life's struggles, always with a hint of optimism.
Keep reading
More stories from A.M. Harte and writers in Families and other communities.
Vegan, Gluten Free Raspberry & Chocolate Tart
It was April 2020, still early in the days of lockdown during the pandemic. I've always had a sweet tooth, and I often enjoy rummaging for snacks in the evenings. The trouble was, I had been having health problems for MONTHS, so I'd drastically changed my diet in a desperate attempt to get well again. There weren't any ready-to-eat snacks around the house for me to grab that would fit the dietary bill. Going out to pick up ingredients wasn’t really an option during the beginning of the pandemic lockdowns, either.
By A.M. Harte5 years ago in Feast
Wise~Guys
— Look Behind what's in Front of You ~ Make Good Choices — Hey, So how you Doin'..! Made~Men — Mobster Movies romanticise a distinctive, elegant appearance, impeccable attire style, along with the 'Families' expressive lingo. Making their 'Bones' gave them Panache — with vintage fedoras, tailored pin-striped suits, mirror-polished wing-tip shoes adorned with tassels; with their 'Gun Moll' gorgeous dates on their arms.
By Jay Kantor19 days ago in Families
The quiet sound of families breaking
There is a kind of silence that is louder than any noise. It is the silence of a child waking in the night and realizing their parent is gone. It is the silence of a kitchen table with one chair suddenly empty. It is the silence of a home that still looks the same, but no longer feels the same. Across the United States, thousands of families live inside that silence. Not because of war. Not because of disaster. Not because of death. But because of policy.
By Kaylee Souther7 days ago in Families
The Devil's Cut
“Comrade, finally you’re awake.” The voice was smooth, sensual. A flickering incandescent bar was all that lit the white, sterile room. All Vladimir remembered was everything going black. He tried to move his arms and found them strapped to the gurney.
By Matthew J. Fromm5 days ago in Fiction


Comments
There are no comments for this story
Be the first to respond and start the conversation.