

AWS VPC is private cloud that gives access and control over virtual resources in cloud you can isolate the all the services like ec2 database services like Amazon Relational Database Service (RDS) instances. you can communicate with each other across accounts, Availability Zones, or AWS Regions. Here is a pictorial reference of AWS VPC
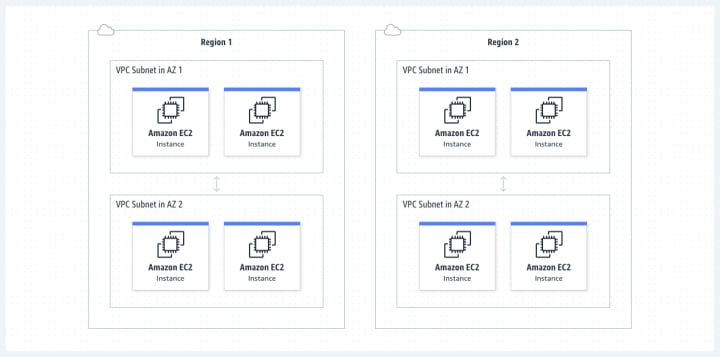
VPC with public and private subnets
AWS VPC provide various AWS resources such as lambda functions, ECS container instances, database instances, etc.
The following steps are done to create a VPC with public and private subnets
Step 1: Create an account in the AWS management console at
Step 2. Sign in to the created account
Step 3: In the dashboard, Go to the VPC service section and select the required VPC's in the left side menu.

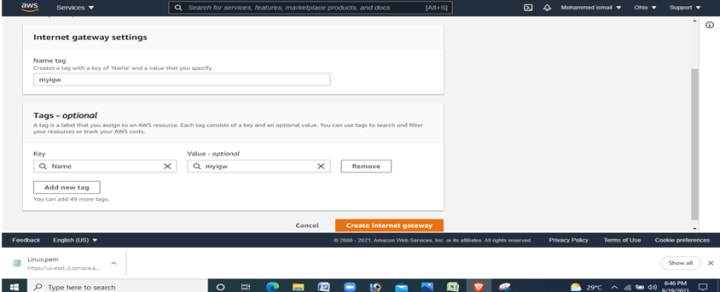
Step 4: To create a VPC following these steps:
Step 4.1 Click create VPC and give any name for the VPC in the name tag in our experiment we have created in the name (my vpc)
Step 4.3: In IPv6 CIDR block give No IPv6 CIDR block
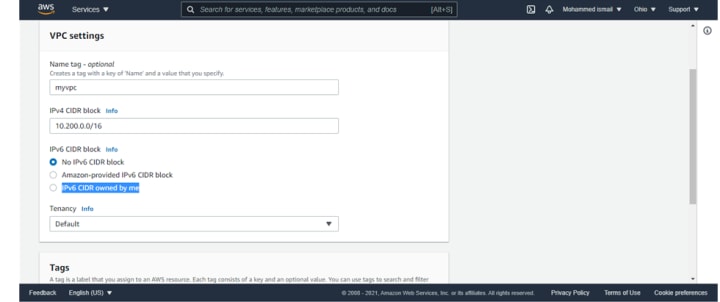
Step 5: click create VPC.
Step 6: VPC created successfully.
Subnet creation
Private and Public subnets are created where it covers many available zones that are required by AWS resources.
The following steps are used to create private and public subnets in VPC.
step 1: In the menu, select subnet tag.
Step 2: Click on create a subnet and give the following details.
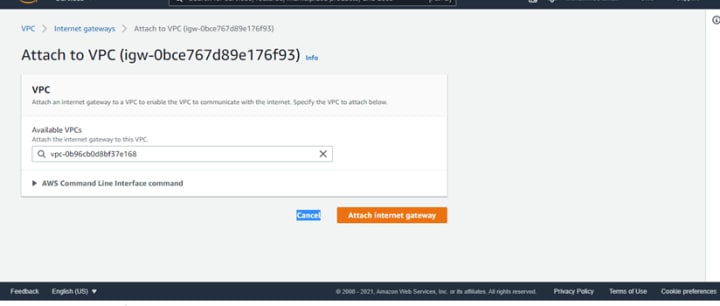
step 2.1: In VPC ID, Select the VPC that is previously created
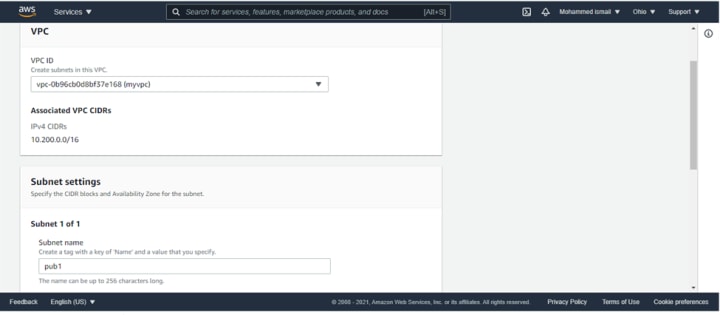
step 2.2: In subnet settings, To create subnets, click on Add new subnet.
step 2.3: In subnet 1 of 1, give the following details:
In subnet name- give pub1
In the Availability zone- select the first option
For every subnet give a CIDR block
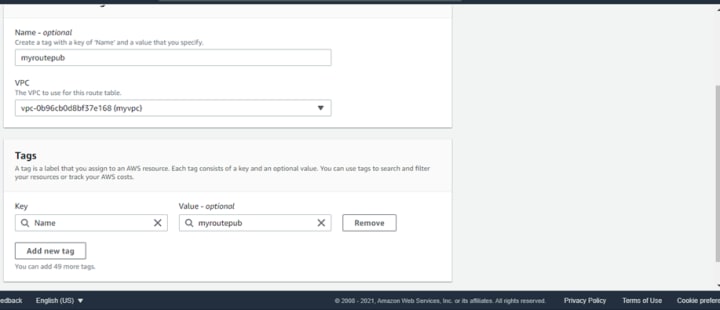
step 2.4: Give name, VPC for the routing table.
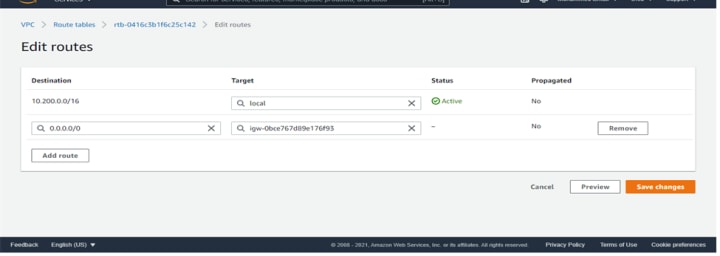
Step 2.5:
In the routing table, edit the routes
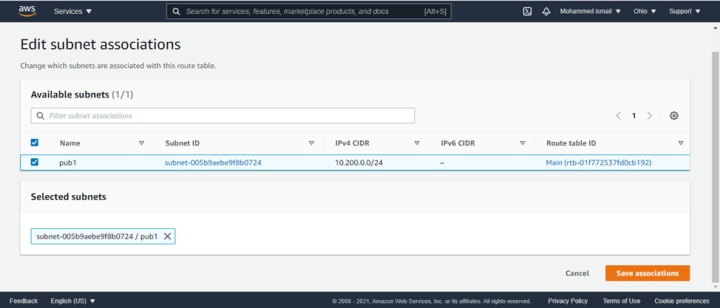
Step 2.6:
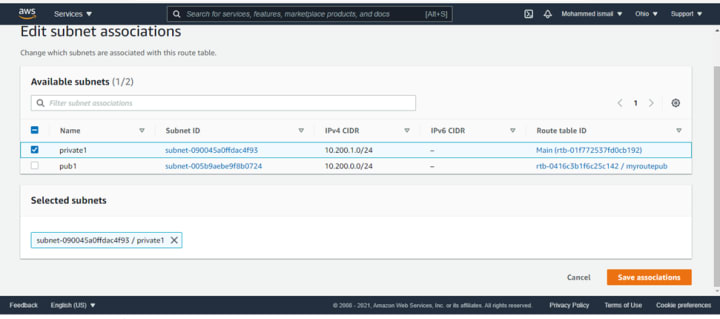
Edit the subnets with the route table
Step 2.6:
Then we need to create the private subnet
Step 2.7: In subnet associations, private and public subnets are listed.
Step 3: subnet created successfully we can see from the screenshot that we have configured the public subnet with the public IP and the private subnet only with the private IP, not with the auto-assigned public IP address.
Linux EC2 webserver instance
After the VPC and the subnet are configured, we can create an instance in the VPC in the public subnet we are creating the Linux machine
Step 1: Choose the Amazon machine image. Linux and macOS are available. Select 64 bit in Linux os.
Step 2: we need to select an instance type
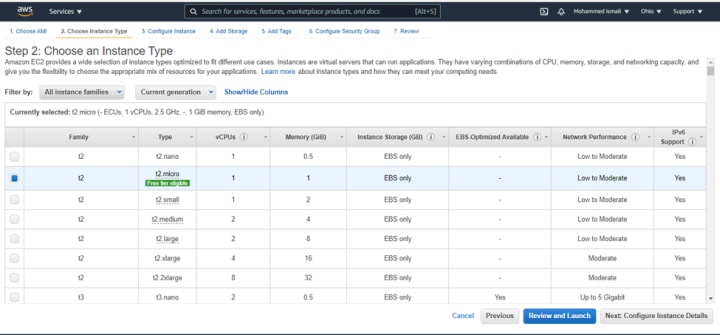
Step 3:
While selecting the network we can see that our VPC is shown as one of the options we need to select our VPC which is my VPC select the public subnet and enable the auto-assign public IP address
Step 4:
Configure security group is where are opening the ssh port to be accessed anywhere from the internet
Step 5: we are selecting a key pair
Step 6:
We can see that our Linux machine is running with the public IP address with vpc created.
Step 1: Open PuttyGen in PC
We are using the putty gen to generate the PPK key. In the parameters, check whether RSA is selected or not.
To access the virtual machine, we need to use putty we are entering the public IP in the hostname

As a result we can see that we have connected to VPC with a ec2 instance
About the Creator
vignesh s
EduTech specialist on various cloud and Administrative technologies
Keep reading
More stories from writers in Education and other communities.
The Lean Advantage: How Small Improvements Create Massive Business Wins
In today’s fast-moving market, businesses don’t always need massive overhauls to see major growth. The real competitive advantage often comes from Lean process improvement—small, consistent changes that reduce waste, improve speed, and strengthen customer value. With a proactive approach, companies can spot inefficiencies early, prevent recurring problems, and build smarter systems before minor issues become costly setbacks.
By Duke Valentour5 days ago in Education
Autonomy Is The Real Privilege
Good morning, freedom-seekers! Today we’re gonna be looking at autonomy. A strange word, I know; one many would probably look at blankly and run away from on sight. We’re gonna figure out what it actually means, consider how it’s achieved, and decipher just how deeply most of us are tangled up in dependence without realising it.
By That ‘Freedom’ Guy3 days ago in Humans


Comments
There are no comments for this story
Be the first to respond and start the conversation.