
How to Prepare Your Lawn for Sod Installation
Tips to Prepare Your Lawn for Sod Installation
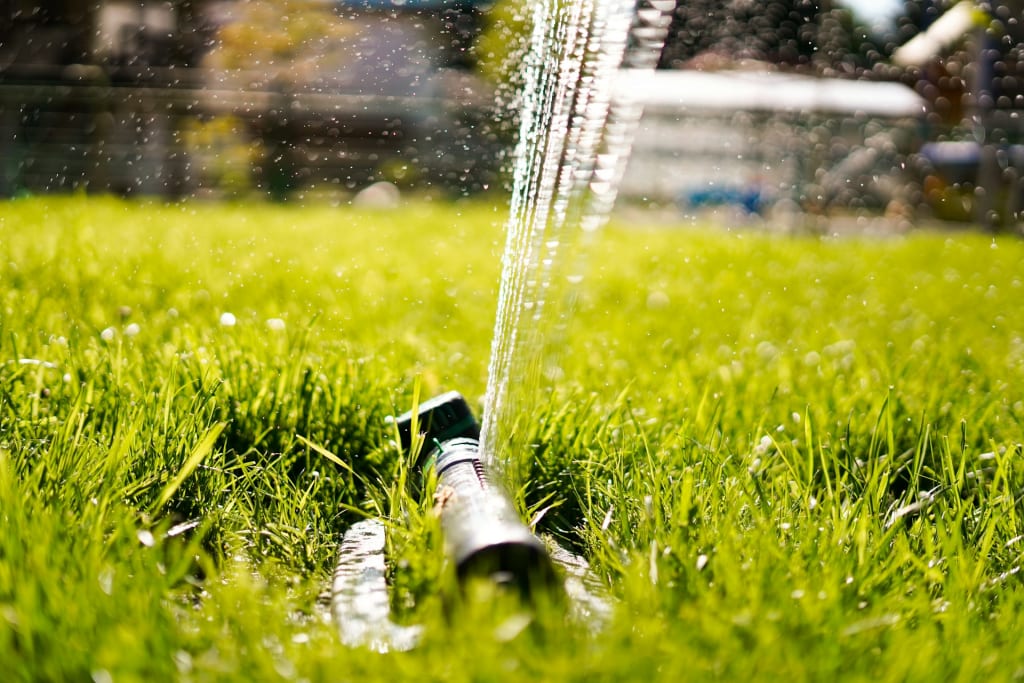
Installing sod is an excellent way to create a lush, thick lawn quickly. However, proper preparation of the site before the sod arrives is crucial for ensuring the new grass takes root and thrives. Skipping this important step can lead to poor establishment, weed invasion, soil issues, and an overall disappointing lawn. Follow these steps to get your lawn ready for sod installation success.
Timing is Everything
The ideal time for sod installation varies based on your climate. For cool-season grasses like fescue and bluegrass, aim for early fall or very early spring. Warm-season grasses such as bermuda, zoysia, and St. Augustine prefer late spring through early summer. Planting during extreme summer heat or cold winter temperatures reduces the sod's ability to root properly.
Kill Off Existing Vegetation
Whether you have an old lawn, weedy ground cover, or just bare dirt, you'll need to start with a clean slate. A non-selective systemic herbicide like glyphosate is the most effective way to eliminate any existing grass, weeds, or other plants. Spray it evenly across the area 7-14 days before your sod delivery date. For the best results, mow first if there is tall vegetation and water the area to encourage growth before spraying.
Remove the Old Lawn
Once the herbicide has done its job, remove any dead grass and other debris with a sod cutter, tiller, or by hand with a rake and shovel. Getting down to bare soil is essential, as any remaining roots, vegetation, or excessive thatch will prevent your new sod from making good soil contact. Dispose of or compost the old grass and debris.
Test and Amend the Soil
Now is the ideal time to do a soil test to check the pH levels and nutrient content. Your local county extension office can analyze a soil sample for you and provide customized amendment recommendations. They may suggest adding lime to raise pH or sulfur to lower it, spreading compost or other organic matter to improve fertility and drainage, and incorporating a starter fertilizer for the sod.
Grade for Proper Drainage
Examine the planting area and identify any low spots that could collect water. For ideal drainage, the lawn should gently slope away from buildings and other structures at least 6 inches for every 10 feet. Fill in any sunken areas with topsoil and use a rake to sculpt the surface into uniform planes that direct water away. Tamp the soil firmly with a lawn roller or plate compactor to prevent future settling. Leave the final grade about 1 inch below any abutting surfaces like driveways or sidewalks to account for the sod thickness.
Till the Soil
After grading, go over the entire area with a tiller or cultivator to loosen and aerate the soil down to a depth of at least 4-6 inches. This prevents compaction and allows the new sod roots to spread easily into the soft, well-drained soil. Break up clumps and remove any rocks, roots, or debris that surfaces.
Level the Area
Use an iron rake or lute to create a smooth, level planting surface free of dips, bumps, and debris. The more uniformly level the soil, the better results you'll get with your sod installation. Compacting the area again with a lawn roller can help put the finishing touches on the level grade.
Install Lawn Edging (Optional)
If you want clean, defined edges along planting beds, sidewalks, or other boundaries, installing edging is a smart move before laying sod. Plastic edging, metal edging, or simply trenching a 4-inch deep edge can help separate grass from the surrounding areas and make mowing and trimming easier.
Order Sod Delivery
With all your preparation work completed, it's time to schedule the sod delivery and installation. Many sod farms require 1-2 weeks advance notice, so order the sod shortly before you're ready to plant. Sod is perishable, so don't get it delivered too early. Have tools like a sod cutter, garden hose, roller, and wheelbarrow ready for installation day.
Water the Planting Area
About 24-48 hours before your sod is scheduled to arrive, give the entire prepared area a deep soaking to lightly moisten the soil down to a depth of 6 inches or more. This helps the sod roots quickly establish in the damp soil after installation. It also makes the soil softer and easier to work with during laying. Don't overwater to the point of creating muddy conditions.
Install the Sod Quickly
After all your lawn prep efforts, the sod installation itself should go smoothly and quickly. Have a crew ready to unload and distribute the sod pallets across the area. Start laying the strips of sod along the longest straight edge and work your way backwards in a staggered brick pattern. Tightly butt the seams together without gaps or overlaps. Use a sod cutter to trim around edges and obstacles. Roll or tamp down each row as you go to improve soil-root contact.
Give it a Drink
Once all the sod is down, give your new lawn its first deep watering to soak the soil beneath. Plan to keep the sod consistently moist through daily or twice-daily watering for the first 1-2 weeks until the roots have knit hold. As grass starts actively growing, gradually reduce watering frequency.
The time and effort invested into properly preparing your planting area pays off huge dividends when it comes to healthy, vigorous sod establishment. Tackle each of these steps methodically and you'll have the ideal foundation for your lush new lawn. With the right site preparation, sod installation transforms any yard into a tidy, green carpet in just a day.
About the Creator
Keep reading
More stories from Michael Evans and writers in Earth and other communities.
Repairing a Sprinkler System After Construction Damage
Construction projects can be exciting, but they often leave a trail of unintended damage in their wake. One common casualty? Your sprinkler system. Whether it’s a broken pipe, a crushed sprinkler head, or a severed wire, construction damage can leave your irrigation system in shambles. If you’re staring at a mess and wondering where to start, don’t worry—this guide will walk you through the process of repairing your sprinkler system and getting it back in working order.
By Michael Evansabout a year ago in Journal
Falling Branch Victim’s Foundation ‘Will Help Kids’
A sudden tragedy has inspired a powerful initiative. Following the unfortunate death of a young child who was struck by a falling tree branch in a local park, the child’s family has launched a foundation dedicated to helping children and promoting safety in public spaces. The foundation, announced just weeks after the incident, aims to turn grief into meaningful action while raising awareness about community safety and supporting families in need.
By Muhammad Hassan2 days ago in Earth
GWR Confirms ‘Major Investment’ with Office Lease: What It Means for Plymouth and the South West
Great Western Railway (GWR) has confirmed a major long-term investment in Plymouth by securing a significant city-centre office lease close to the railway station. While the announcement may sound like a routine property deal on the surface, it actually signals something much bigger — a vote of confidence in the city, a boost for local regeneration, and a clear statement about the future direction of rail-led development in the South West.
By Muhammad Hassan5 days ago in Earth
Rachel Reviews: The Spiral Archive by Pieter Hendrik
It's difficult for me to know where to start with a review of this book as it was, for me, an entirely unique experience and one that I'll probably never have again. I don't want that to be interpreted as unenjoyable but it has left me scratching my head a little and ruminating on its content, its themes and its characters.
By Rachel Deeming7 days ago in BookClub


Comments
There are no comments for this story
Be the first to respond and start the conversation.