
Photoshop Magic: Removing Specific Colors for Perfect Edits
Learn the Techniques to Simplify Your Editing Process

Photoshop is a powerful tool for image editing and graphic design, offering a plethora of features that allow for intricate manipulations and creative effects. One of the common tasks you might need to perform is removing a specific color from an image. Whether you're trying to isolate an object, create a transparent background, or apply special effects, removing a color can be an essential skill. Here's a step-by-step guide on how to remove a color in Photoshop.
Step 1: Open Your Image
First, open the image you want to edit in Photoshop. Go to File > Open, and select your image from the file dialog.
Step 2: Select the Magic Wand Tool
The Magic Wand Tool is perfect for selecting areas of a specific color. You can find it in the toolbar on the left side of the screen. If you don’t see it, it might be nested under the Quick Selection Tool. You can access it by clicking and holding on the Quick Selection Tool icon until the submenu appears, then select the Magic Wand Tool.
Step 3: Adjust the Tolerance
Before using the Magic Wand Tool, adjust the Tolerance setting in the options bar at the top. The Tolerance determines how closely the selected colors need to match the color you click. A lower tolerance selects colors very similar to the one clicked, while a higher tolerance selects a broader range of colors. Start with a tolerance of 30 and adjust as needed.
Step 4: Select the Color
Click on the area of the image that contains the color you want to remove. The Magic Wand Tool will select all contiguous pixels of the same color within the specified tolerance. If the color appears in multiple areas and you want to select all instances, hold down the Shift key and click on each area to add to your selection.
Step 5: Refine the Selection
Sometimes, the initial selection might not be perfect. To refine the selection, go to Select > Modify > Expand to expand the selection by a few pixels or Select > Modify > Contract to contract the selection. You can also use Select > Modify > Feather to soften the edges of the selection.
Step 6: Remove the Color
With the color selected, you have several options to remove it:
Delete the Color: Press the Delete key to remove the selected color, leaving a transparent area (if your layer is not a background layer). If it's a background layer, it will fill the area with the background color.
Layer Mask: Click the Add Layer Mask button at the bottom of the Layers panel to create a mask that hides the selected color. This method is non-destructive, allowing you to refine the mask later if needed.
Step 7: Clean Up
After removing the color, you might need to clean up the image. Use the Eraser Tool to manually erase any remaining unwanted areas or the Brush Tool to paint back any areas that were accidentally removed.
Step 8: Save Your Work
Once you're satisfied with the result, save your work. Go to File > Save As and choose a file format that supports transparency (like PNG) if you've created transparent areas.
Additional Tips
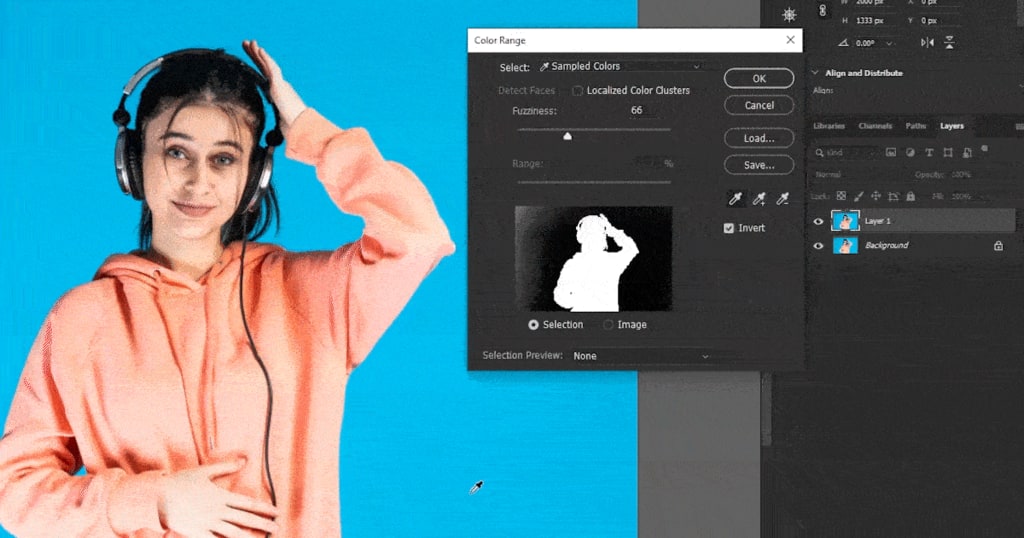
Color Range Tool: For more complex images, the Color Range tool can be more effective. Go to Select > Color Range, then click on the color you want to remove. Adjust the Fuzziness slider to fine-tune the selection.
Adjusting Hue/Saturation: Another method is to use the Hue/Saturation adjustment. Go to Image > Adjustments > Hue/Saturation. Use the Eyedropper Tool to select the color you want to remove, then reduce the Saturation to -100.
Combining Methods: Sometimes, combining multiple methods yields the best results. Use the Magic Wand Tool for initial selection, refine with the Color Range tool, and adjust with Hue/Saturation for a polished finish.
By following these steps, you can effectively remove a specific color from an image in Photoshop, opening up a world of creative possibilities. Practice with different images and settings to master this technique and integrate it into your workflow.
About the Creator
Perfect Retouching
Perfect Retouching offers the best solution for all photo retouching services. We provide Jewellery, Product, Beauty, and Headshot Retouching Services by our expert team at budget price.
Visit here- https://www.perfectretouching.com/
Keep reading
More stories from Perfect Retouching and writers in Art and other communities.
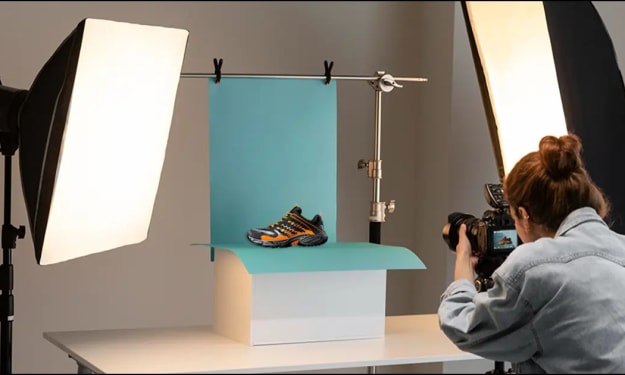
A Complete DIY Tutorial on Photographing Shoes
Capturing stunning photographs of shoes can make a world of difference in showcasing your footwear collection, whether for an online store, social media, or personal enjoyment. With a few simple techniques and some basic equipment, you can take professional-looking shoe photos from the comfort of your home. Here’s a comprehensive DIY tutorial to help you get started.
By Perfect Retouching2 years ago in Art
Smart phones, Humans and Aliens.
WARNING. I will be tapping into one of your favorite creative tensions: The absurdity of humans worshipping their glowing rectangles as if they were tiny oracles. There’s something deliciously poetic about that contradiction, and it lends itself beautifully to an instructive proviso.
By Novel Allen5 days ago in Poets


Comments
There are no comments for this story
Be the first to respond and start the conversation.