
Mastering Recipe Photography: Tips for Capturing Stunning Food Images
Recipe Photography
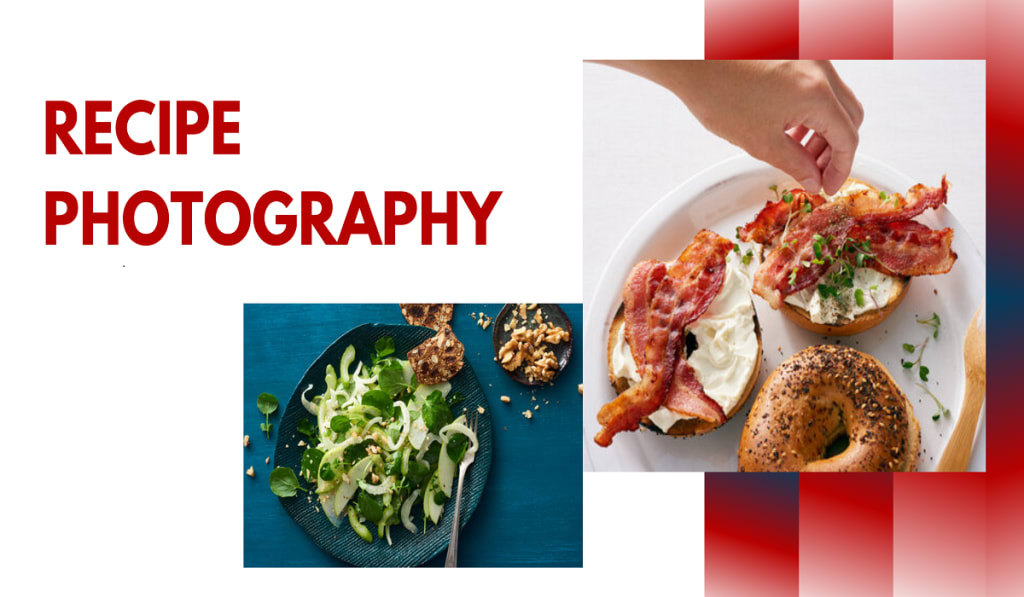
In the world of food blogging and culinary content creation, recipe photography has become an essential skill. A well-executed photo can make a recipe irresistible and drive engagement on social media and food blogs. Whether you're a professional photographer or a home cook looking to share your creations, mastering the art of recipe photography can elevate your food images from ordinary to extraordinary. Here’s a comprehensive guide to help you capture stunning food photos that will make your audience’s mouths water.
Understanding the Basics of Recipe Photography
1. The Importance of Lighting
Lighting is the cornerstone of great recipe photography. Natural light is often the best choice because it enhances the colors and textures of food in a way that artificial lighting cannot always replicate. Aim to shoot your photos near a large window with soft, diffused light. If natural light isn’t available, consider investing in softbox lights or LED panels that mimic natural daylight. Avoid direct sunlight, as it can create harsh shadows and unappealing highlights.
2. Composition and Styling
Composition refers to how the elements in your photo are arranged. A well-composed image guides the viewer’s eye and emphasizes the dish’s best features. Use the rule of thirds as a starting point: divide your frame into a 3x3 grid and place key elements along these lines or at their intersections. Experiment with different angles—overhead shots are great for flat lays, while side angles can highlight layers and textures.
Food styling is equally important. Arrange ingredients and dishes thoughtfully, and consider the use of props like utensils, napkins, or garnishes to add context and interest. Keep the focus on the food; avoid clutter and ensure that the dish is the star of the image.
3. Choosing the Right Background
The background of your food photo can significantly impact its overall look. Opt for backgrounds that complement the dish without overshadowing it. Neutral colors like white, beige, or gray often work well, but you can also use textured surfaces like wooden tables or marble countertops for added depth. Ensure that the background enhances rather than competes with the food.
Advanced Techniques for Recipe Photography
1. Use of Props and Accessories
Props and accessories can add personality and context to your recipe photos. Consider using items such as cutting boards, bowls, and vintage utensils that match the style of your dish. For example, a rustic stew might look great with a wooden spoon and a linen cloth, while a sleek, modern salad could benefit from contemporary, minimalist props.
2. Incorporating Colors and Textures
To make your photos stand out, play with colors and textures. Use ingredients with vibrant colors or add garnishes like herbs, spices, or edible flowers to enhance visual appeal. Textures, such as a sprinkle of sea salt or a drizzle of sauce, can add an extra dimension to your photos. Experiment with contrasting colors and textures to create a visually engaging image.
3. Focus on Details
Close-up shots can highlight intricate details of your dish, such as the layers in a cake or the crispiness of a fried item. Use a macro lens or the macro mode on your camera to capture these details with precision. Ensure that the focus is sharp and that any imperfections are minimized.
Practical Tips for Recipe Photography
1. Use a Tripod
A tripod is essential for stability and consistency in your food photography. It allows you to experiment with different angles and compositions without worrying about camera shake. A tripod is particularly useful for low-light conditions or when shooting at slower shutter speeds.
2. Edit with Care
Post-processing can enhance your recipe photos, but it should be done subtly. Use editing software to adjust brightness, contrast, and saturation as needed. Avoid over-editing, which can lead to unrealistic colors or textures. The goal is to make the food look as appetizing and true-to-life as possible.
3. Keep Your Camera Settings in Mind
Understanding your camera settings can greatly impact the quality of your food photos. Use a wide aperture (low f-stop number) to achieve a shallow depth of field and make your subject stand out against a blurred background. Adjust your shutter speed and ISO settings to ensure proper exposure. Experiment with different settings to find what works best for your specific setup.
Common Mistakes to Avoid
1. Neglecting the Importance of Styling
A beautifully styled dish can make a huge difference in food photography. Avoid placing food directly on a plate without any thought to presentation. Take the time to arrange the food attractively and consider how it will look through the camera lens.
2. Ignoring Lighting
Poor lighting can ruin even the most well-styled dish. Avoid shooting in low light conditions or using harsh, direct artificial light. Always prioritize natural light when possible and use reflectors or diffusers to manage shadows and highlights.
3. Overlooking Cleanliness
Ensure that the area around your dish is clean and free of any spills or smudges. A cluttered or messy background can distract from the main subject and detract from the overall quality of the photo. Take a moment to tidy up before snapping the shot.
Conclusion
Recipe photography is both an art and a science, requiring attention to detail, creativity, and technical skill. By mastering the basics of lighting, composition, and styling, and by avoiding common pitfalls, you can create mouthwatering images that capture the essence of your culinary creations. Whether you’re sharing recipes on a blog, social media, or a cookbook, great food photography can make your dishes shine and entice your audience to savor every bite.
About the Creator
Keep reading
More stories from Dhanrajemanuel and writers in Art and other communities.
Mastering Recipe Photography: Tips for Capturing Stunning Food Images
In the world of food blogging and culinary content creation, recipe photography has become an essential skill. A well-executed photo can make a recipe irresistible and drive engagement on social media and food blogs. Whether you’re a professional photographer or a home cook looking to share your creations, mastering the art of recipe photography can elevate your food images from ordinary to extraordinary. Here’s a comprehensive guide to help you capture stunning food photos that will make your audience’s mouths water.
By Dhanrajemanuelabout a year ago in Art
The River and the Drops
High in the mountains, where no one watched and no one applauded, tiny drops of water slipped from melting snow. Each drop was small, almost invisible, and carried a quiet fear within itself. They began their journey without knowing where they were going, only knowing that they were moving away from where they began.
By Sudais Zakwan8 days ago in Art
Smart phones, Humans and Aliens.
WARNING. I will be tapping into one of your favorite creative tensions: The absurdity of humans worshipping their glowing rectangles as if they were tiny oracles. There’s something deliciously poetic about that contradiction, and it lends itself beautifully to an instructive proviso.
By Novel Allen4 days ago in Poets


Comments (1)
Thanks for sharing