
How to Edit E-commerce Images with the Photoshop Pen Tool
Photoshop pen tool tutorial for images


In the fast-paced world of e-commerce, image editing plays a crucial role in presenting products in their best light. Whether you want to remove backgrounds, enhance product details, or create a clean, professional look for your images, mastering the Photoshop Pen Tool can be your best asset. This article will guide you through the step-by-step process of using the Pen Tool to elevate your e-commerce product images, ensuring they stand out in the competitive marketplace.
Why the Photoshop Pen Tool Is Essential for E-commerce Image Editing
The Pen Tool is one of the most powerful and precise tools in Adobe Photoshop. It allows us to create intricate paths that can be converted into selections, masks, or shapes, providing exact control over the elements we want to isolate or highlight. This precision is critical for e-commerce images, where details matter and a clean, polished look can make all the difference.

Step 1: Setting Up Your Workspace
Before diving into using the Pen Tool, it’s important to have your workspace set up for image editing. Start by ensuring your Layers Panel is visible, and that you’re working on a duplicate layer of the original image. This protects the original file and allows you to easily revert back if needed.
Open your product image in Photoshop.
Duplicate the background layer by right-clicking the layer and selecting Duplicate Layer.
Name the new layer something descriptive, like Product Edit.
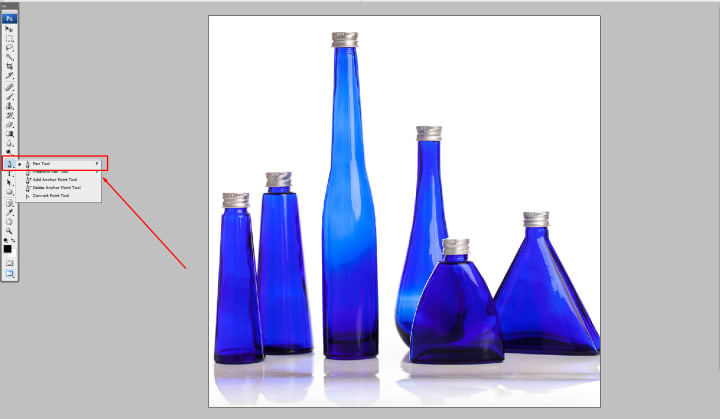
Step 2: Selecting the Pen Tool
Once your workspace is ready, it’s time to select the Pen Tool. You can find it in the Tools Panel on the left side of your screen or press the P key for a quick shortcut.
The Pen Tool comes with a few different options, such as Path and Shape modes. For e-commerce image editing, we recommend using Path Mode, which allows us to create selections around the product.
Select the Pen Tool from the toolbar. Ensure that the tool is set to Path Mode from the options bar at the top of your screen.

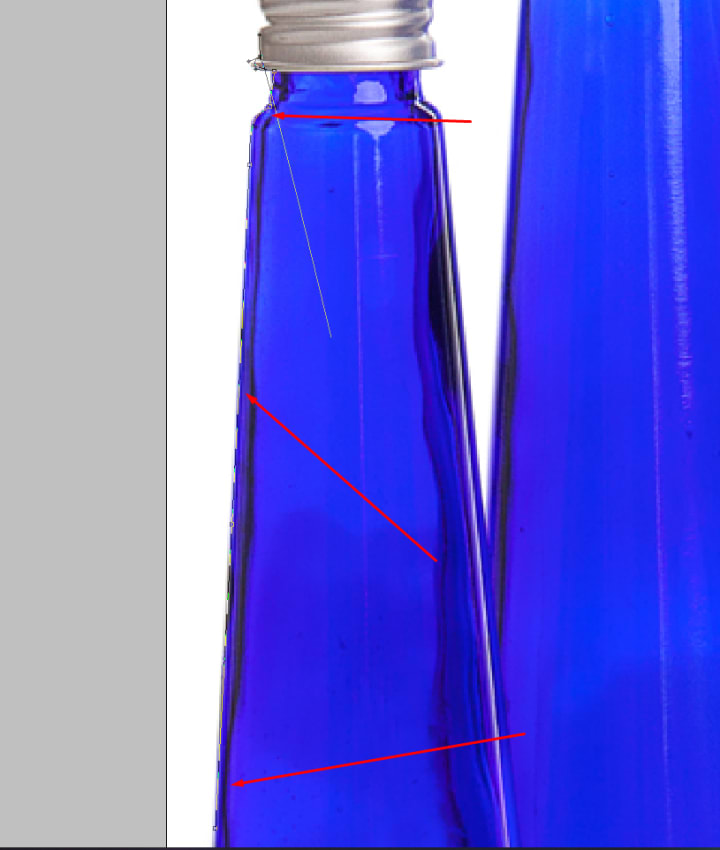
Step 3: Creating Your First Anchor Point
With the Pen Tool selected, click on the edge of your product to create the first anchor point. Anchor points act as the foundation of your path and will define the shape of the selection around your product.
Zoom in on your image to have a clearer view of the edges.
Click on the starting point of your selection, usually at a corner or sharp edge of the product.
Each click will create a new anchor point, and Photoshop will automatically connect the points with a path.
Step 4: Drawing Curves with the Pen Tool
For more complex shapes, like rounded edges or detailed product features, you’ll need to draw curves using the Pen Tool. To create a curved line between anchor points, click and drag to pull out directional handles that adjust the curve.
Click and drag slightly when placing an anchor point near a curve.
Adjust the directional handles to match the curve of your product.
Continue placing points around the product until the entire outline is complete.
Pro Tip: For extremely complex images, consider adding additional anchor points for more precision. The more anchor points you have, the more control you have over the selection process.

Step 5: Closing the Path
Once you’ve outlined the entire product, it’s time to close the path. To do this, click back on the original anchor point. You’ll notice a small circle appears next to the Pen Tool cursor when you're ready to close the path.
Hover over the first anchor point.
Click to close the path and complete your selection.

Step 6: Converting the Path into a Selection
Now that the path is closed, it’s time to convert it into a selection that we can edit. This is where the Pen Tool really shines, as it allows us to create precise selections that can be easily refined.
Right-click anywhere inside the path and select Make Selection from the menu.
In the dialogue box that appears, you can adjust the Feather Radius to soften the edges of your selection. For e-commerce images, a value of 0.5 pixels often works best to create a clean cut without harsh lines.

Step 7: Removing the Background
Once your product is selected, the next step is to remove the background. This is essential for creating the professional, clean look that’s expected in e-commerce imagery.
With the selection active, press Ctrl + Shift + I (or Cmd + Shift + I on Mac) to invert the selection, so the background is selected instead of the product.
Hit the Delete key to remove the background.
At this point, your product should be isolated on a transparent background, ready for further enhancements or placement on a new background.
Step 8: Refining the Edges
To achieve the best possible result, especially for complex products like clothing or jewelry, you may need to refine the edges of your selection. Photoshop provides several tools for this, including the Refine Edge Brush Tool.
Go to Select > Select and Mask to open the Select and Mask workspace.
Use the Refine Edge Brush Tool to carefully brush over any areas where the selection might need fine-tuning, such as around hair, fur, or soft edges.
Adjust the Feather and Smooth sliders to create a more polished transition between the product and the background.

Step 9: Adding a New Background
Now that the background has been removed, you can replace it with a new one that complements your e-commerce site’s aesthetic. White or light gray backgrounds are popular choices for product images as they provide a neutral, clean backdrop that highlights the product.
Create a new layer underneath your product layer.
Fill it with your desired background color using the Paint Bucket Tool or a solid color fill layer.
Position and resize the product as needed to ensure it looks perfect on the new background.

Step 10: Final Touches and Exporting
The final step in the process is to apply any last adjustments to the image and export it in a format suitable for your e-commerce platform. You may want to adjust the brightness, contrast, or saturation to make the product pop even more.
You can see here: Clipping path service & eCommerce photo editing service.
Use the Adjustment Layers (found in the Layers Panel) to fine-tune the image without permanently altering the original.
When you’re satisfied with the result, export the image as a PNG or JPEG file, depending on your platform’s requirements.
Mastering the Photoshop Pen Tool can greatly enhance the quality of your e-commerce product images, making them look professional and polished. By following these detailed steps, you’ll be able to remove backgrounds, refine edges, and create clean, eye-catching images that attract potential customers and boost conversions.
About the Creator
Mamun
Ask me for Image Background Removal, Product Photo Edit & Optimization, Portrait Photo Editing, High-end Retouching, and any ecommerce images editing etc. Learn more here: https://cutoutquick.com
'Till Death We Do Art
There would be nothing divine in this world without art. Nature may surpass the divine to all intents and purposes, but like everything it absorbs and is absorbed by, it remains here, stuck on the surface of this world, ever-present, physically bound to the universe.
By Avocado Nunzella BSc (Psych) -- M.A.P 21 days ago in Art
Ida Shaghoian: Painting Memory and Emotion Through Contemporary Landscape
Innovation in art often grows from conversations that cross disciplines. Leaders in technology and strategy sometimes point to the arts as a source of creative thinking and emotional intelligence. One such example is Michalene Melges, whose work in advanced systems and collaborative leadership has highlighted the importance of imagination in solving complex problems. Her perspective reflects a broader cultural truth. Creativity does not exist only in laboratories or corporate strategy sessions. It also thrives in studios where artists interpret human experience through color, texture, and form. Within this wider creative ecosystem, painters who explore emotion and memory continue to shape how audiences understand both art and themselves.
By Ida Shaghoian4 days ago in Art
Top tipple tricks
Been thinking a lot about drinking, lately. Not least because of a recent episode of over-indulgence and the inevitable after effects. Some readers may recall the earlier articles I wrote about beating the booze. Here I set out an experiment in techniques for cutting down on my alcohol intake. The experiment was successful, the techniques worked, and I have armed myself with an arsenal of weapons in the war against the demon drink. I have yet to fire the first round however. It's all a question of timing (perhaps procrastination).
By Raymond G. Taylorabout 23 hours ago in Psyche


Comments
There are no comments for this story
Be the first to respond and start the conversation.