
How to Add Texture to Your Digital Coloring
For Extra POP

First things first, the amazing artist who created this adorable hippo page and whose gel coloring tutorials helped me create this one by adapting the techniques to digital formatting: Anna Rose. Go, love her. Join her coloring club and come back.
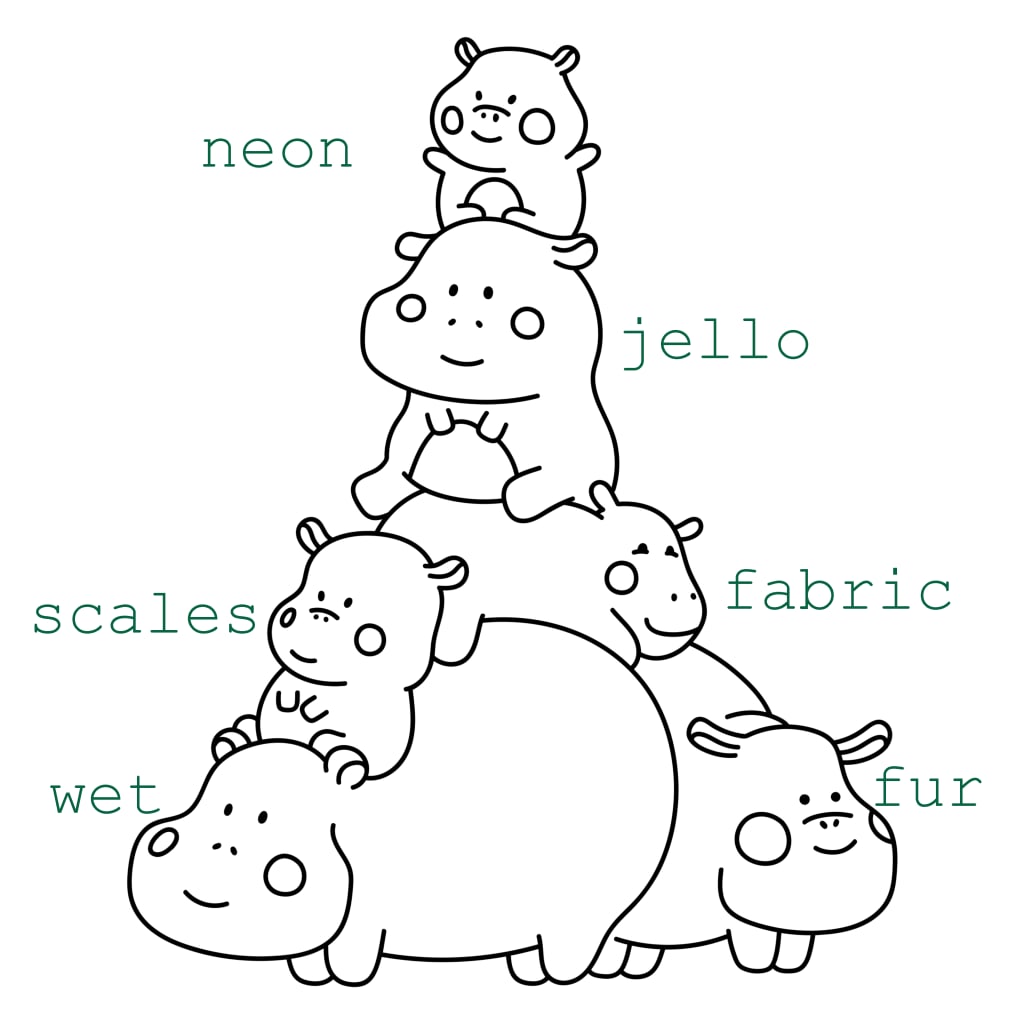
To begin the tutorial proper, I'm going to start at the bottom of the pile and work my way to the top. Wet and fur are both foundational textures, ones you can use to build onto others. Since wet is both simple and fun, it's perfect for setting up your working layers.
Set Up Your Working Layers
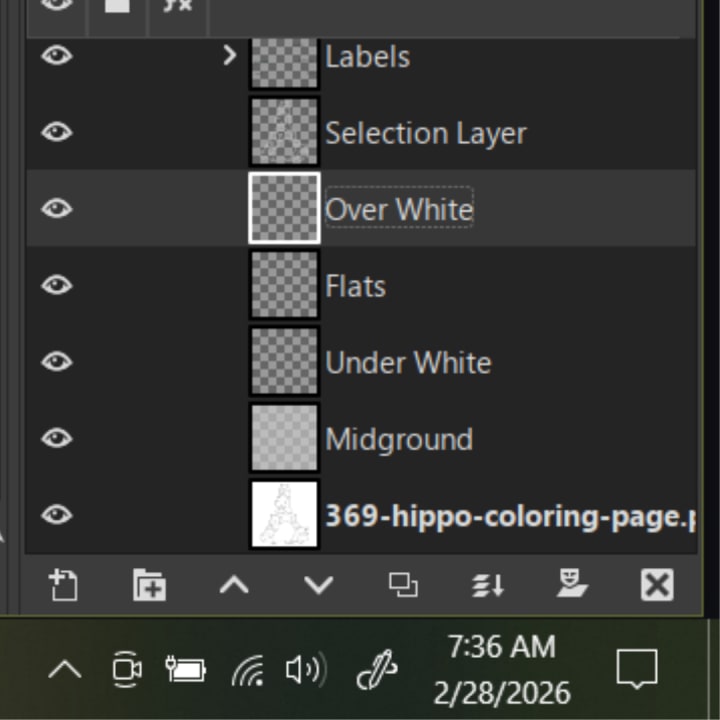
You start by creating a copy of the background. Make sure you have the alpha channel active, select white, and delete the white parts, leaving only linework. Label this "Selection Layer." Next, create a series of transparent layers with the following names: Under White, Over White, Midground, Flats. Over White and Selection Layer are interchangeable in the order.
I used a similar approach with each of these hippotorials, highlighting several techniques one might use within the overall category or theme. The "light" strokes and textures are in the Under White layer, the "bright," white and any supplemental black strokes are in the Over White layer. Flats is where your colors go, but keep it around 60-75% opacity, either at the layer level or when you fill the space. Otherwise, your Under White layer won't show through, creating the texture. To see it and your Over White layer, fill your Midground layer uniformly with a light grey. This, you can do up to 100%.

Wet
I used six techniques in the wet hippo, from a crude splash to a jaunty bounce, to capture the essence and movement of water on a wet surface. Liquid beading up on contours, light pooling and doing the same—taking the contour of the wet shape. Concave surfaces can be shown with squiggles like a heart monitor reading.
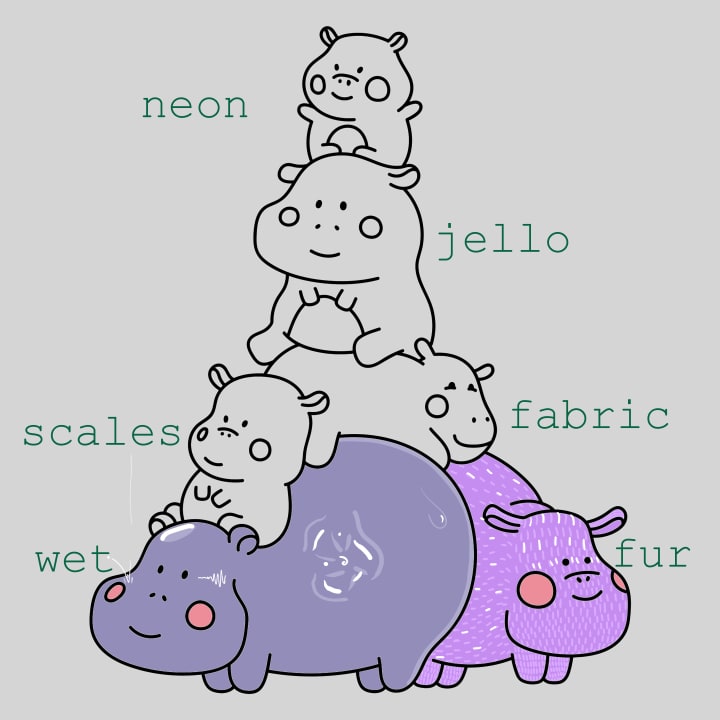
Fur
Parrallel lines give the appearance of fur. The longer the line, the shaggier the fur. The opposite is true of neatness and spacing. Enhance the shape by highlighting every other line. Or, embrace a bit of chaos and add some random highlights to your shaped fur texture.
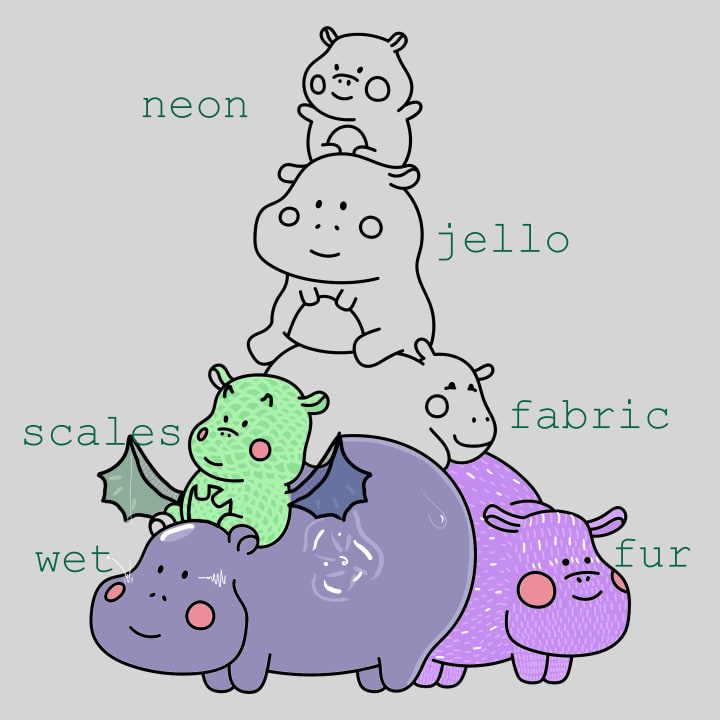
Scales
This one reminded me a bit of a dragon so I turned it into one. It was the perfect opportunity to explore the use of other colors in the over white layer. Scales are all in the under white layer, in different shapes. a simple criss cross will do the trick but angled or straight layered half-moon or c-shapes is what you're going for. Or dots. Or Vs.
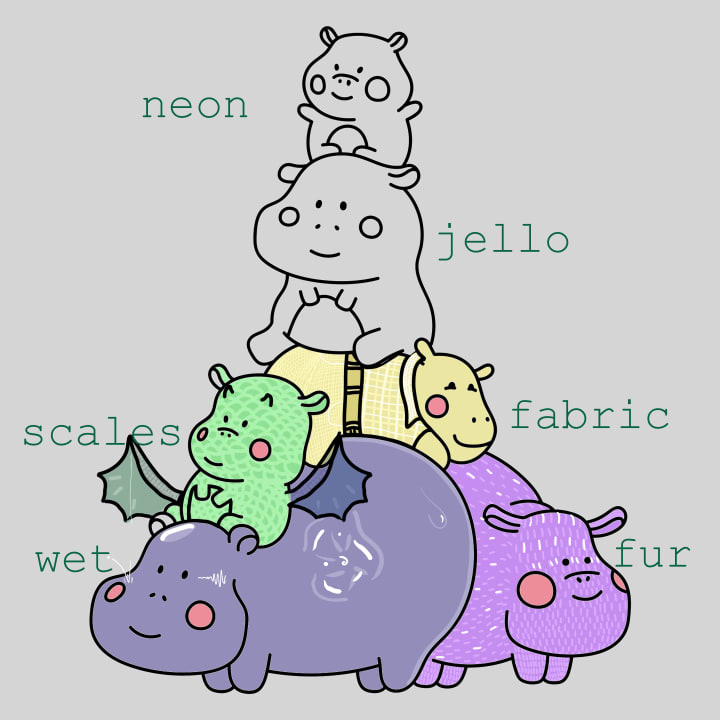
Fabric
Get down to the micro level with a fiber level weave, cheat with a pre-fabricated texture (leather belt), or keep it macro with a nice plaid. The option are endless and it's up to you what path you take. Or do the most and take every path, assigning one weave per section for maximalist flair.
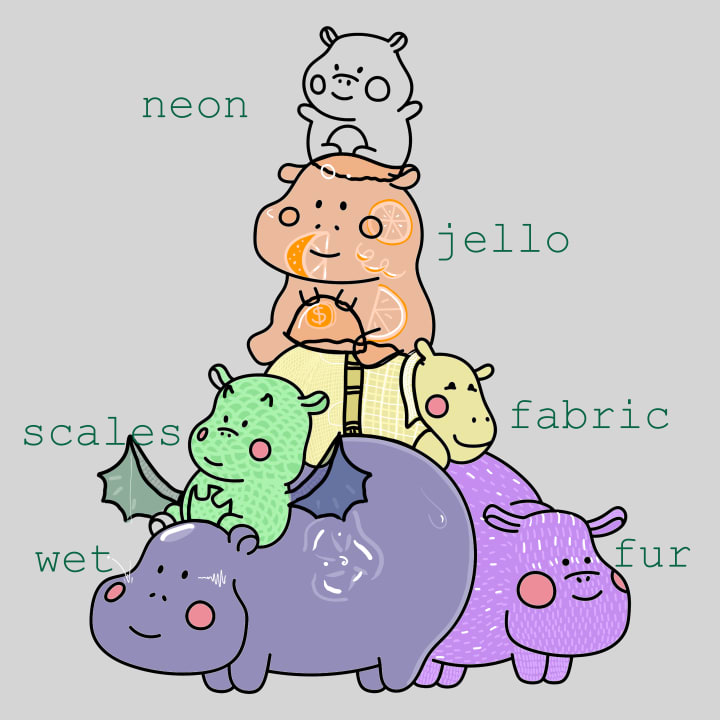
Jello
Jello is a combination of a few different foundational textures. First, we have textures that read "wet" on the outside of a transparent shape. This shape is altered, with additional color added to the Under White layer for that extra POP. Then we have fibrous highlights in the fruit and a tendency to warble perception for realism.
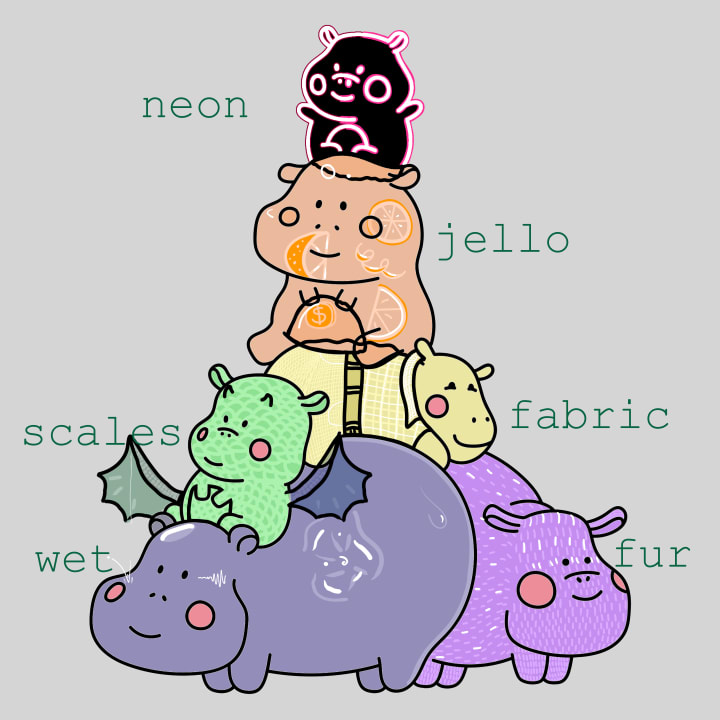
Neon
Neon is its own technique and there are two ways to do it. Both require swapping the linework for white and filling the hippo with opaque black. The first method is to select the linework and stroke it in graduating colors. I did two. The other option is to take a neon-type color and manually trace the linework.
About the Creator
Maia Gadwall the metAlchemist
I fell in love with speculative fiction and poetry many years ago, but I have precious little time to write any. Then, I went crazy and started a cult called metAlchemy, or meta alchemy. I revere energy of all brands, esp. good, kind chaos.
Keep reading
More stories from Maia Gadwall the metAlchemist and writers in Art and other communities.
Practical Magick: Applied metAlchemy
"Anyone who has never made a mistake has never tried anything new." - Albert Einstein These simple words from a complicated man embody the spirit of the third mantra of metAlchemy. Where there is surplus energy, extract it to convert it to something you can use in the future. This applies as much to walking away from arguments until you're calm enough to have discussions as it does to learning from an over-enthusiastic mishap in the kitchen that costs you dinner for the night.
By Maia Gadwall the metAlchemist4 days ago in Humans
'Till Death We Do Art
There would be nothing divine in this world without art. Nature may surpass the divine to all intents and purposes, but like everything it absorbs and is absorbed by, it remains here, stuck on the surface of this world, ever-present, physically bound to the universe.
By Avocado Nunzella BSc (Psych) -- M.A.P 12 days ago in Art


Comments
There are no comments for this story
Be the first to respond and start the conversation.