
Cross Stitch Quick Start Guide
A beginners guide to get you cross stitching, now!


Sometimes we want to do a thing, but we don’t yet know how to do the thing, so we need someone to tell us. Here are the things I wish I knew when I first started cross stitching. Hopefully this guide will give you enough of the basics to get started , without completely overwhelming you with information.
Cross stitch is a really accessible and fun way to get into needlework and embroidery. You can do it just for the pretty pieces you end up with, or you can use it to mend clothes, to give a bit of colour and excitement to accessories or anything else your imagination can think of.
If you have a question, please drop it in the comments and I’ll be happy to help!
Fabric
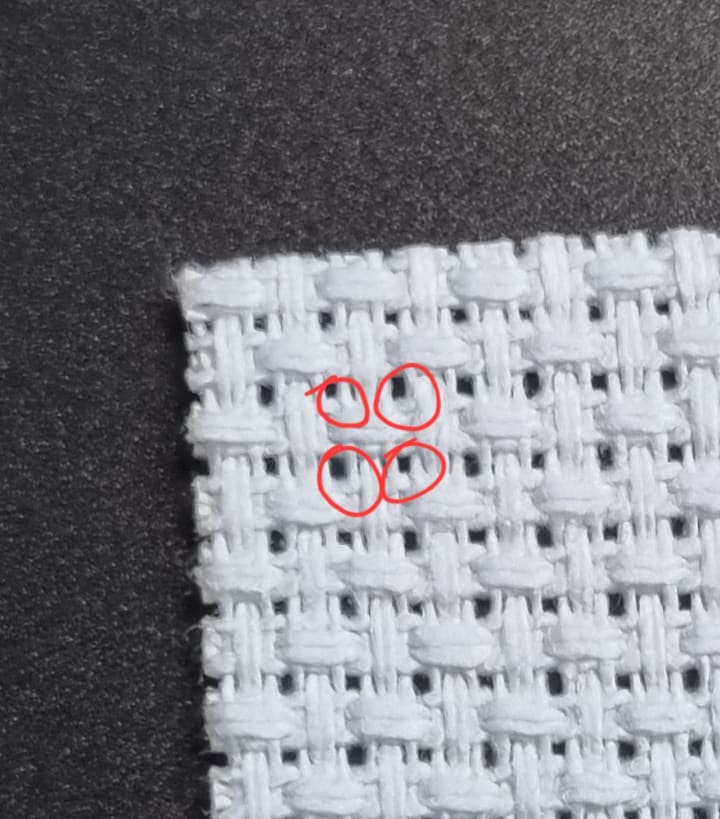
You can stitch on anything you like, but for cross stitch it’s going to be a lot easier if you use some kind of evenweave fabric. Evenweave is fabric where, stay with me here, the weave is even.
You want to be able to see little, evenly spaced holes between the fibres that go up and down, and the ones that go across.
This fabric is called aida, it’s very common to do cross stitch on this type of fabric.

Here’s some examples of other evenweave fabrics that you could also use.


If it’s got evenly spaced holes, then you can cross stitch on it!
Thread
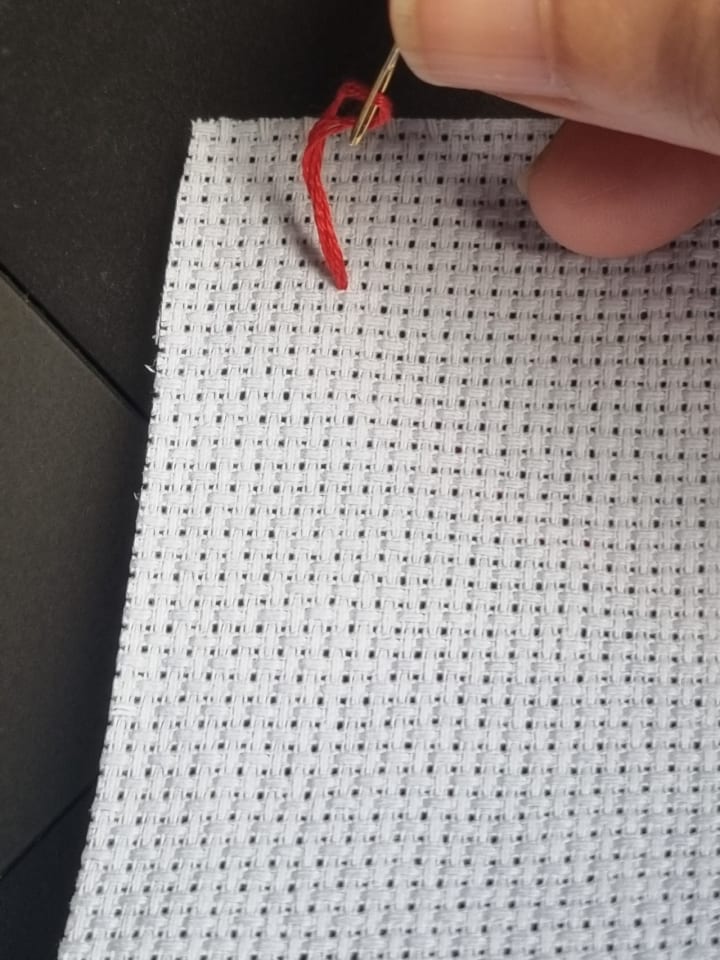
The thread that you typically use for cross stitch is called floss. The key feature of floss is that it can be separated out into six individual strands.

Below is an example of thread that is not for cross stitch.

Neither is this.

Cut a length of thread to start stitching with. About 40-50cm is good. Not so long that it gets tangled, not so short that you’re constantly threading needles. Now you want to separate out some strands from that cut length, by grabbing three of the individual strands and separating them from the other three.
This can get messy. Everyone develops their own ‘never fail’ method of separating their strands. You’ll find what works for you, but only after many tangled threads and swear words. Just go slowly, and untangle as you go, it will get easier.
These three separated strands are what you will stitch with. NOTE: you will not double these over (then you would be stitching with six strands).
Needle
You can use whatever kind of needle you want or have to hand. You will find it easier if you use the right kind, but we don’t always have the choice. The most important thing for cross stitch is that the needle has an eye large enough to accommodate three strands of thread.
A tapestry needle is the best kind. It has a large eye and a blunter tip.

The blunt end helps us go through the holes of the fabric more easily without catching surrounding threads.
This needle has a very small eye and a very pointy point. You can cross stitch with it if it’s all you have, it will just be more difficult.

How to read the pattern
Cross stitch patterns, or charts, are a grid that align with the holes on your fabric. Each intersection of a horizontal and vertical line on the pattern corresponds to a hole in the weave of your fabric.
Most patterns will either be coloured blocks

Or symbols

For each coloured block or symbol on your pattern, you are going to stitch an X on your fabric
Deciding where to start can be tricky.
The centre is always a good choice. Find the centre of your fabric by folding it over and noting where the middle is. Most patterns have numbers on the top and sides to help you keep track of where you are. Use the numbers to find the middle of the pattern, or just eyeball it.
Starting in the top left is also a good choice. Make sure you leave a couple of centimetres of space, don’t start your first stitch right in the corner. The fabric will fray with handling, plus you might need some excess to work with for framing or finishing, depending on what your plans are for the final piece.
Starting
Tie a knot in the end of your thread.
Don’t listen to the gatekeepers who tell you knots are bad.
Sure, knots aren’t the best way, but for now, to get us going, we’re just going to use a knot. Later we can learn some better ways to start.
Stitching the X
Bring your needle up through the top left corner of the square you are going to stitch
Bring your needle down though the bottom right corner of the square you are stitching

Bring your needle up though the top right corner of the square you are you are stitching

Bring your needle down through the bottom left corner of the square you are stitching

Congratulations! You’ve made your first cross stitch!
Find the next square and repeat.
Where it can get tricky is when you finish your X and the hole you have just brought your needle down through, is also the same place you need to bring your needle up to start the next X
When this happens you may have to change the order of how you stitch your X. Instead of starting at the top left, you can start at the bottom right.
You might have to do
The most important thing to remember is to keep your X’s going the same way. Always have the first ‘leg’ slanting one way, (eg, left to right, like this: \) and the second ‘leg’ slanting the other way (eg, right to left, like this: /). It doesn’t matter if you stitch them top to bottom or bottom to top, left to right or right to left. As long as your X’s all look the same when you’re finished it doesn’t matter how you stitch them.

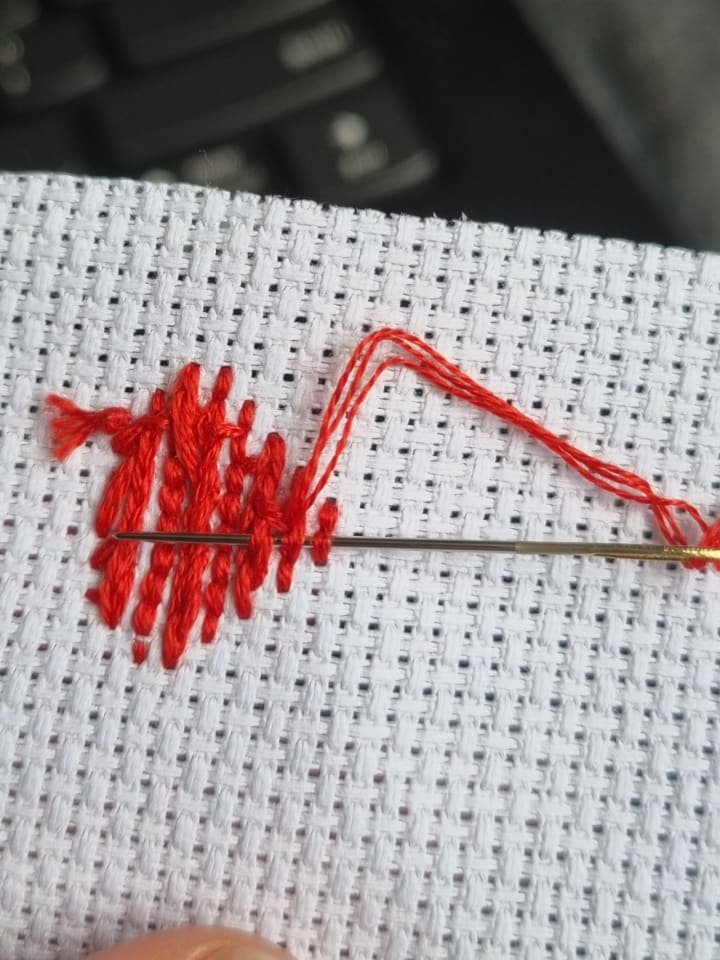
Finish your thread
When your thread gets too short, finish it by flipping to the back of your fabric and sliding the needle under a few of the stitches and cutting the thread off.
Keep going!
Keep going until you have finished your pattern. Take breaks as often as you need - your eyes, back, neck and hands will thank you!
Now you can display your finished cross stitch however you like! Frame it and hang it on a wall! Stitch it onto a bag or a jacket! Use it as a bookmark!

I hope this is enough to get you started on your first cross stitch project. I feel like I’ve barely scratched the surface of how in depth we could get here! If anything is unclear or you need help please let me know, I’d love to help.
There’s soooo much more we can go into, so if this has helped you at all and you’re interested in any of the below topics, let me know. More suggestions are welcome!
Advanced topics
- Cloth count
- Stitching on high count fabric
- 2 over 2, 1 over 1 etc
- Stitching with things other than floss
- Number of strands, when to use more or less
- Patterns with lots of colours
- X directions
- Full X’s or \\\\ then ///// (English vs Dutch style)
- How to have a neat back
- Loop start
- Stitch in hand vs stitch in a hoop
- Framing
- Edging to turn your cross stitch into a patch
About the Creator
Book of Stitches
Documenting my journey as an embroidery artist living in Otago, New Zealand.
Keep reading
More stories from writers in Art and other communities.
'Till Death We Do Art
There would be nothing divine in this world without art. Nature may surpass the divine to all intents and purposes, but like everything it absorbs and is absorbed by, it remains here, stuck on the surface of this world, ever-present, physically bound to the universe.
By Avocado Nunzella BSc (Psych) -- M.A.P 16 days ago in Art
Silent Intensity
Once in a distant future, in a world filled with towering silver cities and flying vehicles, there lived a young girl named Mira. She was fourteen years old with bright green eyes and hair that shimmered like the night sky. Mira was not like other children in her city. She possessed a rare gift, one that allowed her to hear the thoughts of others. This power felt like a blessing at times, but it also made her feel very alone. The noise of people's thoughts often overwhelmed her.
By Hamad Afridi 4 days ago in Art
"Scream 7" (2026): Running out of Fresh Screams
This is the seventh time we’ve had a Ghostface crisis. Scream 7 is the latest edition of the Scream franchise. Sydney Prescott and her family are under attack by another anonymous killer dressed in a Ghostface costume. While having issues with her daughter, Tatum, they run from the bloody murders, trying to determine who is behind it all.
By Marielle Sabbag4 days ago in Horror
I wanted to title this something different, but worried that my chosen title might cause problems entering the United States in the future so this is the new title. It's the greatest title. No one has ever written a title better than this. (All titles unrelated to content).
Let me be honest. I am finding this difficult. Now, I like a challenge, a stretch, a bit of an obstacle course. “Write about the decline of the British Empire in the form of a narrative poem in which your protagonist is an artichoke” I read, and flex my fingers. “Write a haiku to evoke the sensation of sibilance using only the first half of the alphabet.” “Well”, I think to myself, “this should be fun.” But “write about a system that isn’t working”? A system that isn’t working? Now? In 2026? ONE system? My favourite system that isn’t working? The sexiest system that isn’t working? The one giving me the most angst day to day? The one giving me the most existential dread? I am, as I say, finding this difficult. I will own that I have contemplated writing a thousand words on why the steady “all on” setting on my fairy lights is the EIGHTH of seven options which must be sequentially activated to get there, because that is a system that some fool came up with and it definitely doesn’t work, and now who is paying the price, eh? But how can I write about my fairy lights when…. When…. When….
By Hannah Moore7 days ago in Humans


Comments
There are no comments for this story
Be the first to respond and start the conversation.