
A Step-by-Step Guide to Creating a Fantasy Map
All about how to make a fantasy Map

Before I dive into my step-by-step guide for making a fantasy map, keep in mind that this is just one of many possible approaches to this type of art. In this guide, I’ll show you how I draw fantasy maps. Take what you can from this guide, but also note that there are many other methods out there.
What Tools are Needed?
There are plenty of tools available for creating maps, but you don’t need much to get started. All you really need is paper and a pencil, and you’re good to go! These two simple tools can already be enough.
However, if you want your map to stand out, you might consider using additional materials, such as fine liners for inking. For adding color, you can use colored pencils, watercolors, crayons, or more.
For this guide, I will only be using easily accessible materials that don’t have to cost much (or anything at all), as you may already have them at home. The materials used in this guide include:
A sheet of paper (preferably thicker paper)
A pencil
A fine liner
Some colored pencils
Nothing else will be needed.
Step 1: Shape your Map

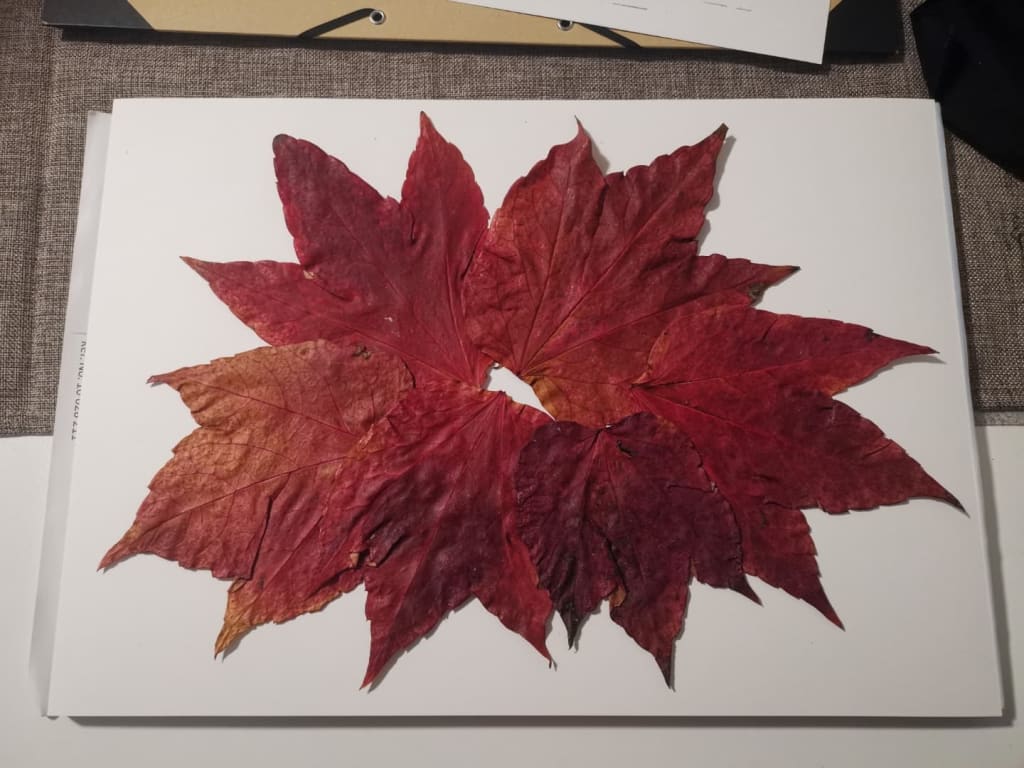
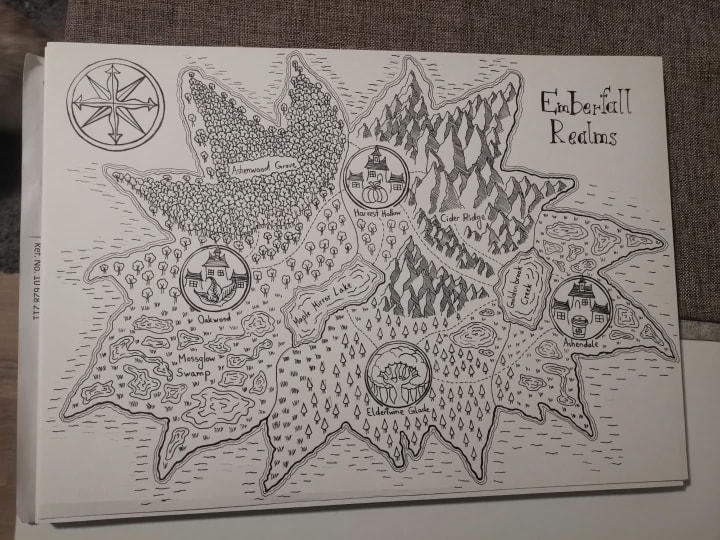
In this step, you will create the shape of your map. As shown in the picture above, I used some fall leaves to shape my map. I chose this method to demonstrate that there are many ways to generate an interesting landmass shape.
Classic techniques used by many cartographers include scattering rice or beans. You could also find inspiration outdoors in nature—rocks, sand, or even cloud formations can serve as great references.
What you’ll want to do is spread your chosen material on your sheet of paper and shift it around until you see a shape you like. This can be done intentionally or randomly—both approaches work!
Step 2: Draw the Outline
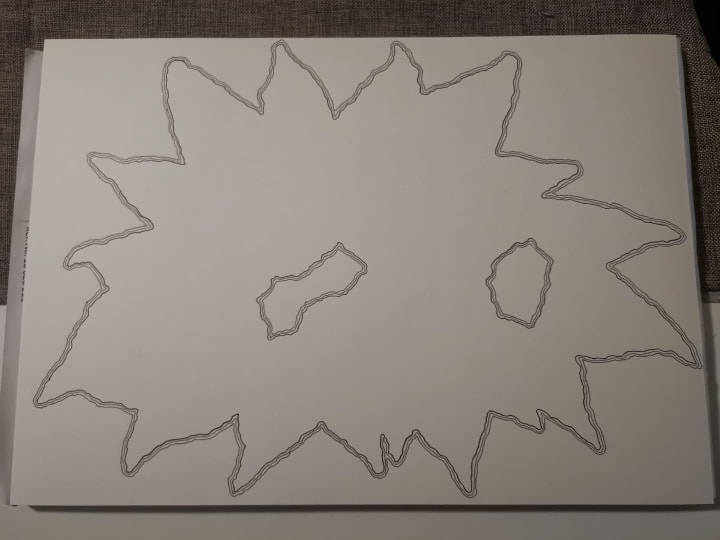
Next, grab your pencil and carefully trace the outline of your chosen shape. Once done, you can remove the material from the paper, revealing a proper outline for your fantasy map.
For added detail, you can double or triple the outline, as shown in the example above.
Step 3: Fill your Map
This step naturally takes longer and depends on how you choose to fill in your map. To keep things simple, I’ll describe my approach, but many other methods are possible. Here are some key considerations:
Choose where you want to place locations: Decide where villages, towns, or landmarks will be placed. I prefer to start with these to ensure they have enough space. I also name key locations immediately so I don’t have to squeeze names in later. If you prefer to wait, just make sure to leave space for labeling later on.
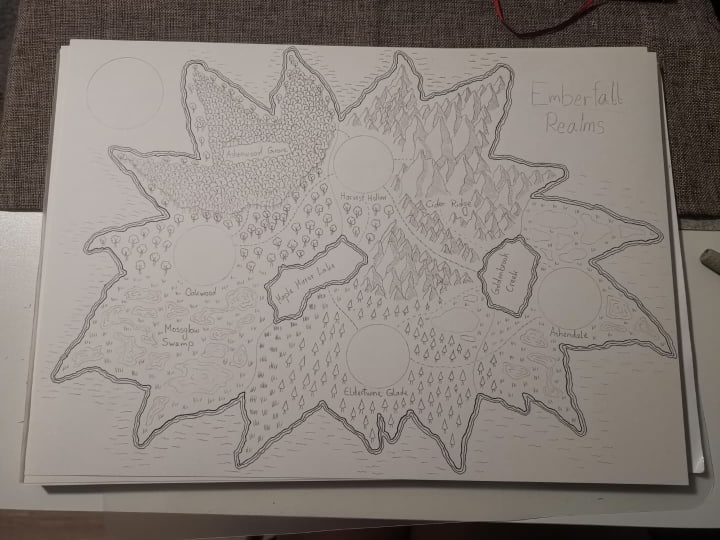
In the picture above, I circled my locations and drew a key building or feature to mark each one.
A simpler approach is to use dots to mark locations, like in the example above.
Tip for naming locations: Struggling with names? I understand! There are online name generators that can provide inspiration. I personally use ChatGPT for name ideas, then tweak them to my liking. Names can also give clues about the history or nature of a place.
2. Draw lakes and rivers: Like with towns, I draw lakes early to ensure they have enough space. You can double or triple outline them for emphasis and add wavy lines to represent water.
3. Add natural features: Mountains, forests, and swamps help define the landscape.
Swamps: Some maps need swamps! I create them using clusters of small lakes and drawing grass or tiny lines between them.
Mountains: I draw shaky triangles to form mountain ranges and shade one side to make them pop.
Forests: Draw clusters of small trees to represent forests. You can use a mix of different styles.
4. Add labels and details: Once the map is filled, write your fantasy map’s name. You can also add decorative elements like a compass rose, like in the picture below.
Step 4: Start Inking Your Map
This part of the process is quite meditative. Take your fine liner and trace all the lines on your map. Once done, allow the ink to dry before moving on to the coloring process.

Now it’s time to bring your map to life with color! There are different approaches to coloring maps:
Full-color approach: Every element is brightly colored.
Selective coloring (like my map): Only parts of the map are colored, keeping a balance between ink and color.
To make details pop, apply shading techniques:
Press firmly on outlines and fade out softer.
Don’t worry if you color outside the lines—most people won’t notice!
Depending on how much color you add, this step can be the most time-consuming, but it’s totally worth it!
Conclusion
Congratulations! You’ve now created your own fantasy map. With just a few simple materials and creative techniques, you can design unique, imaginative worlds. Keep experimenting, try new approaches, and most importantly—have fun with the process!
For more information check out my Instagram account @ kayla_breyanna or find me on Deviantart @ kaylabreyanna
blessed be,
Kayla
About the Creator
Kayla Breyanna
Hi there! I'm Kayla, and I love to write about games, game development, cartography, and a little bit about spiritual topics.
Keep reading
More stories from Kayla Breyanna and writers in Art and other communities.
Tips on how to make a good Portfolio
Before I share my tips with you, I want to clarify that these are specifically for those interested in pursuing a degree in the arts and planning to apply to art schools. If you already have an art degree and are looking for job application advice, you may need to look elsewhere.
By Kayla Breyanna11 months ago in Art
21 Freelancing Tips to Build a Successful Career (From Someone Who Actually Did It)
TL;DR version (60 seconds read time) + Paypal receipt at the end of the blog. I’ve made thousands of dollars with freelancing. See screenshots at the end of the post. Everything I say to you, I’ve tested it first on myself.
By Dena Falken Esq2 days ago in Art


Comments
There are no comments for this story
Be the first to respond and start the conversation.