
Effortlessly Make a DVD: 3 DVD Authoring Tools
This article reviews five top DVD makers, highlighting their features and unique capabilities to help you make DVDs step by step.


Backing up important files, audio and video is essential to protect your work and precious memories. A reliable solution is to create DVD backups. You don't have to worry about computer crashes or hard disk damage. In this guide, we have listed 3 best free DVD maker software and created easy-to-follow tutorials to help you understand how to make DVDs so you can quickly decide which software to choose.
How to Make DVDs [Tutorial]
Method 1. How to Make a DVD with a Personalized Menu using DVDFab DVD Creator
DVDFab DVD Creator offers convnient and user-friendly DVD creation for both Windows and macOS users. It supports various video file formats and allows you to make DVDs with interactive DVD menus. With this DVD Creator, you can edit the video to your liking by removing unwanted audio tracks and subtitles as well as importing external subtitle files. One of the standout features of this software is the ability to preview the effects before finalizing your DVD.
In addition, it allows you to save your video DVD as a folder, ISO image file, or burn it directly to a blank DVD (DVD5/DVD9) without the need for an additional third-party burning tool. Even though DVDFab DVD Creator is paid software, it provides a 30-day free trial with full functionality.
Step-by-step guide on how to make a DVD on Windows with DVDFab DVD Creator:
Step 1. Free download and install DVDFab DVD Creator on your computer, and launch it upon installation is complete. Switch to the "Creator" module. The default mode should be "DVD Creator."
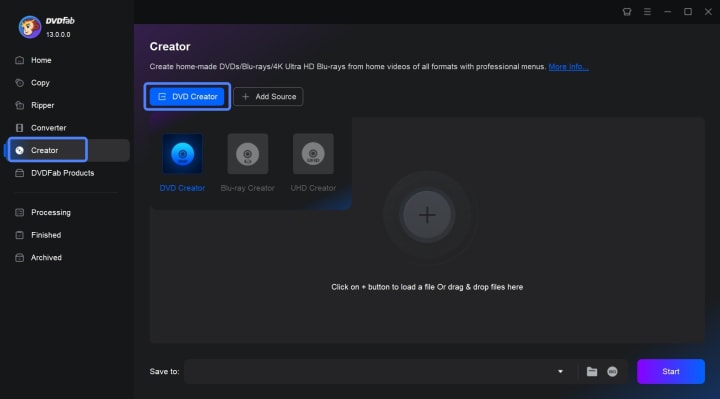
Step 2. Use the "+Add Source" feature to add the video files you wish to create a DVD backup. You can also drag and drop the videos as sources.
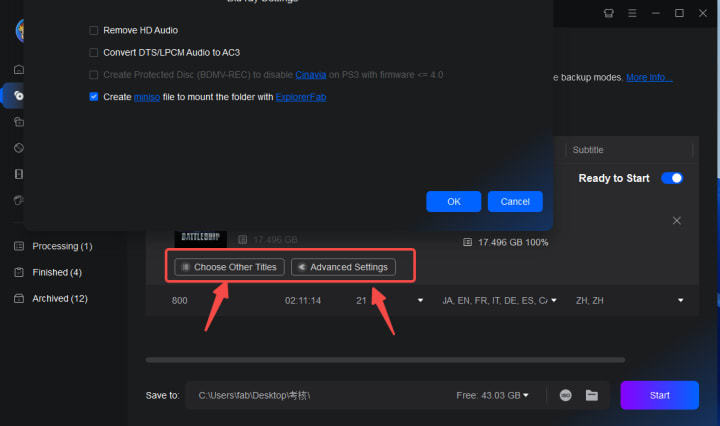
Step 3. Set the output type as DVD5 or DVD9 and the output quality. Click on the "Audio" tab to deselect the audio tracks if needed, and remove or add external subtitles under the "Subtitle" tab.
The supported external subtitle formats include ".srt", ".smi", ".ass", and ".ssa".
Tips: In the Subtitle Edit window, you can add more subtitles, set subtitle font/transparency/position, and delay the subtitle speed if needed. The change will be shown in real time.
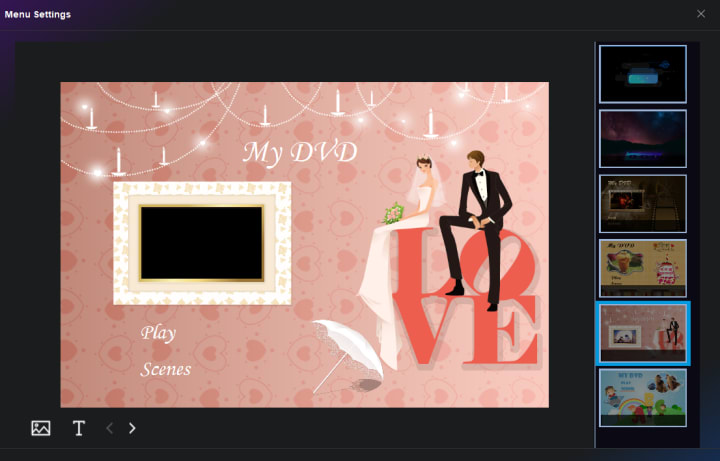
Step 4. Click the "Menu Settings" button to customize the background image, texts, and play buttons per your preference.
Step 5. Once you have done all the editing, go back to the main interface, and select your burner as a target from the dropdown list. You can also save the video DVD to your hard drive as a folder or ISO file.
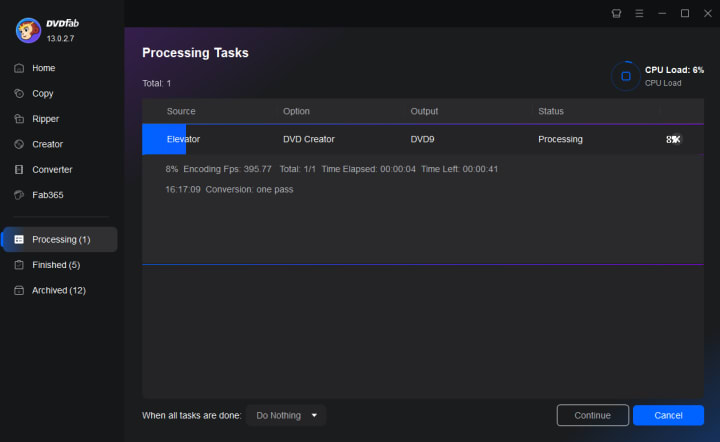
Step 6. Input a blank DVD5 or DVD9 depending on what you have selected before, and then click the "Start" button to make your own DVD.
Method 2. How to Make a DVD Backup with DeepBurner Free
DeepBurner Free is a Windows-only CD and DVD-burning software tool that allows you to make your own DVD for backup files, videos, and audio. You can create data CDs and DVDs, make ISO backups, and create audio CDs. One of the outstanding features of this tool is that you can create autoruns and create and print personalized labels.
However, if you want to create a DVD compatible with standard DVD players and use the Menu feature, you will need to get the pro version.
How to make a DVD backup using DeepBurner Free?
Step 1. Visit the official site and then download DeepBurner Free on your computer.
Step 2. Launch the software and select the project type as "Create data CD/DVD". On the popup window, choose how to make a DVD, multisession, append session, or no multisession.
If you do not need to add additional data to the disk in the future, use the "No multisession" feature, it will finalize the disk after the initial data is burned to it.
Step 3. Use the "Add Folder/Add Files" button on the top to browse for the files and then add them as sources.
Step 4. Switch to "Burn Disk", choose the burner, and then click the "Burn" button to start the process.
Method 3. How to Make DVDs from Files/Folders with AnyBurn Free
AnyBurn Free works on Windows 11 and previous Windows systems. It has a straightforward interface, so you can follow the on-screen instructions to effortlessly make DVDs from files and folders on your hard drive.
With AnyBurn, you can also burn and rip Audio CDs, convert and extract image files, create bootable USB drives, and copy discs to image files. However, you will need to pay to get the pro features.
Follow the steps here on how to make DVDs from files and folders with this tool:
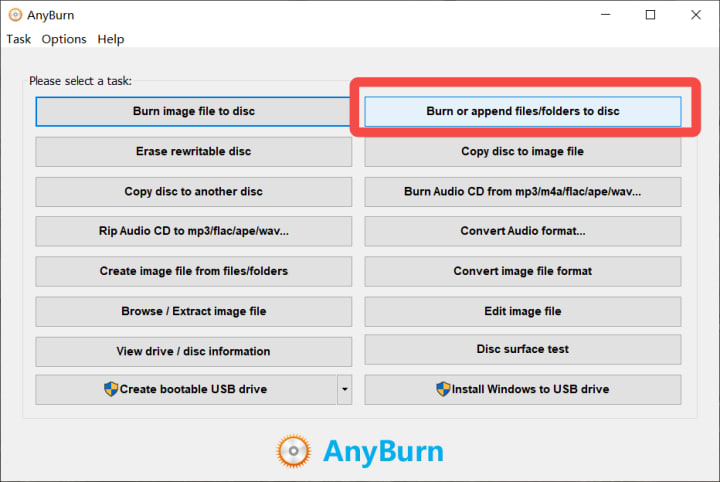
Step 1. Download AnyBurn Free from the official site and install it on your computer. Then run the software, and click "Burn or append files/folders to disc."
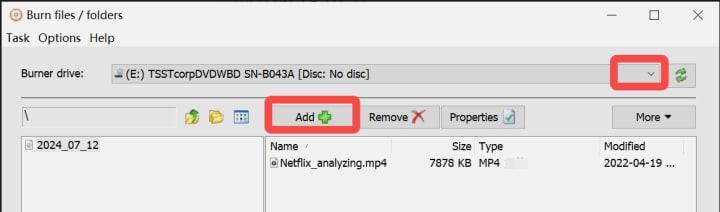
Step 2. Use the "Add" button to import the files you want to backup. Switch the Burner drive if needed.
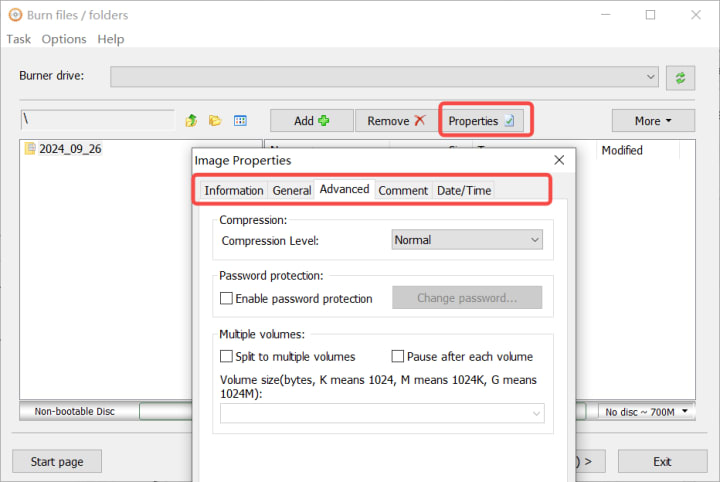
Step 3. Click the "Properties" button to adjust more settings. Select the file system, and compression level and you can even set a password protection to keep your DVD safe.
Step 4. Back to the main interface, click "Next", and insert a blank disc in the selected drive, then click the "Burn Now" button.
Step 5. Wait for AnyBurn to complete the process. When you see "Burning completed successfully", it means you have created a DVD successfully.
Conclusion
We hope you now have a better understanding of how to make a DVD. Different tools are available for creating data CDs/DVDs, or video DVDs that are compatible with standard DVD players. You can choose the tool that best suits your needs, or even use a combination of tools. With the right tool, creating a DVD can be an easy task.
About the Creator
Rita
I am a freelancer, specializing in DVD, Blu-ray, and multimedia technologies. With a strong background as a tech editor, I bring a deep passion for the tech industry to my writing, crafting insightful articles.
Soundtrack of a City: How Local Music Scenes Reveal the True Soul of a Destination
Music as a Cultural Language Every city has a sound. Long before you understand its history or customs, you can often feel its spirit through the music that fills its streets, clubs, and neighborhoods. Local music scenes act as a living language, expressing everything from struggle and celebration to identity and pride. When you travel, listening to that soundtrack gives you access to emotions and stories that guidebooks can never fully explain.
By Devon Alexis5 days ago in 01


Comments
There are no comments for this story
Be the first to respond and start the conversation.