
Little Patches, Big Impact–Style Your World
Boost Your Style With Patches


Embroidered patches: Not just stylish add-ons; but a way to bring your personality to life through your clothes and accessories. Be it your favorite jean jacket, a backpack, or even a cap, a well-chosen patch does it all!
These miniatures have been around for decades, evolving from military and scouting badges to creative fashion statements. Nowadays, anyone can use patches to create something one-of-a-kind—no advanced sewing skills needed!
Ready to get creative with embroidered custom patches? Here’s a rundown of five tips to help you use them like a pro. It begins with choosing materials and ends at caring for your finished project. So, don’t wait to turn any of your pieces into personalized works of art.
1. Choose the Right Fabric and Materials
Before you start, selecting the right fabric and materials can make all the difference. Stable fabrics, like felt or cotton, work best for patches since they help keep the patch secure and avoid stretching or bunching up.
Here’s a quick list of the essentials:
- Material: Sharp needles
Purpose: Helps create clean, precise stitches.
- Material: Thread
Purpose: Match or contrast with your fabric for different effects.
- Material: Adhesive, water-soluble paper
Purpose: Makes transferring designs easier.
- Material: Embroidery hoop
Purpose: Keeps fabric taut, ensuring neater results.
Quality materials are key to a polished finish.
2. Your First Steps in Embroidery
To make your patches look their best, let's get started with these easy-to-learn stitches.
Back Stitch: Perfect for outlines. Just pull the needle up at point A, down at point B, and continue.
Satin Stitch: Great for filling shapes. Create a dense, textured effect by stitching back and forth across the shape.
Running Stitch: Good for simple outlines. Use even, small stitches to follow your design.
If you’re new to embroidery, practicing these stitches on scrap fabric first will help you feel more confident.
3. Perfect Placement for Your Patch
Placement can be a big factor in making your patch stand out. Here’s how to get it right:
Mark the placement: Lay your garment flat and use a fabric marker to outline the desired patch position.
Secure the patch: Pin or baste the patch in place to hold it steady during sewing.
Patch Placement Tips:
Large patches work well on the back of jackets or as statement pieces.
Smaller patches are ideal for pocket areas, hats, or shirt sleeves.
Take a moment to check the placement before you start permanently attaching your patch to make sure it looks just right.
4. Attach Your Patch Securely
Discover the best way to secure your patch.
Let's weigh the pros and cons of different attachment techniques.
- Method: Iron-On
How It Works: Use heat to press the patch onto the fabric.
Pros: Quick, no sewing required
Cons: Not durable on heat-sensitive fabrics
- Method: Sewing
How It Works: Sew around the edges of the patch.
Pros: Very secure, precise placement
Cons: Takes time, requires sewing skills
- Method: Fabric Glue
How It Works: Apply glue to the back of the patch
Pros: Easy and quick
Cons: Less durable for frequent washing
Depending on your needs, you can pick the method that suits you best. For a long-lasting patch, sewing is generally the best choice.
5. Care Tips for Your Patched Garments
Keeping your patched items looking fresh is easy with a little extra care:
Washing: Turn your item inside out before washing, and if possible, use a laundry bag. Cold water and gentle detergent are best. For delicate patches, hand-wash or spot-clean the area around the patch.
Regular Checks: Every so often, check if your patch needs a touch-up. If edges start lifting, you can reinforce stitches or add a bit of fabric glue to secure it.
When to Use Professional Digitizing Services
If you’re creating a more detailed design, it might be worth considering digitizing services for embroidery USA. Professional services convert intricate designs into digital stitch files that machines can read, ensuring high-quality results.
Bring your vision to life with custom digitizing. Companies like “The Embroider” can transform your intricate designs into stunning embroidered patches.
Conclusion
Imagine the patches possessing magical properties, transporting you back in time to the era of their creation. Try out different designs, experiment with placements, and enjoy the creativity that comes with personalizing your favorite pieces. Remember, with each patch, you’re adding a little more of you to your style!
About the Creator
Keep reading
More stories from writers in Styled and other communities.
Happy Polka Dot Day
Happy Polka Dot Day! So, this is celebrated every year on January 22nd for Disney’s stars – Mickey & Minny Mouse. In 1928, Minny Mouse’s first appearance was in a black and white dot dress. Since then, this print has been iconic and has appeared in fashion and accessories.
By Lynne Blackabout 7 hours ago in Styled
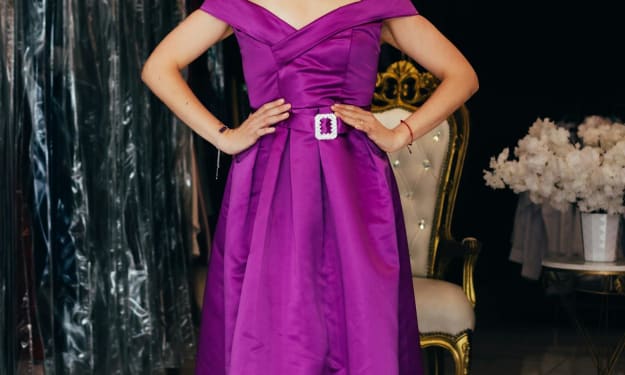
Why Formal Dresses Remain a Core Wholesale Category
In an industry driven by trends and seasonality, some fashion categories consistently deliver strong performance year after year. Formal dresses are one of those essentials. From weddings and galas to proms and corporate events, formalwear serves a wide range of occasions. For retailers and resellers, sourcing bulk formal dresses remains a dependable and profitable wholesale strategy.
By Style Sparksabout 20 hours ago in Styled
Thoughts on Vocal and the way the world is
"Death cannot stop true love, only delay it." – Wesley in The Princess Bride. I decided to come back to Vocal on a very cold and dark night at the end of December. I had been, and still am, convalescing from a horrible staph infection that had gone misdiagnosed for months. This, paired with the increasing challenges of being healthy, making the best choices for my co-parented child, being a wife, and being a director at a new job, was a lot to manage.
By Jazzy 4 days ago in Confessions


Comments
There are no comments for this story
Be the first to respond and start the conversation.