
Exploring Raised Pavement Markers and Their Impact on Road Safety
Road safety is a critical concern worldwide, and innovations like Raised Pavement Markers play a pivotal role in enhancing visibility and reducing accidents.
Road safety is a critical concern worldwide, and innovations like Raised Pavement Markers play a pivotal role in enhancing visibility and reducing accidents. These small but powerful devices are essential tools for guiding drivers, especially during low-visibility conditions. In this article, we’ll explore what Raised Pavement Markers are, their types, how they contribute to road safety, and the adhesives used for their installation.
What Are Raised Pavement Markers?
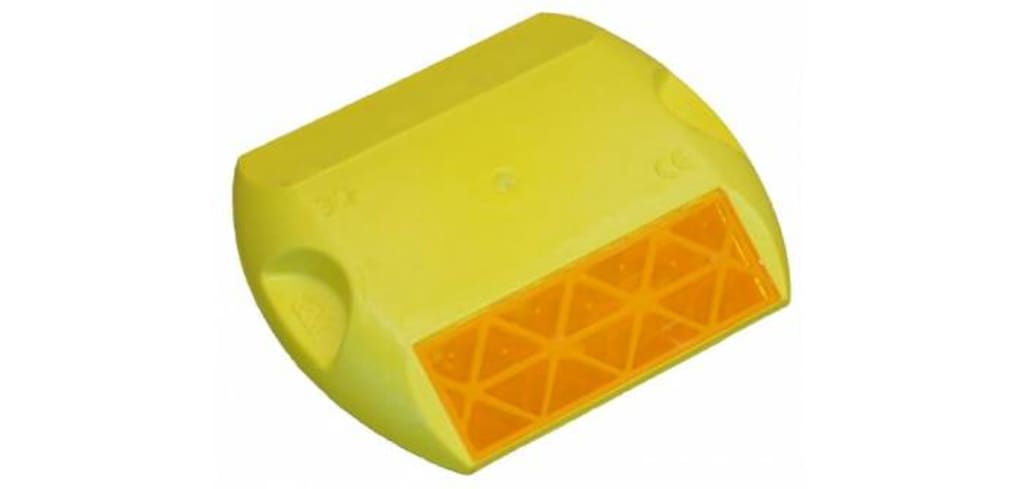
Raised Pavement Markers are durable, reflective devices installed on road surfaces to provide guidance, delineation, and warnings to drivers. Unlike painted lines, which can fade or become less visible, RPMs stand out due to their raised structure and retroreflective properties, making them highly effective both day and night.
Typically made from robust materials such as plastic, ceramic, or metal, RPMs are designed to withstand heavy traffic, extreme weather, and long-term wear and tear.
Types of Raised Pavement Markers
Raised Pavement Markers come in various types, each suited for specific purposes. Let’s break them down:
1. Reflective Raised Pavement Markers
Purpose: Enhance night visibility by reflecting headlights.
Common Uses: Lane marking, intersections, and high-speed roads.
Features: Retroreflective elements made from prismatic or glass beads.
2. Non-Reflective Raised Pavement Markers
Purpose: Provide tactile feedback to drivers.
Common Uses: Temporary road markings during construction zones or low-traffic areas.
Features: No reflective surfaces but often brightly colored for daytime visibility.
3. Solar-Powered Raised Pavement Markers
Purpose: Illuminate roadways without relying solely on vehicle headlights.
Common Uses: Remote roads, accident-prone areas, or where electricity is unavailable.
Features: Embedded LED lights powered by solar panels for continuous operation.
4. Ceramic or Metallic Raised Pavement Markers
Purpose: Indicate road boundaries or serve as rumble strips.
Common Uses: Urban streets, parking lots, and traffic calming zones.
Features: High durability and resistance to damage from heavy vehicles.
How Raised Pavement Markers Improve Road Safety?
Raised Pavement Markers significantly contribute to road safety in the following ways:
Enhanced Nighttime Visibility:
Reflective RPMs shine brightly when illuminated by headlights, making it easier for drivers to follow lanes and navigate safely.
Weather Resistance:
In fog, rain, or snow, RPMs remain visible and functional, unlike painted lines that may be obscured or washed away.
Tactile Feedback:
Non-reflective markers create vibrations or sounds when driven over, alerting inattentive or drowsy drivers to stay in their lanes.
Accident Prevention:
By clearly marking lanes and road boundaries, RPMs reduce the likelihood of collisions, especially at night or in challenging driving conditions.
Guidance During Construction:
Temporary RPMs ensure safe navigation through construction zones, reducing confusion and maintaining traffic flow.
What Adhesive is Used for Raised Pavement Markers?
The installation of Raised Pavement Markers requires strong, durable adhesives to ensure they stay in place despite exposure to heavy traffic and extreme weather conditions. Common adhesives include:
Epoxy Adhesives:
These are widely used due to their exceptional bonding strength and ability to withstand heavy loads. Epoxy adhesives are also resistant to temperature fluctuations and moisture.
Polyurethane Adhesives:
Known for their flexibility and weather resistance, polyurethane adhesives are ideal for areas with frequent temperature changes.
Bituminous Adhesives:
These are asphalt-based adhesives that are particularly suited for integrating RPMs into asphalt roads, providing a seamless bond.
The choice of adhesive often depends on the type of RPM, road surface material, and environmental conditions.
Installation Process of Raised Pavement Markers
Proper installation is crucial for the effectiveness and longevity of Raised Pavement Markers. Here’s an overview of the process:
Surface Preparation:
The road surface is cleaned to remove dust, oil, or debris, ensuring optimal adhesion.
Adhesive Application:
The selected adhesive is applied evenly to the base of the RPM or directly on the road surface.
Placement:
The RPM is firmly pressed onto the adhesive and aligned according to the marking plan.
Curing Time:
The adhesive is allowed to cure, securing the RPM in place. Traffic is often diverted during this period to prevent displacement.
Maintenance of Raised Pavement Markers
While RPMs are durable, they require periodic maintenance to ensure their effectiveness. Common challenges include:
Damage from Snowplows:
In snowy regions, RPMs can be dislodged or broken by snowplows. Snowplow-resistant models are available to mitigate this issue.
Wear and Tear:
Over time, heavy traffic and environmental factors can reduce the reflectivity or stability of RPMs. Regular inspections are essential for timely replacements.
Adhesive Failure:
Poor installation or inadequate adhesives can lead to RPM displacement. Using high-quality adhesives and following proper installation protocols can prevent this.
Conclusion
Raised Pavement Markers are indispensable tools in modern road safety strategies. From improving nighttime visibility to providing tactile feedback, they enhance the driving experience while reducing accidents. Their versatility, durability, and effectiveness make them a cornerstone of roadway design and maintenance.
By using the right adhesives and ensuring proper installation, RPMs can remain functional for years, saving lives and ensuring smoother traffic flow. Whether you’re a road safety enthusiast or a professional in transportation infrastructure, investing in quality Raised Pavement Markers is a step toward safer roads for all.
About the Creator
Keep reading
More stories from Pifiwo Tiervio and writers in Serve and other communities.
How to Use Your Leather Bag Safely for Your Shoulder?
Messenger bags, as a timeless accessory, merge style with functionality. A messenger bag leather vintage is not only stylish but also is a strong companion for you in meeting all daily needs. But wrong handling of any bag is sure to cause strain on shoulders, resulting in discomfort or problems that may even be long-term. To enjoy leather messenger bags without suffering health problems, you need to use them safely and wisely. Here is a detailed guide to help you achieve that.
By Pifiwo Tiervioabout a year ago in Styled
The Impact of World War I: Global Changes and Costs
World War I, often called the Great War, was a conflict that reshaped the political, social, and economic landscape of the 20th century. Beginning in 1914 with the assassination of Archduke Franz Ferdinand of Austria-Hungary, the war quickly escalated due to complex alliances, rising nationalism, and militarism in Europe. Nations including Germany, Austria-Hungary, Britain, France, Russia, and eventually the United States were drawn into a conflict that would last four brutal years and leave an indelible mark on the world.
By shaoor afridi5 days ago in Serve
Rising Tensions: The Current State of Iran-U.S. Relations and Global Implications
Relations between Iran and the United States have been tense for decades, shaped by political rivalry, military confrontations, and deep ideological differences. In 2026, these tensions have escalated again, drawing global attention and raising concerns about regional stability and international security. The situation involves military actions, economic sanctions, and disputes over nuclear development, all of which could have major consequences for the world.
By shaoor afridi3 days ago in Serve


Comments
There are no comments for this story
Be the first to respond and start the conversation.