
The Art of Self-Portraits
A guide to better solo photos when you’re alone
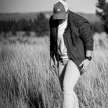
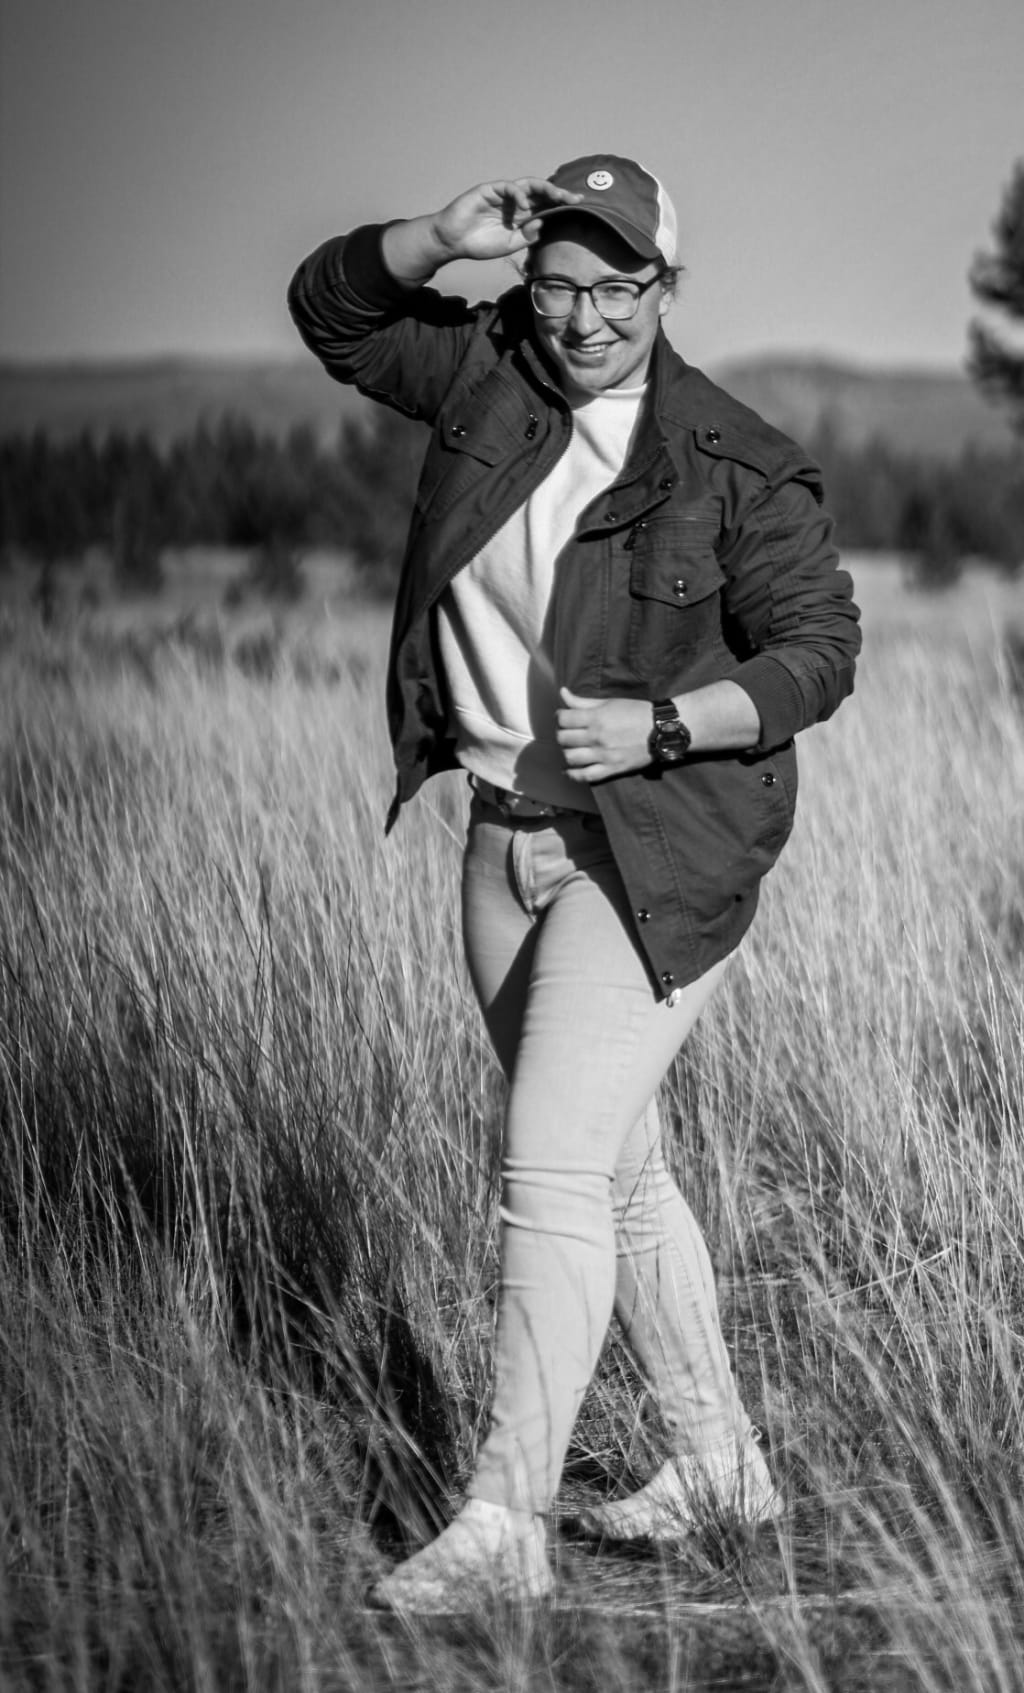
When you find yourself traveling alone and you want to document yourself in a beautiful location or a fun and exciting place, what do you do?
Do you turn your back to the scene, to the beauty, and take a selfie? Or do you dedicate yourself and set up a shot for an awesome photo of yourself?
It’s not always easy and it can be awkward, but believe me, its’s worth it!
First, you should probably have the right equipment. No matter what you are using to take the photo, make sure you have a tripod or something to hold your phone/camera still and in one place, where it is secure and won’t move.
Second, either set your camera to a timer (giving you time to run to your mark and get in the frame) or have a trigger to push that is unnoticeable in the photo.
If you are using a DSLR camera or a camera that allows you to shoot in manual mode, I would highly recommend learning how to use it. It allows much more flexibility in the lighting, focus, and feeling of the photos. It also gives you more “room” to work with if you plan to edit your photos.
If you are shooting with your camera on your phone, don’t worry about shooting in manual mode. Just adjust the focus of the camera so it is focused where you will be standing (or whatever object you want to focus on) and adjust the light meter as needed. (Again, the slightly darker photo will allow for better editing, where the automatically adjusted lighting done by the phone gives less maneuverability)
If you are in a crowded place, and you are using a DSLR camera, set your camera for a slower, or longer, shutter speed. For example, if it’s fairly crowded, I’d set it for about 3-4”, adjust as needed. Just make sure to stand as still as possible in the shot so you don’t get the motion blur. By doing this, you will usually eliminate anybody else from your shot. Resulting in you being the sole focus of the photo.
If you have an IPhone, you can take a photo, making sure it’s in Live Photo mode, and set it to be a “long exposure” shot. This will also help remove others from the shot. Just remember to stay still!
Now, if you do have a DSLR camera, using a ND filter will definitely help if you are in a location where it is fairly bright outside or really sunny. The filter will dim down the photos so when you do the long exposure shots, you won’t just get a bright white photo, but rather a photo swimming in detail and exposed just right in the lighting department.
Adjust your settings on your camera(DSLR manual mode). Set the ISO to as low as possible while still keeping your photos light enough to see the details. You’d don’t want your photos super dark. Now, adjust your aperature to as low as possible. Normally I’d set it to around 3.4 when it’s just me in the shot, and I don’t want the background stealing the focus.
If you do want your background in focus, as well as you, use a higher aperature. Keeping in mind that this will also darken your image, as not as much light will be coming through the lens.
None, adjust your shutter speed. As previously stated, in a crowded place, use a lower shutter speed if you don’t want others in your shot. If you are in a location where you have some privacy, setting your shutter speed to about 1/250 is usually good, but adjust as needed. Now, keep in mind that the higher/faster your shutter speed the less light comes in, so your image will be darker. And the lower/ slower your shutter speed the more light comes in so the brighter your picture will be.
Take a few practice shots to get your settings right, and then jump into the frame!
Now, take your time! Don’t rush it! You are on an adventure and deserve an amazing photo! It may take several shots before you get one that you like, so don’t be discouraged.
It may also seem silly and awkward to be running back and forth from your camera to your mark, but don’t let that get in the way of your shot! Dedication makes awesome results!
Be sure to keep an eye on your belongings and equipment if you are in a crowded place. Especially when traveling alone. Make your personal purse or backpack fit into your shot. Use it as a prop. Trust your instincts and be careful!
Now go take your shot! Share your beautiful smile with the world (or just family and friends) and make your solo photo a photo to remember!
About the Creator
Keep reading
More stories from Darcy Lance and writers in Photography and other communities.
Why Printed Photographs Still Matter: The Art and Value of Preserving Memories in Print
In a world where most photographs live on phones, laptops, and cloud storage, it is easy to assume that printing pictures is a thing of the past. Yet something meaningful gets lost when memories stay locked inside a device. A photograph printed on high quality paper carries a weight and warmth that no screen can fully replicate. It can be held, shared, framed, and passed down through generations.
By The Iconabout 3 hours ago in Photography
Author’s Advice
If you would’ve asked me 20 years ago did I know I’d become a writer and an author, I would’ve said “nope, ain’t happening”. As fate would have it I did become an author and I can honestly say I’m loving it so far. It really does feel good to be a writer. I’ve learned a lot on this journey and I feel like with even me being as new to this world as I am, there’s some wisdom I need to share with every other aspiring author.
By Joe Patterson4 days ago in Journal

Comments
There are no comments for this story
Be the first to respond and start the conversation.