
Stop! Don't Trash Those Memories
Two ways to save those priceless snapshots.
Before the pandemic, we used to take on average four trips a year. Vacation trips and others for work. On all those trips, we would take time to explore.
It’s been a year. No traveling. No exploring. The perfect time to organize all those vacation photos.
Photos bring back a ton of great memories. One big problem though, some were either too dark, over exposed, blurry and so on.
I used to haul around a heavy Nikon SLR camera. Now my camera is an iPhone 6S Plus. It’s hard to believe that my iPhone’s camera is a robust piece of software.
Top features that I love:
• 12-megapixel camera
• Live Photos with stabilization
• Autofocus with Focus Pixels
• Optical image stabilization
• Exposure control
• f/2.2 aperture
Before organizing my photos, I edit them. Editing photos, lots of them, can be tedious. Finding ways to streamline the process is crucial.
I use Photoshop. If you’re familiar with the software tools, then the following step by step process will be easy to follow.
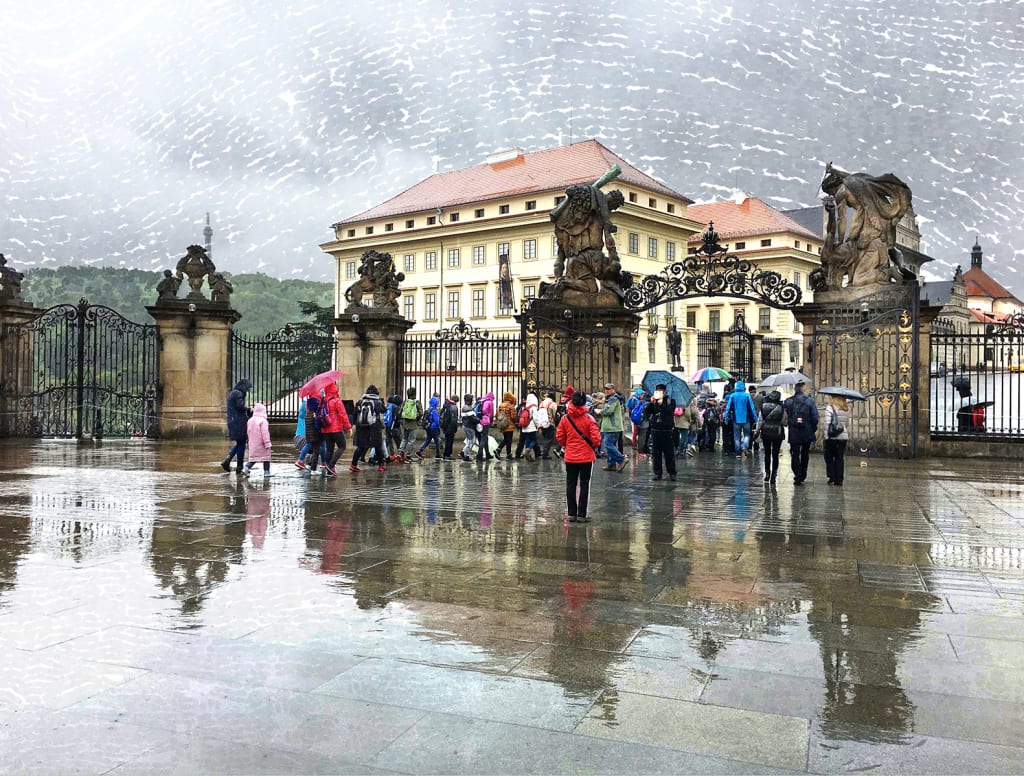
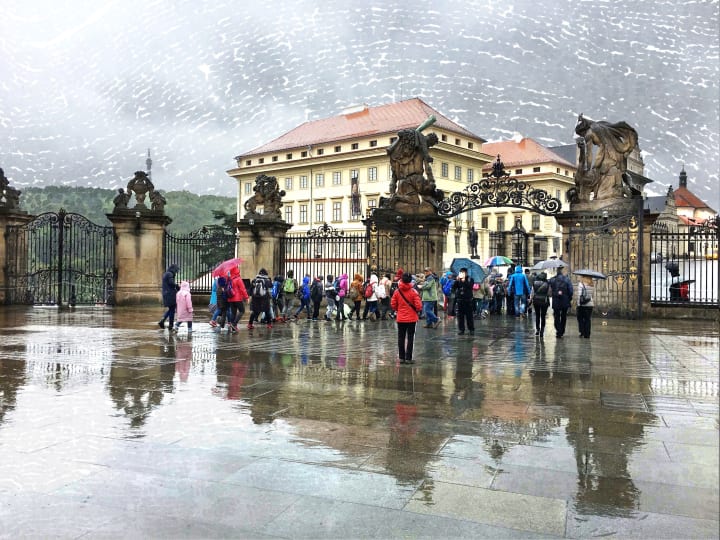
The first photo is the original, unedited shot of the entrance to Prague Castle. It was a cloudy and rainy day. Bitter cold. April temperature was around 44°F. The light was a diffused gray tone. The photo came out too dark.
I think it captured the ambience, a gloomy feel overall. It reminded me of the sombre Dutch paintings of the 17th century.
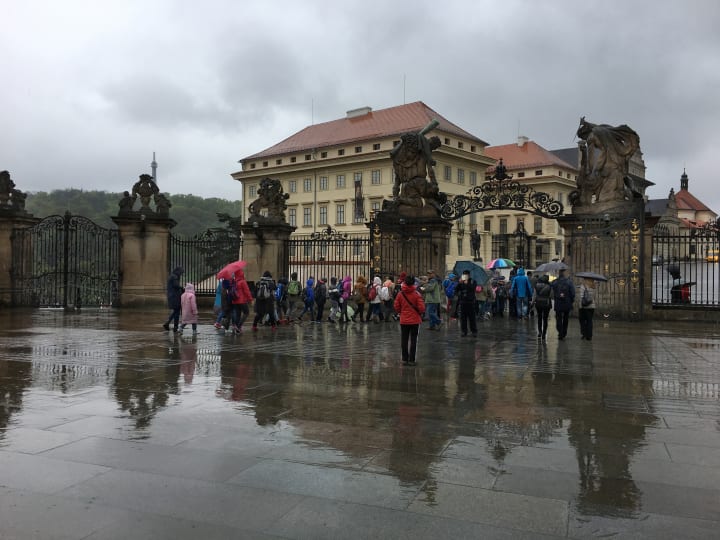
Photo file size and dimensions:
4032 px x 3024 px
RGB
72 px/inch
Scale 100%
I edit based on how I’ll use the final product. For this shot, I want to use it on a web page. It will also work as a printed postcard.
For the first edit, I applied an oil effect. This is done without using Photoshop Paint effects.
The process:
Import image into Photoshop. The background layer is locked.
1. Duplicate the layer
2. Image to Adjustment to Shadows/Highlights. Shadow amount below 35%. The highlight was kept at 0.
3. Image to Adjustment to Levels. Use the eyedropper tool to select a white point.
4. Image to Adjustment to Brightness/Contrast to adjust the contrast.
5. Merge all the Adjustments layers and Layer 1
6. Duplicate Layer 1
7. Filter to Other to High Pass. Keep radius at 2 and Blending mode to Overlay.
8. Merge Layers 1 and 2
9. Now to Filters to Sharpen to Unsharp Mask. Keep the amount below 150, the radius between 2 and 3, and the threshold at 0.
At this point, the image is ready. Time to apply the oil effect.
10. Filter to Stylize to Diffuse. Choose Anisotropic and click OK.
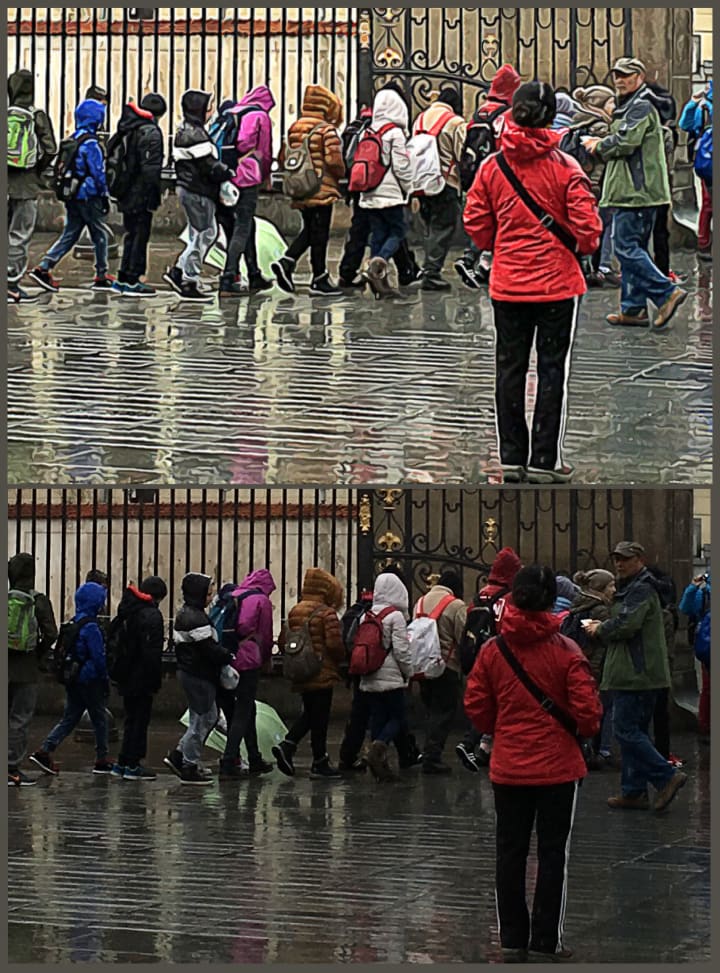
These two shots below are of the original and edited snapshots magnified 200%.
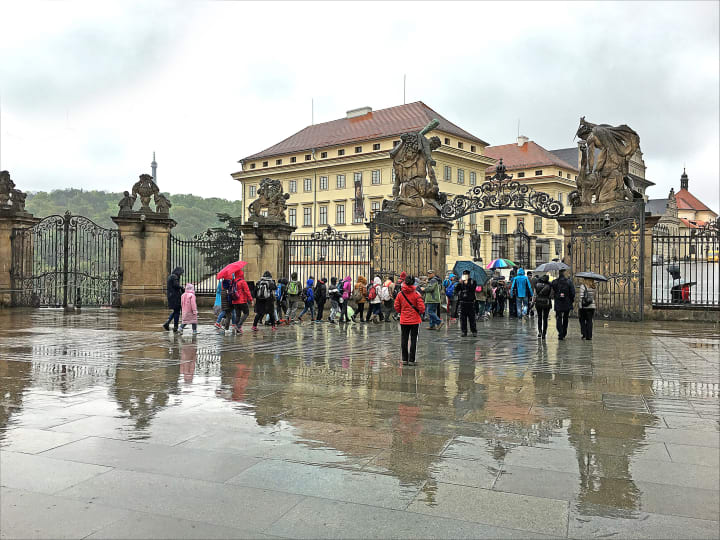
For this last edit, I used a combination of tools from both Photoshop and Procreate. First, in Photoshop, I adjust the Levels, then the Brightness and Contrast.
Then I transferred the .jpg file to Procreate. I could have transferred a .psd but that would be a huge file.
If you aren’t familiar with Procreate, it’s a raster graphics editor app. According to Procreate.art, ‘Procreate is the most powerful and intuitive digital illustration app available for iPad. It's packed with features artists love, and it's an iPad exclusive.’
I had also imported third party brushes into the app. The ones that I used for this one was from a set of 24 brushes ‘Impressionism Brushes For Procreate 5+’ offered on the creativemarket.com site.
There are tons of Procreate brushes on this Creative Market site.
Before using the brush, I duplicate the layer. Lock the background layer.
Using the brushes is easy. First, create a clipping mask layer. Sample the sky color, then paint on the mask layer.
For the wet ground, I used the same brush, but changed the color to match the water puddles. If I’m not happy with the finished work, I can always delete the mask layer and create a new one.
Once I’m happy with my work, I save the file in .psd format. I export in .jpg when I need to share on social media, blogs and websites.
About the Creator
Salote T Faotusia
Live fully in the moment. That's the secret, to living a full life.
Keep reading
More stories from Salote T Faotusia and writers in Photography and other communities.
Leavie Scott
ORDER HERE Chicago – A Radiant Urban Masterpiece by Leavie Scott Arts & Culture Review – Feature Story In his striking new work Chicago, photographer Leavie Scott captures the soul of the Windy City with a level of vibrancy and emotional resonance that is impossible to ignore. The image immerses viewers in a dazzling skyline bathed in mesmerizing tones of purple, pink, and gold—a palette rarely seen in traditional urban photography and one that instantly distinguishes Scott’s artistic voice.
By Organic Products 4 days ago in Photography
Curious Photography Tips Every Beginner Should Try
Have you ever wondered why two people using the same camera can produce completely different photos? The answer often lies in how well the photographer understands the camera itself. For beginners, cameras can seem filled with confusing buttons, dials, and settings. But what if those settings are actually the key to better photos?
By Craig Spiesman2 days ago in Photography
The BAFTA Awards
By now, in a stunning departure from recent years, most of the world is aware of what happened at the BAFTA film awards. Social Media Headlines will tell you the bare bones: that John Davidson, a Tourette's Syndrome advocate, shouted a racial slur at two Actors of Colour, Michael B Jordan and Delroy Lindo.
By Natasja Rose3 days ago in Psyche


Comments
There are no comments for this story
Be the first to respond and start the conversation.