
Simple Edits on Lightroom
Using Adobe Lightroom to Enhance your Photos
Photo editing is an art medium itself, where images can be rendered and turned into something completely different from the original shot. I admire the creativity and skill put into photo processing, and everyone has their own editing style.

My photography is focused around nature, architecture, and travel, and my goal in editing is to fix the lighting and colors to improve the image in a natural way. To do this, my favourite photo editing program is Adobe Lightroom.
Whether you’d like to improve your phone camera images or edit high resolution photos, Lightroom is a strong editing program. The free smartphone app is incredibly useful and can produce high quality edits. I used to do all of my photo editing through my phone, but now I also use the desktop program Adobe Lightroom CC, which I pay for through a monthly subscription. I can open, edit and save files between my phone and computer programs. All of the photo examples I'm showing in this article were on my phone and could be done through the free Lightroom phone app.
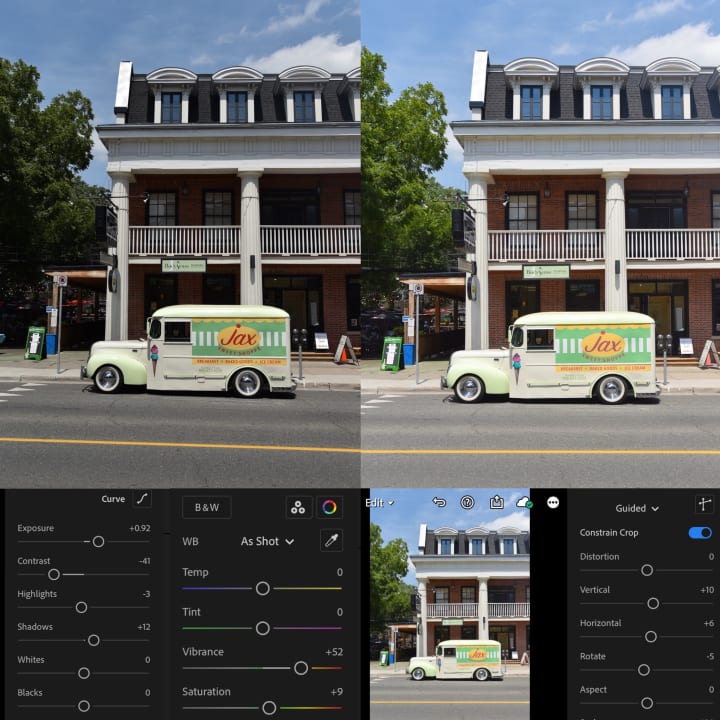
There are so many great tutorials available online on how to use Lightroom, so instead of explaining each function in depth, in this article I will be demonstrating my favourite features using my own photos. Each example shows the original and edited photos, along with the settings that produce the final version.
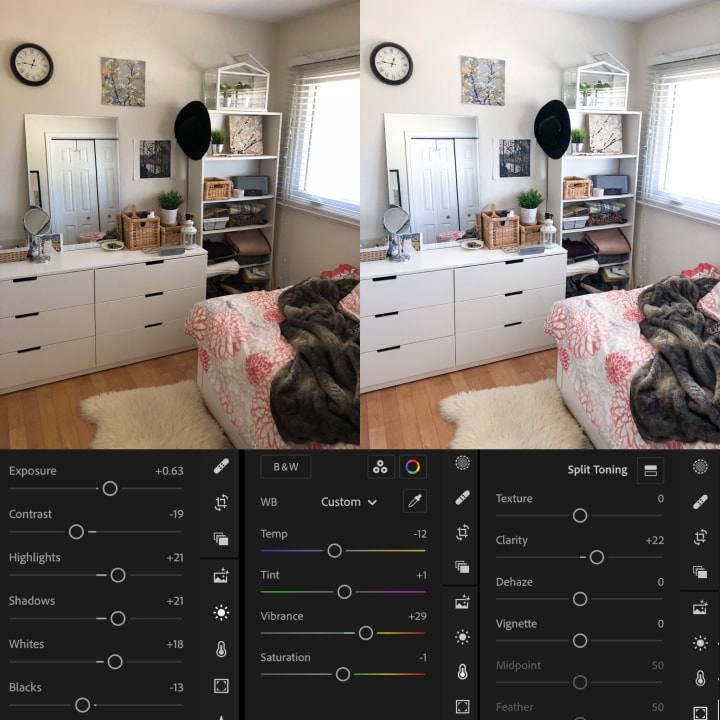
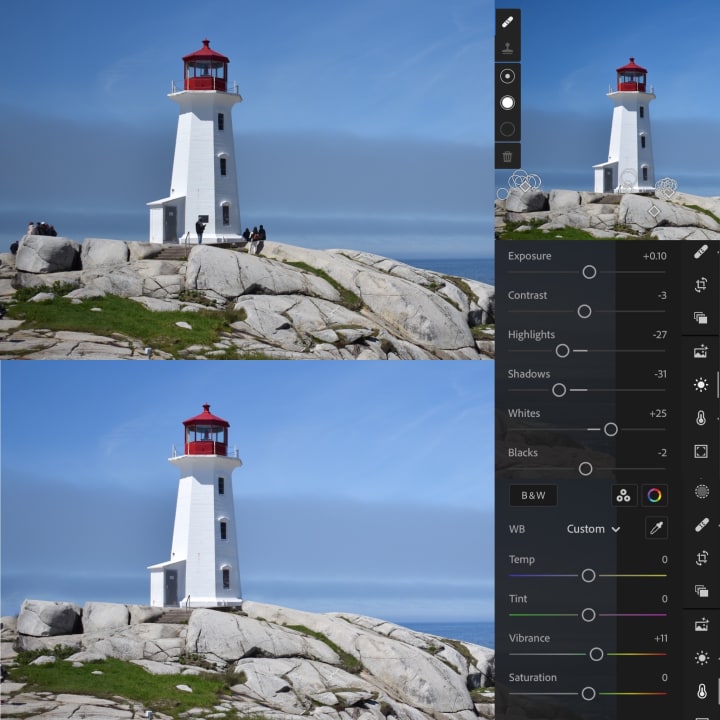
Brightening photos is one of the easiest things to do. It usually involves increasing exposure, contrast, shadows and whites.
Yellow indoor lighting can be fixed by moving the temp slider to the cooler blue side, or going into the color mix settings and desaturating yellows and oranges individually.
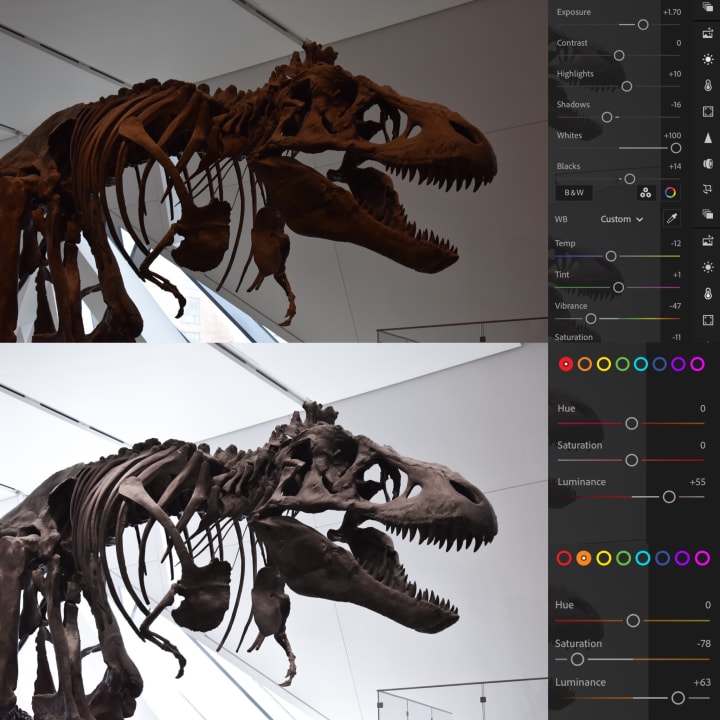
With this dinosaur photo, I changed the saturation and luminance of the orange and red colors to be more neutral. Not all poor lighting is fixable through editing. If the original photo is too dark, increasing the brightness will just give you a poor quality, grainy image. It's best to take photos in soft, natural light to get the best exposure and colors.
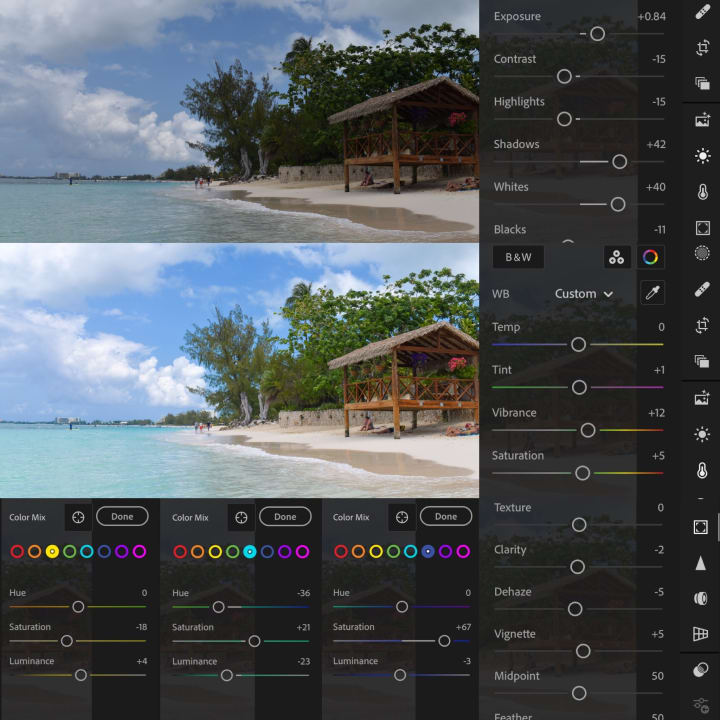
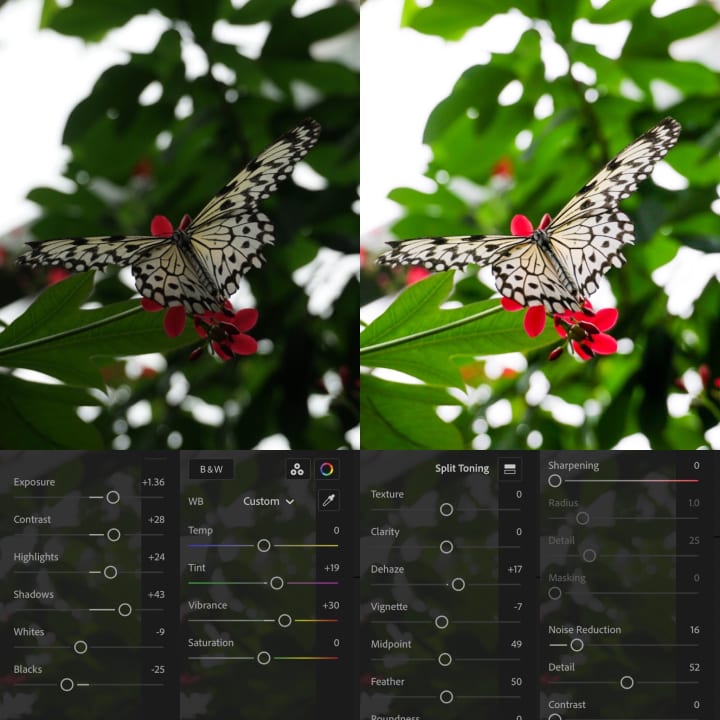
The color mix feature is great for isolating and fixing individual colors. In this beach photo above, I could increase the saturation of the blues in the sky and water.
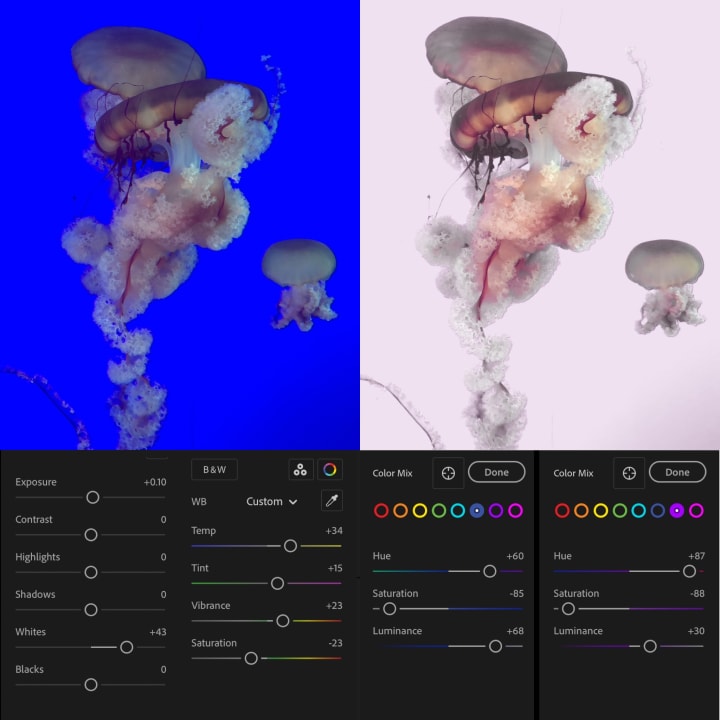
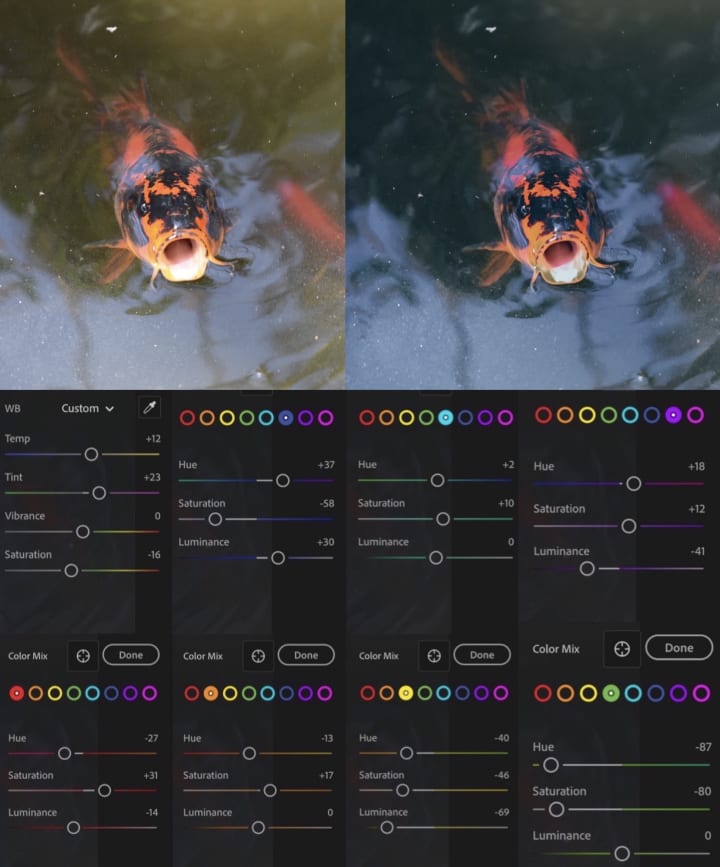
In the jellyfish photo above and koi fish photo below, I was able to change the background colors completely using color mix.
Major color changes don't work on all photos, and creating these final versions took some trial and error.
Darken photos by adding contrast, deepening blacks, and adjusting single colors. This can help washed-out photos look more vibrant.
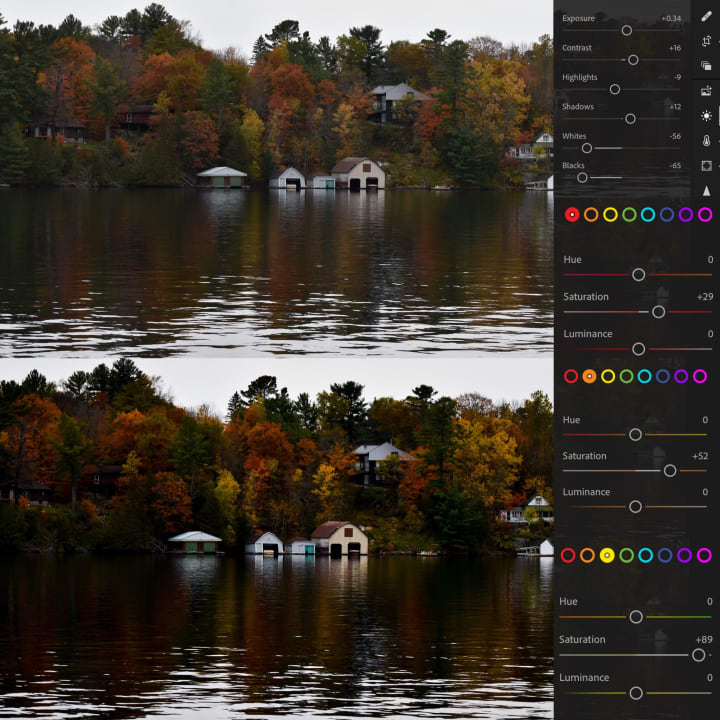
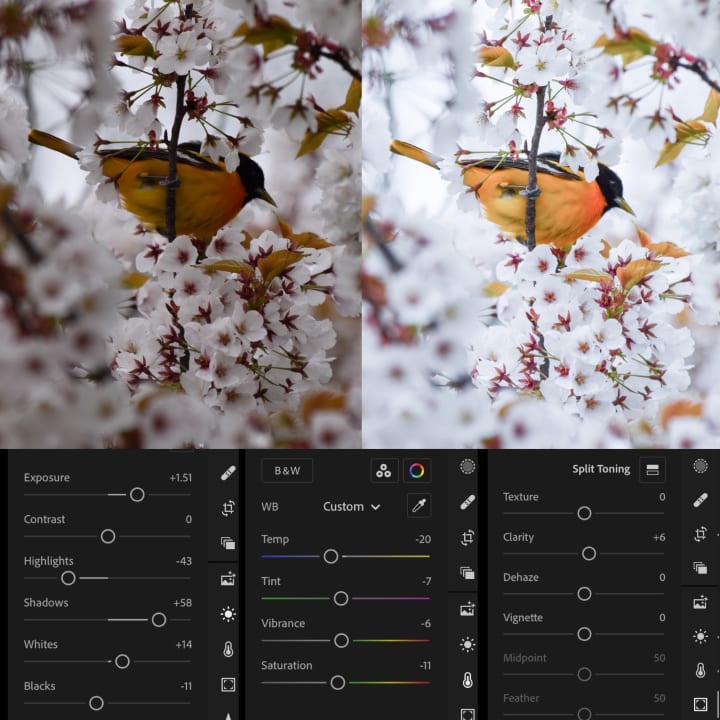
In the lake photo above and the coyote photo below, I increased contrast and darkened black tones. I wanted to exaggerate the fall colors by increasing the saturation of yellow, red and orange.

In this coyote photo I also moved the temperature (Temp) scale slider to the warmer yellow side. The original image on the left has cooler blue tones, and my final edited image on right has warmer yellow/orange tones.
Removing small objects is possible through the healing feature, and it can give you decent results if you're careful, though it is fussy. There are better ways to make these kinds of edits through other programs, but this works if you need it.
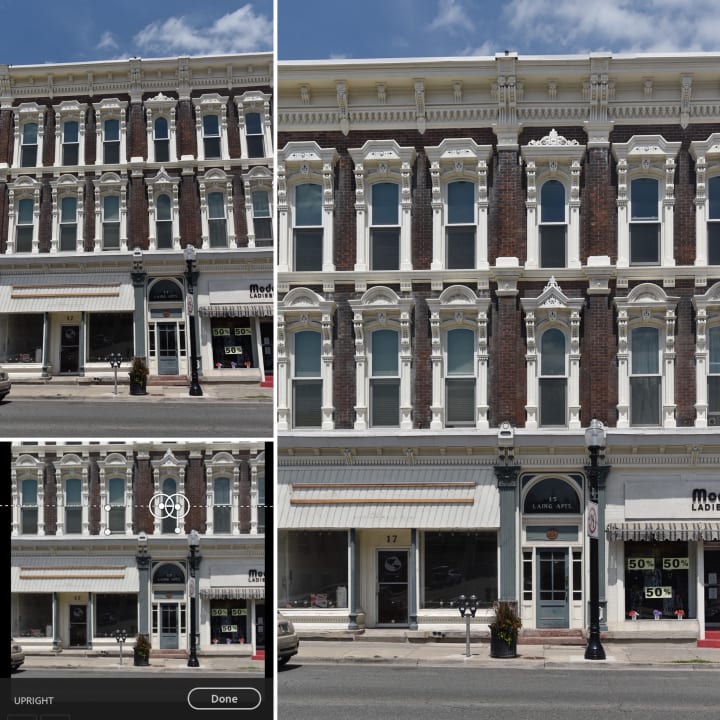
Cropping and straightening images is easy and important for getting the photo framing perfect.
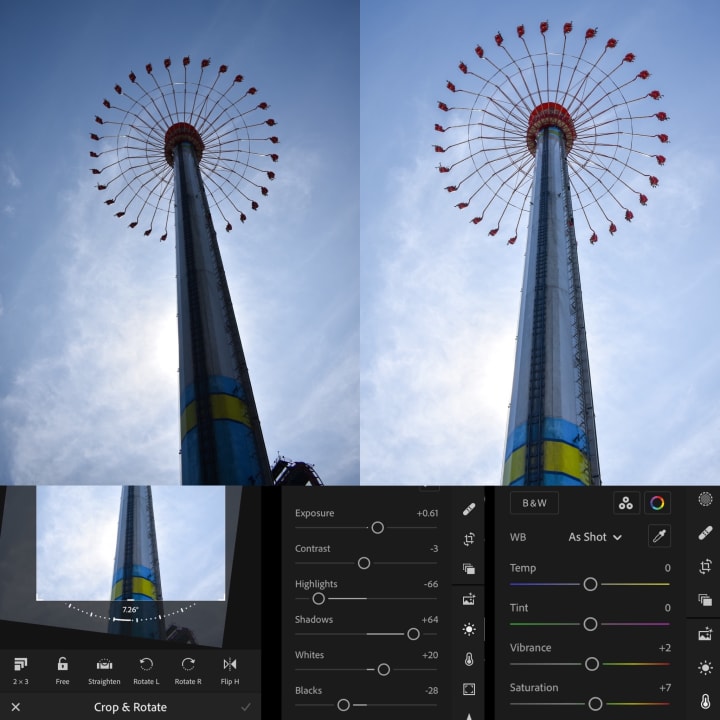
Distortion is when straight lines appear bent or disproportionate in the image. The geometry feature in Lightroom can straighten objects in the image, and this can make dramatic changes, where the final edited version looks like a completely different photo.
A Few Things to Remember
Photo editing takes a lot of trial and error. There is no set formula for editing, but this program is easy enough to try out yourself and see what kind of editing style you like best.
You can't fix everything through editing, it starts with the photo. Some of my bad photos turn out unexpectedly well through editing, while other photos I can't seem to get right no matter how much time I spend on them.
Photo brightness, contrast and colors appear differently depending on the type of device and screen you're looking at. Photos also tend to turn out differently when printed, depending on the quality and types of printer, ink and paper.
Lastly, there are many more useful features on Adobe Lightroom that I didn't write about in this article, like using the tone curve, color grading, selective edits, and presets. There are many great resources online to learn how to use these features. I hope this article was helpful for anyone who wants to start editing photos, or if you already have Adobe Lightroom then you got to see how I like to use this program.
Good luck with your photo editing creations!
About the Creator
Keep reading
More stories from Joanna and writers in Photography and other communities.
The Photographer's Code
You decide to visit your local park. You have become a close confidant to the homeless people who gather there most days. While talking to Cleo and Reed, you notice a new face in the crowd. It belongs to a stick-thin, middle-aged woman. She has her hand on her forehead as if taking her temperature.
By Paul Aaron Domenick5 days ago in Photography
Becca
"Everything is so... flat." Denille said stupidly as she looked around her new neighborhood. She looked around at the muted desert where even the smallest sign of life seemed to have given up. The plant life was shrubs that were half cooked by the heat and where there should have been a lawn, a mess of white rocks laid glistening in the sun. Even the sky looked stretched thin, like the sun had ironed it smooth. She’d moved from Riverside, where at least there were hills, but here in Barstow, everything felt baked and brittle.
By Sara Wilson8 days ago in Fiction


Comments
There are no comments for this story
Be the first to respond and start the conversation.