
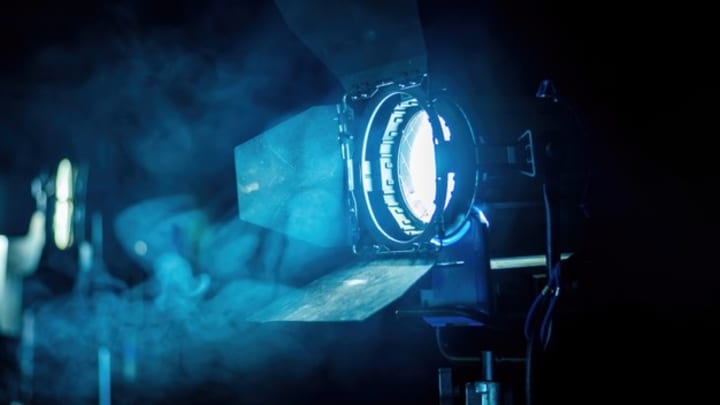
Requisite Photography Tips for the Beginners.
Photography is an enjoyable and interesting process. It's much easier than ever to start as well. The times of having to carry around a darkroom or waiting for hours to snap just one photograph. You can dive into the darkroom and begin snapping away at anything that sparks your curiosity.


Photography is an enjoyable and interesting process. It's now easier than ever before to begin as well. There are no longer the times of carrying around a darkroom or waiting for hours to take just one photograph. You can dive into the darkroom and begin snapping away at whatever piques your curiosity.
Quick-fire Photography Tips
• Learn the entire rules so you won't be breaking them later.
The rules of photography are important as they serve as a base for more advanced tips and tricks in photography later on. Start by learning the rules so that you can have greater control when you break them later. Learn along the way. Don't let that hinder you from acquiring a camera.
• First, focus and expose and frame your shot.
An unnaturally exposed or blurry image is not usable, and however, those that are not properly framed can nevertheless be preserved. It is essential to focus and expose the subject properly before changing the frame.
It happens most often in scenes with extreme darks and lights within the same scene.
• Focus on your eyes
The eyes always draw us in photographs because eyes are the natural focal point we are drawn to. When you take portraits at any aperture, be sure you get the attention of the eyes. When your eyes are properly focused, both you and your subject will be more likely to view the photograph to have been properly captured.
• Learn from your mistakes, and then you can learn from them.
More mistakes that you commit, the quicker you'll be able to improve your photography abilities. Every professional photographer began without a basic understanding of what's on a camera.
The true value lies in learning from mistakes to enhance your abilities. Therefore, try a method or style that you've never tried before, and be prepared to make a few mistakes throughout the process.
• Perfect exposure trifecta
The correct exposure for photography is about making sure you balance three aspects, such as the shutter speed and aperture and ISO settings. It is possible to begin by shooting using priority or automatic mode; however, to control everything and shoot using manual controls for your camera, you'll need to be aware of the connection between these three elements that directly impact the quality and exposure of your photo.
ISO It is pronounced "eye-so," this is (strangely) an acronym for International Organization for Standardization. The ISO is the degree to which the film or sensor will be in the presence of light. In darker conditions, you'll require greater than or higher ISO settings to take in light, like the 800 and 1600 ISO, and higher settings usually bring more noise or grain in the photo.
Aperture The term is the measurement of the opening inside the diaphragm in the lens. Fewer numbers signify a greater opening and a shallower depth of field for your images. The larger numbers allow in less light, and however, they let more of your images appear sharp.
Speed of shutter The speed of your shutter is the time the shutter of your camera is open, as well as the length of time your film or sensor is subjected to sunlight. Faster speeds can "stop" motion, while slower speeds allow more light and record motion blur.
• Always be prepared
Prepare yourself like a boy scout. And always be prepared to snap a photo. Most Digital SLRs offer almost instantaneous starting times, and they require just a little battery to keep your camera powered up.
Make sure your camera is set to either semi-automatic or fully automatic modes for unplanned photos before your subject takes off or drives away. It is possible to return to your preferred mode whenever you have enough time to adjust to the stationary subject. Sometimes, you'll only have just a few seconds to get the perfect image.
• Make use of a larger aperture for portraits to let your subject stand out.
Make sure to choose an aperture approximately f/2.8 up to f/5.6 to create a background that makes your subject appear more blurred. It can eliminate distracting backgrounds and help the subject pop out. It is possible to experiment with larger apertures, but you must ensure that you keep your subject's gaze in focus.
• Make sure that your photos aren't blurry by matching shutter speed and aperture focal length.
If, for instance, you're using the 50mm lens, you must make use of shutter speeds of 1/5 seconds or more to make handheld pictures and ensure they are sharp. Longer lenses weigh more and are more difficult to maintain in place, making the shutter speed quicker to keep the camera shake at bay.
• Cut and straighten when editing.
It is recommended to straighten your images by looking through the camera's viewfinder before taking the image. It isn't easy to make this right on the first attempt.
The viewfinder or the screen preview is small compared to full-screen editing, and you could notice that it requires adjustments when you look at it on a larger screen. Rotate your photos using the post-production software and then crop out any gaps.
• Avoid camera shake
A camera shake can make a photograph inaccessible. Increasing your ISO and extending your aperture will allow for faster shutter speeds, which reduces the likelihood of blurry images. However, this isn't the only option when trying to preserve other aspects of your photograph.
Start by taking the steps you can to limit camera movements. It begins with learning to correctly hold the camera.
Utilize one hand to hold the camera's body while using one hand to hold the lens. Keep your elbows pressed against your body so that they can rest their bodies on. Keep your breath in the exact moment before you press the release button. It is also possible to help your body remain upright if there are trees, walls, or any other solid object and the flooring to lie on. Certain situations that require longer exposures may need the assistance of tripods. Tripod.
• Keep your eyes alert while looking through the rangefinder.
It has several advantages. Photographers who shoot portraits will find that their subjects will connect with you via your eyes. In the absence of this, some people may feel uncomfortable, as if you're hiding behind your camera.
Also, keeping your eyes open will allow you to observe what's out of your frame so that you know the time when your subject will be in the frame. It is essential when capturing wildlife, sports or any other actions shots.
• Learn how to utilize exposure compensation
Sometimes you'll capture photos that don't adequately expose your subject, and they are either way too bright or too dark. It could be the result of several factors that include what areas of the scene assess for exposure, and how different in brightness dark and light areas are in your photo.
It is easy to correct these images by applying the exposure compensation in-camera to ensure that your subject looks exactly as it should.
• Photography the things you love
Concentrating on the things you enjoy can make photography more enjoyable. If you're obsessed with animals, nature, people, or something else completely, begin by taking photographs of it.
It will keep you interested in photography and enable you to conquer learning hurdles without working hard.
• Use reflections
There are a lot of unusual opportunities to be found if you look to the areas that most people overlook. One of the things you should keep an eye out for is reflections.
You can spot them following (or in) stormy weather, on puddles in lakes, and even in swimming pools. The water isn't the only source, and try mirrors, large glass windows, or chrome-plated fixtures.
• Make use of your photography "golden hour."
Lighting is crucial as it affects the image's shape, texture, contrast, and shadows that you can see in your photographs. The golden hour spans an hour or so just after sunrise or shortly before sunset.
The long shadows and the diffused light that is available during these times provide more pleasing lighting. Because the illumination is diffused, you're less likely to blow out highlights or lose details in shadows that are hard to avoid when you're using the bright light that's available most of the day.
Its golden hour also will calculate the time of golden hours for you based upon the location of your home.
• Purchase a reflector at a bargain price to dramatically increase the options available to you
Reflectors can allow you to better control the light that hits your topic. You can also use foam core boards at an art store, which is coloured white one way and black on the opposite side for less than $5.
Fabrics that fold can be offered at photography stores. The black side allows you to limit or block light sources, and the white side is used to create shadows. Both options offer more control over your positions and angles instead of being restricted by the primary light source. If you are experiencing too stark contrast in your image, use a reflector to lighten shadows on your subject. Set the distance of the reflector to your subject to regulate the brightness that the light fills.
• How to capture fireworks
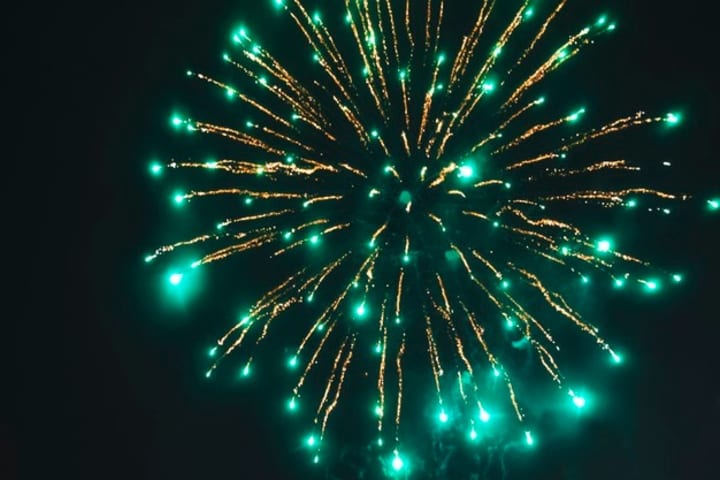
The fireworks are a spectacular sight and sure to be one that's captured on film too. Prepare and get your setup in advance to improve your chances of getting excellent outcomes. Follow this guideline:
1. Find out which area the firework show will take place in to ensure that you are in the best spot. The majority of fireworks shows aren't long; therefore, if you must move around during the show, you may miss it!
2. Maintain the camera as quiet as is possible. Utilize a tripod and a cable release to activate the shutter without having to touch the camera.
3. Make sure your camera is set up to ISO 100 for a clean look. The fireworks are bright. Therefore, you should also consider using an aperture that is relatively small, around 8 mm or less.
4. Release the shutter just before the fireworks begin to explode, and then release the shutter when the fireworks have faded. Examine your photo and alter your framing and aperture as needed to take the next photo.
• Portrait photography tips

If you're beginning your journey, likely, you do not have a studio or extravagant light equipment.
The best solution is to utilize a window light. Switch off all lighting in the room, and walk towards the window with curtains to experiment with diffusing the light.
The switch to turn off all lights will turn off the flash that your camera has too. Be sure to focus on the eyes, ensure that your subjects feel relaxed, and take a shot!
• Tips for photography with pets

Pets have a lot of personalities, and capturing this on camera may require different methods depending on the pet's individual needs. Dogs are particularly prone to mirror your mood. Therefore, you must be mindful of your actions based on the picture you'd like.
Certain pets are energetic, so it's a shorter zoom lens could be helpful when you're stuck against the wall. Photograph in the shutter priority mode and move between 1/125 and 1500 seconds depending on the pet. In addition, just like human subjects, focus on the eyes and keep them sharp.
• Tips for taking landscape photos

Landscape photographs typically capture large areas, and the most popular type of photo you'll come across are landscape photographs in nature. However, this can apply to urban landscapes as well.
They can trigger powerful reactions due to what they say or images they depict. However, you must first ensure that you're equipped with the right equipment and techniques.
1. Think about the image you're trying to create. It will tell you the best time and place to be to get those results.
2. Choose a proper lens. For sensor cameras that are cropped, A telephoto lens of about 10-200mm will give you the coverage you require for landscapes. A stabilization feature can help as well.
3. Adjust your aperture. Most photographers like having everything on the scene in sharp focus as it is more appealing when it comes to this kind of photography. You should use an aperture that is around the f/16-f/22 range to get this effect. You might need to adjust according to the distance you are from the subject.
• Tips for capturing the perfect party

It is possible to have fun at parties and take amazing photos without having to fiddle on your camera all night. The majority of parties are indoor or in dark environments. Select the large zoom lens with the broadest possible range of 24mm, ideal for pictures in spaces with limited space and group shots.
Beware of using the built-in flash as it can create unflattering images. Use an external light source and a mounted flash that can bounce off walls and ceilings.
• How to paint using light

Painting or drawing using lighting in photography can be exciting and fun, and it's simple to convince others to take part with you.
People generally like it since it's very similar to drawing. It's possible to get quite imaginative using this technique, based on the number of people drawing and the light source. Follow these steps:
1. Choose a dark space or wait until the sun goes down and switch off all nearby lights. You'll require a source of light like a flashlight to draw with.
2. Make sure your camera is set on the lowest ISO, typically 100, 200 or even 300. You can set the aperture at 2.8 to 3.5. You can set a timer on your shutter for 5-15 seconds, or you can use “bulb" to draw the "bulb" function and have another person keep the shutter release for whatever time you'd like to draw.
3. Release the shutter, then turn on your flashlight and begin drawing! You can swiftly move it around or go slow and draw in precision, as you would draw on paper. Check your drawing, and you can alter the aperture or shutter speed as required. After a few adjustments, you will get it right, and you are ready to draw anything using the flashlight!
Author Bio:
Ab_camergraphy takes stunning photos with DSLR lenses and post-processing to create a unique imaging effect. Ab_camergraphy was awarded and recognized through Palanpur Vidyamandir Trust competition TASVIR-2016' Best Photographer of the Year'. Created an Instagram following of more than 1500 followers to help freelance businesses. Assisted photographers to capture numerous live events, including sports games, concerts, Weddings, Landscape and wildlife, portraits.
About the Creator
Ab_cameragraphy
Ab_camergraphy captures stunning photographs using DSLR-lenses and Post-processing to create unique digital imaging effect. And get Awarded & Recognition by Palanpur Vidyamandir Trust competition TASVIR-2016' Best Photographer of the Year'.
Keep reading
More stories from Ab_cameragraphy and writers in Photography and other communities.
10 Portrait Photography Tips for Beginners.
Have you ever questioned why the foremost straightforward portraits shot by skilled photographers square measure continuously a lot of gorgeous than your own? Because it seems, portrait photography is on the far side, simply knowing how to take photos of individuals.
By Ab_cameragraphy4 years ago in Photography
The Photographer's Code
You decide to visit your local park. You have become a close confidant to the homeless people who gather there most days. While talking to Cleo and Reed, you notice a new face in the crowd. It belongs to a stick-thin, middle-aged woman. She has her hand on her forehead as if taking her temperature.
By Paul Aaron Domenick6 days ago in Photography
Thief In The Night
To the thief in the night that took and replicated what once was mine: Honestly, I feel kind of bad for you. It’s funny, because we hardly know each other. I only know of you through the magazines you’ve written and the broadcasts you have televised in the past — as well as through the public mentions of you from your show business connections there.
By Snarky Lisa7 days ago in Humans


Comments
There are no comments for this story
Be the first to respond and start the conversation.