
Mastering Image Editing with PhotoCut: Crop, Rotate, Color Correct, Convert, and Compress Your Images
Mastering Image Editing with PhotoCut: Crop, Rotate, Color Correct, Convert, and Compress Your Images

Image editing is indeed of utmost importance in the present day and age. A professional photographer, graphic designer, or content creator would employ the skill, while an amateur would use it for personal purposes. Tools such as PhotoCut help this endeavor by incorporating functionality that allows easy cropping, rotating, color correction, conversion, and compression of pictures. The present write-up is a one-stop shop for everything related to these basic image-editing functions, their importance, and how to work with PhotoCut to maximize the outcome.
Create cute chibi art with PhotoCut’s Chibi Maker.
Cropping Your Images with PhotoCut
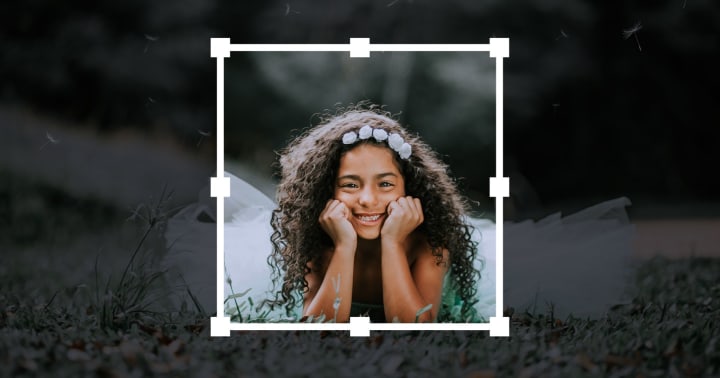
Cropping is the one-and-only editing method that applies to an image to eliminate irrelevant portions, provide a better view of the subject, enhance composition, and tell a more effective visual story. Crop images to help tell a story without distractions or to optimize for certain formats.
How to Crop Using PhotoCut
- Open the image in PhotoCut’s editor.
- Select the crop tool.
- Make a custom crop frame or select one of the presets: 1:1 (Instagram), 16:9 (YouTube thumbnails), or 4:3 (standard photography).
- Crop and save the image.
Best Practices for Cropping
- Follow the third rule to keep the composition balanced.
- Avoid tighter croppings, particularly in portrait work, so as not to appear awkward.
- Ensure that any cropped-out image is at a high resolution to maintain clarity.
- Throw away all distracting elements in your picture using cropping, enhancing the focus on the subject.
Rotating Your Images with PhotoCut

Rotating an image tends to correct any errors regarding orientation, gives the option to straighten a tilted horizon, or sometimes ends up providing more dynamism in a visual effect. Some images that were captured at an angled perspective need rotation for better framing.
How to Rotate Using PhotoCut
- Upload your image to PhotoCut.
- Select the rotate tool from the toolbar.
- Use the preset angle for rotation (90, 180, or 270 degrees) or adjust it with the slider for more precise angles.
- Apply the rotation and save the image.
Best Practices for Rotating
- Make sure straight lines are adjusted accurately by using the alignment grid.
- Steer clear of over-rotating since this might obscure crucial features.
- For a finished look, if necessary, combine cropping and rotation.
- Experiment with slight rotations for creative perspectives in artistic photography.
Color Correcting Your Images with PhotoCut
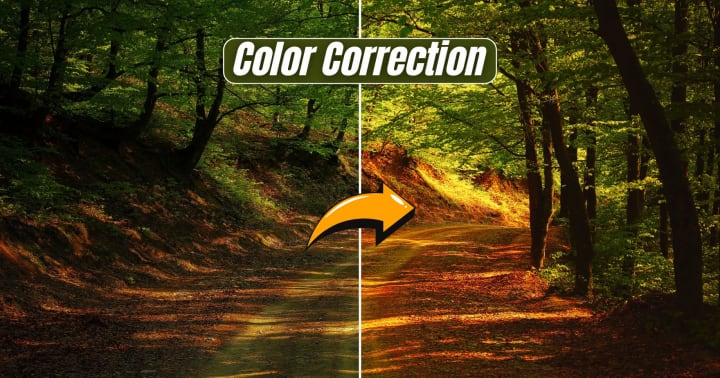
Color correction adjusts exposure, contrast, brightness, and saturation to attain an overall balanced and pleasant view of the image. It heavily features product photography, social media images, and professional prints.
How to Color Correct Using PhotoCut
- Import your image into PhotoCut.
- Navigate to the 'Adjustments' area.
- Make changes to brightness, contrast, saturation, shadows, and highlights.
- Use auto-adjust for rapid repairs or fine-tune manually; the option is yours.
- Apply the changes and save your improved image.
Best Practices for Color Correction
- Keep colors natural and avoid over-saturation.
- Adjust contrast and brightness carefully to retain detail.
- The white balance assignment is for correcting undesired color casts.
- Also wish to put color grading into play for an atmospheric effect.
- Always compare clean, balanced copies of your images to their post-craft versions.
Converting Your Images to JPG with PhotoCut

Among the most commonly used image formats, JPG or JPEG stands almost everywhere, striking a balance between quality and size. Therefore, it is indeed the format of choice to use on websites, for posts on social media, and for digital storage.
How to Convert Using PhotoCut
- Upload your image (PNG, TIFF, BMP, or any other format) to PhotoCut.
- Select ‘Convert to JPG.’
- Adjust compression settings if needed to optimize quality.
- Save the newly converted JPG file.
Best Practices for Converting
- Use a higher quality setting when converting images for print or professional use.
- Opt for moderate compression to maintain clarity while reducing file size.
- If transparency is required, consider using PNG instead of JPG.
- Test different compression settings to determine the best balance for your needs.
Compressing Your Images with PhotoCut

Image compression reduces an image's file size without significantly sacrificing quality. This is essential for faster web loading speeds, email attachments, and storage space reduction.
How to Compress Using PhotoCut
- Upload your JPG or PNG file to PhotoCut.
- Select the ‘Compress Image’ tool.
- Adjust the compression level using the slider (low, medium, or high compression).
- Preview the compressed image and save it.
Best Practices for Compression
- Use higher compression for web images to improve site performance.
- For print quality, keep compression levels moderate to retain sharpness.
- Standard compression algorithms should be selected based on the intended outcome of size and quality.
- Large images should be compressed before uploading to websites, as it increases the speed of page load.
- Ensure that compressed images remain readable, especially those that are graphics with text.
Advanced Editing Techniques Using PhotoCut

While the above editing functions cover essential tasks, there are advanced techniques you can apply in PhotoCut for enhanced results:
- Layer Editing: Combine different images or elements within PhotoCut for creative compositions.
- AI Background Removal: Use the AI guide of PhotoCut to remove backgrounds proficiently.
- Filters and Effects: Give artistic filters a go to spice up your image style.
- Noise Reduction: Get rid of digital noise from low-light images for cleaner looks.
- Sharpness Adjustments: Improve detail in an image by sharpening-dulling without going the other way, outward.
Design your cards online for free using PhotoCut’s Card Maker.
Optimizing Images for Different Platforms

Depending on the intention for using the edited images, the images may require different kinds of optimization by platform:
- Social Media: Resize and convert images for Instagram, Facebook, Twitter, and LinkedIn.
- Websites and Blogs: Use compressed images for fast load time.
- Print Media: Use high-resolution JPGs with minimal compression for good print quality.
- E-commerce: Ensure your product images are cropped, color-corrected, and compressed for online stores.
Discover the easiest ways to remove glare from your photos.
Conclusion
PhotoCut is a powerful and easy-to-use tool that aids in performing mountains of image editing tasks. Whether you wish to crop, rotate, color correct, convert, or compress images, the reasonably intuitive tools offered by PhotoCut are great to add to the workflow. Mastering these basic techniques and delving into the advanced editing capabilities will help you make high-quality visuals that suit personal, professional, or commercial purposes. Start using PhotoCut to make your images easily!
Learn how to enhance your images in Photoshop.
FAQs
Q1. Can I crop my image to any aspect ratio?
Ans. Yes, PhotoCut usually offers a choice of the commonest aspect ratios (for example, 1:1 for square images, 4:3, 16:9). You may also be allowed to adjust the cropping box yourself to fit your desired aspect ratio.
Q2. Is there a way to crop my image to a circle or other custom shapes?
Ans. PhotoCut primarily offers rectangular cropping. Advanced shape cropping might not be available in all versions. Refer to the software's latest documentation for more information about supported shapes.
Q3. Can I rotate my image by a specific angle (e.g., 15 degrees)?
Ans. PhotoCut might offer a free-rotation slider or a text box where you can enter the exact rotation angle. Check the "Rotate" tool options within the software.
Q4. Is it possible to flip an image horizontally or vertically in PhotoCut?
Ans. Check the "Rotate" tool options. PhotoCut frequently provides buttons to flip the image horizontally (mirror) or vertically.
Q5. How can I correct washed-out colors in my image?
Ans. Increase the saturation for bright colors and the contrast to better light-dark distinction.
Q6. Can I adjust the white balance in PhotoCut to correct color casts?
Ans. PhotoCut might include white balance adjustment tools. Look for options like "Temperature" and "Tint" or predefined white balance presets (e.g., "Auto", "Daylight", "Cloudy").
Q7. What is the difference between JPG and other formats?
Ans. JPG is an old and popular format known for compression, so image files are small. It is perfect for photographs or images with many colors. The only disadvantage of JPG is that it is a lossy compression; thus, even though some data compression might be invoked, quality suffers. On the other hand, formats that keep all data intact are PNGs, but they are larger.
Q8. What quality settings should I use when saving as a JPG?
Ans. PhotoCut typically offers a "Quality" slider or option when saving as a JPG. Higher quality settings result in larger file sizes but better image quality. A setting of 80-90% is often a good balance between file size and quality.
Q9. What do you lose when compressing an image?
Ans. So much image quality can get lost after compressing, especially with lossy compression like JPG. The more compression applied, the more noticeable the quality loss you get.
Q10. Besides using JPG compression, are there other ways to reduce file size in PhotoCut?
Ans. Here are some ways you can try:
- Reduce Image Dimensions: Resize the image to smaller dimensions (width and height). Smaller images naturally have smaller file sizes.
- Remove Unnecessary Data: Some picture editors allow you to remove metadata (such as camera and location information) that might increase image size.
- Color Optimization: Depending on the image, lowering the number of colors utilized might help to reduce file size.
About the Creator
PhotoCut
AI Photo Editing Tool - Remove or Change your Background & Enhance Product Photos
Keep reading
More stories from PhotoCut and writers in Photography and other communities.
Revolutionizing Image & Video Editing with PhotoCut
Now, we are in a digital age where content creation is entwined with branding, marketing, and personal expression. The rise of artificial intelligence has facilitated the advent of PhotoCut, a new-age image-and-video editing tool. From amateurs to professionals, PhotoCut has exclusive features that help artists streamline their profiles. This article will explore cutting-edge image/video editing techniques and new-gen AI features, as well as API updates, with a bunch of tips to help PhotoCut users.
By PhotoCut9 months ago in Photography
My Year, in Prattling and Photos
It's been a year since... last year. Ironically, it seems I've found myself a new tradition of getting sick during the New Year holidays. At least, this year (that is, this inter-year period remarkable for its shiny decorations in the streets and houses, and closed supermarkets and pretty much everything), I'm doubtlessly doing better: I've managed to come visit my friends in Germany for Christmas (which I failed to do last year) and—after having some good quality time eating machanka, playing Munchkin and swinging machetes (the last one obviously crept into this checklist only for the sake of the phonological form)—I came back home via proverbial Deutche Bahn and probably less known Schweizerische Bundesbahnen, my body hosting a family of viruses, virions and who knows what other tiny critters somewhere inside my chest.
By Andrei Z.18 days ago in Photography
A Lifetime of Shakas
For more than three decades as a part-time freelance news and sports photographer in Hawaiʻi, I’ve captured countless moments across the islands — and a few on the mainland. Along the way, almost without realizing it, I built an ever-growing photo archive of people flashing the shaka sign.
By Tim Wright44 minutes ago in Photography


Comments
There are no comments for this story
Be the first to respond and start the conversation.