
It's Like Magic
An 8 step approach to the mess in my head.

As an artist, to analyse & describe one’s work process in a streamlined format seems like a gruelling exercise to perform, but its really just an administrative approach to the beautiful mess in your head. This is the conclusion I have drawn from doing the activity myself, and I wish to share my findings.
But first, a bit of insight into my background and skillset. Since my photo edits comprise of both photography and illustrated elements, the simplest way to describe myself would be something along the lines of a ‘multimedia artist’. To be super specific, I am a freelancing experimental animator & illustrator with a natural gravitation toward alternative concepts & ideas. I’m also a photographer, filmmaker & editor on contract. Just like many other artists, I struggle to focus on just one thing and so I choose to do them all. I am, however, content with the chaos and thoroughly enjoy the creative diversity.
My editorial practise, defined in simple terms, is the creation of digitally illustrated portraits using both photography and design elements.
The interlacing of these two mediums feels like making magic, but requires quite a bit of technicality.
That being said, I’m not amongst the most technically sound or software savvy artists out there. I have my own way of doing things, but it seems to work for me. I’m actually quite a traditionalist and the transition to digital from hand-drawn was a bit of a learning curve. I managed to gain fair competency in Photoshop during my animation studies and became very comfortable using my university’s Wacom tablets. I have since adopted an iPad and work predominantly in Procreate, which is an absolute breeze in terms of functionality and consistency. It’s also nice to not be confined to my desk and my lower back appreciates that immensely.
Marrying illustrative elements into reality-based settings in a way that both compliments the scene, tells the story, and makes compositional sense is no easy task. It is very easy to botch it up by making less than fantastic design choices, so strategic planning is crucial. This brings me to….
STEP 1: Developing the Concept
Okay. I want to create an image that provokes feelings of ___ and the story I’m trying to tell is ____, so therefore I need to make something that incorporates____, ____, and____. That’s one way to do it.
I tend to gamble on a mix of serendipitous discovery as well as intentional execution. Sometimes I’m out and about in the wild and I come across a scene or subject that stimulates my senses and I have to snap a shot of it. I then make a note of what where I was, what I felt, and what I saw. And by saw, I mean what my brain added to the equation to make it that spectacular sight. I now have a base idea to work from, and the seed has been planted. Other times, the concept develops in my head and I have to hunt down the elements needed to pull that visual together.
STEP 2: Drafting it Out
Whether or not I’m working from an existing image, I always take the time to sketch up the idea. This stage is where I establish my subject, my story, and my vision. I make sure pay attention to things like lighting, composition, and colour palette. It doesn’t have to be a masterpiece and I often have to remind myself of that. Its sole purpose is to lock down the direction so that the real labour can be spent nailing the final. Like storyboarding for film, it will ultimately save a lot of time and minimise potential problems during the execution stage.
STEP 3: Gather the Goods
Now that I have a rough outline of what I want to accomplish I have to ready my elements for assembly. If I already have my image, I move straight into STEP 4. If I don’t have my photograph yet, I need to arrange a shoot before I can move on. Fortunately, there’s a plethora of individuals out there who are more than happy to have themselves immortalised into artwork. I set the scene, place my sourced subject(s) into position, and snap the shot. I will have decided before the time whether I simply wish to use the individual for the edit, or if I would like to incorporate some background elements. in the case of no background elements, I will set up my subject with a plain backdrop so it’s easy to remove in editorial. I also like to use complimentary props and structural aids, especially when I’m working with specific perspectives and/or objects. Once I have my image, I’m free to move on to the initial image preparation process.
STEP 4: Image Prep
This is where I buff my image in preparation for the illustration stage. Almost like priming a canvas before laying in paint, my goal is to remove any unwanted bits and pave the way for a smooth application. At this stage, I pay no attention to the actual subject and focus only on cleaning up the background. If I wish to remove the background entirely, I will do so simply by isolating the subject via the selection tool and pasting it onto a separate layer, thus discarding the background. I will then go in with a soft-edged eraser tool and smoothen out any hard lines created during the ‘cut out’ process. If I choose to compliment the background with illustrative elements rather than remove it entirely, I will not necessarily separate my subject from it's environment by placing it on a separate layer.
STEP 5: The Clean Up
This involves lightly smoothing out blemishes on the subject’s skin & clothing, enhancing features with isolated colour & lighting adjustments, as well as performing any ‘digital surgeries’ to the subject’s anatomy (I have a tendency to remove the occasional limb).
I then make any necessary amendments to orientation, positioning and sizing of the image.
STEP 6: Drawing it Up
This is where STEP 1 comes in handy. I already have the basic outline of where my illustrations need to sit compositionally, because I’ve already invested time plotting it out. Sometimes my image turns out slightly different than originally intended, and I need to make adjustments to the illustration layout to accommodate. Either way, I already have my guideline in place and I also have my colour palette picked out. I start by dropping in a flat background colour on a separate base layer, beneath the image and artwork layer. This colour will compliment anything I lay overtop, especially anything with a transparency, and will play an important role in defining the overall mood. I then overlay the rough sketch atop the other layers, lower its opacity to 30%, and begin the clean line work beneath whilst using it as a reference.
STEP 7: Colour, Texture & Light
Now that I have all my final illustration’s line work ready, I am free to fill the page with colour and begin the process of stylistically merging the two mediums. I achieve this in a few ways. First, I ensure that the lightest lights and the darkest darks are present across the board. The same goes with colour, so I generally start by utilising the colours found in my photo subject layer. This way, everything seems like it exists in the same world - at least on tonal level. I’ll squint my eyes slightly while looking at the image, just to make sure it’s translating well. Secondly, I incorporate illustrated elements into the subject’s features, accessories, props and clothing (if they’re wearing any). I also make sure to texture everything somewhat similarly, whether that be crosshatching in all the shadows or strategically scattering debris-like elements. Layers upon layers of colouring, texturing and shading are added to build up a sense of depth & dimension. I am very detail-oriented, so this process takes a while.
STEP 8: Final Touches
This is the most satisfying part. I am already happy with my edit, but now I just need to add a few things to really make it POP. This typically includes highlights, shadows & basic colour correction. I play around with these micro-adjustments until it hits home, and when it does, I am absolutely delighted.
That’s the magic feeling I spoke of in the beginning. When it all comes together and your vision has been realised, it’s a pretty special kind of satisfaction. Not to mention presenting the final edit to your ‘subject’ for the first time. Phew. That in itself is well worth the effort.
Methodising my workflow has provided me with invaluable insight into my practise and, in a way, has also reminded not to undervalue my work as a freelancer. At least now I've formally acknowledged what it takes.
About the Creator
Shannon More O'Ferrall
Shannon was brewed in South Africa & is now based in Vancouver, BC.
She is a multifaceted artist with a strong focus on storytelling. Her mediums include: 2D visual development, animation, illustration, writing, photography & film.
Keep reading
More stories from writers in Photography and other communities.
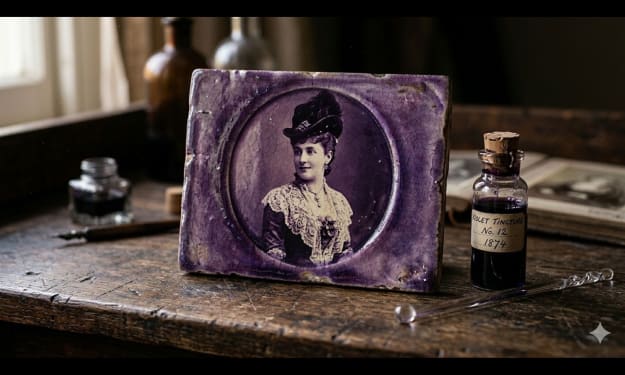
Gold Chrysotype Photography Is Back and the Colours Are Breathtaking
There is a moment when a chrysotype print is lifted from its chemical bath and held up to the light stops people mid-breath. The colours that bloom across the surface — soft dusty pinks fading into deep magenta, rich cyans pooling at the edges, velvety blacks settling into the grain of the paper — look less like a photograph and more like something pulled from a dream.
By CurlsAndCommasabout 11 hours ago in Photography


Comments
There are no comments for this story
Be the first to respond and start the conversation.