
How To Take Product Photos with an iPhone
Yes, you can take product photos with an iPhone without it looking awful. Here's how.

Being a fledgling business owner isn't easy, especially when you're starting a business on a shoestring budget. When you literally have to come up with business ideas you can start for free, or when you're looking up business ideas for entrepreneurs on a budget, you definitely don't have time or cash to get professional marketing materials in place.
If you're selling something, you can already see how this can be an issue. At the very least, you're going to need to take product pictures. If you have a good smartphone, you're in luck here. This guide will show you how to take product photos with an iPhone, without them looking amateur.
While you can take product photos with an iPhone 5, that's not really optimal. If you really want to have the full benefit of an iPhone camera, you're going to need a later model. We suggest getting an iPhone X, but if you can't afford that, an iPhone 7 or later will do just as well.
Once again, the later the model, the better you will be.
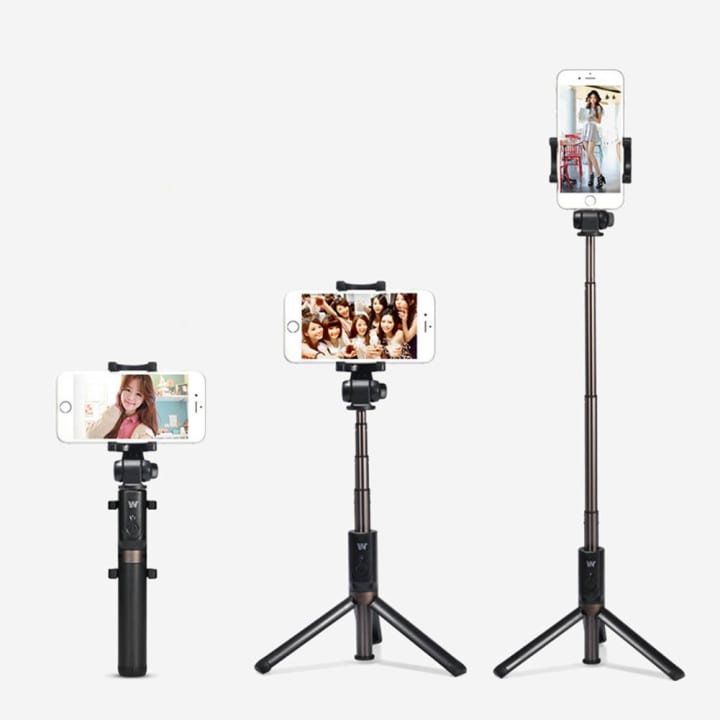
A tripod is incredibly useful when you want to take product photos with an iPhone. Keeping your phone still is incredibly important when trying to take crisp and clear photos. Besides, it will come in useful when you decide to do other things with your iPhone, too.
The KCOOL Tripod is a universal tripod that allows you to take photos with a remote control and locks your phone in securely while you use it. It's a sturdy, versatile option.
If you want to take product photos with an iPhone, keeping your pics clear is key. The right lenses for your smartphone can help you achieve that clarity.
If you really want to splurge, you might want to try the Moment Telephoto lens with its accompanying iPhone case. This allows you to zoom extra close, get amazing telescopic views, and even bring extra clarity to portrait shots.
If you really want to take product photos with an iPhone and have them appear professional, you should look into getting a product photography box.
This is an all white box that is built to reflect light, giving your products the classic "professionally taken" look of a hovering product in a white background. CowboyStudio makes a pretty affordable one, even for business owners on a budget.
Now, let's begin by making sure your product looks spiffy.
The first thing that you're going to have to do in order to take product photos with an iPhone is to make sure your photo's subject looks alright. After all, if your product looks like hell, you're not going to be able to do much in terms of improving its appearance after you take the shot.
Here are some quick tips:
- Clean your product. If your product is dirty or used, don't try to take a photo of it until you clean it. Remove dust from it, brush it off, and just do what you can to make it look good as new. (Yes, this applies to antiques too!)
- If you have a product that comes in a box, remove it from the box and pose a second identical product in its box next to it. This is a classic layout that professional photographers use to show what a buyer would expect to get inside and outside of the package.
- If you only have one of the products, gently remove it from the box. Ideally you should take at least one photo of the box the product came in.
- No dented, banged up boxes, please. These details might not seem like much right now, but trust me, they do matter. A dent in the box will be noticeable—and will make the product look cheap.
If you're not using a product photography box, you will need to come up with a good setup for your items.
The best way to get a professional look when you take product photos with an iPhone is to make your own product photography box. You can make one out of foam boards to reflect light, a large poster paper that you can place your products on.
If you are going for a more "artisan" approach (such as with food or a handmade item), you will want to choose a background that is not too busy, such as a table or a bed of grass. Imagination is key!
Then, there's lighting to consider.
Lighting is often the hardest aspect of learning to take product photos with an iPhone. (Then again, that can be said about just about any kind of photography, right?)
When it comes to getting flattering photos, soft light is ideal. Harsh light, especially when it's direct and glaring at the product, will cast shadows that can be hard to fix in post.
A good way to get great lighting while on a budget is to opt for indirect sunlight. Place your products perpendicular to the light that's coming from a window. This way the light is softer and slightly less powerful than an "all in" light setup.
Oh, and don't use your iPhone's flash. Indirect or natural light sources are a better choice.
Once you're ready to take a photo, clip your iPhone to your tripod and snap a few.
Once everything is set up, it's time to take product photos with an iPhone. It's best to take multiple photos when the setup is complete, since there are often subtle differences in each shot you take.
We also suggest setting up the tripod in a number of different angles and positions. You'd be surprised at what a huge difference shifting the camera an inch to the left or right can make.
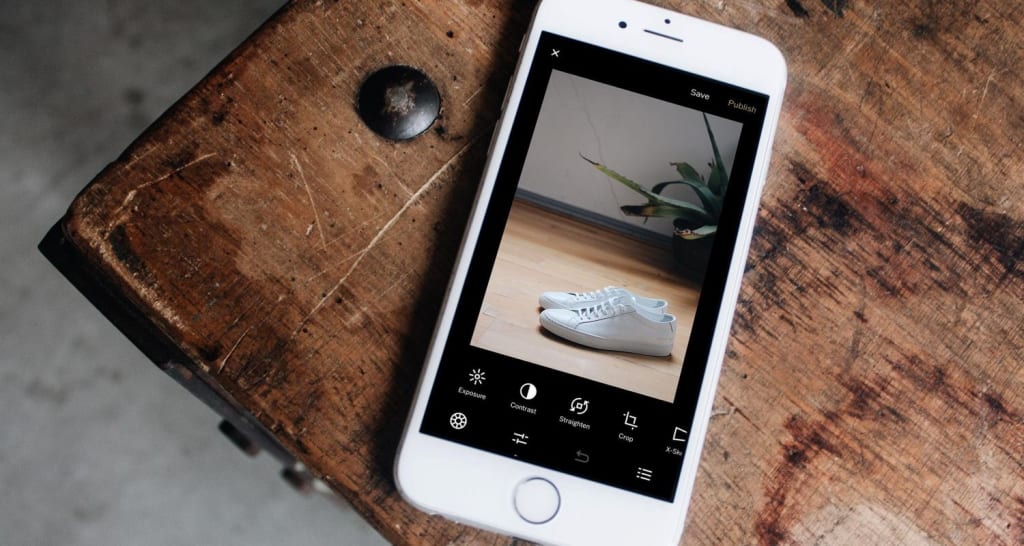
When shooting, make a point to review your photos via the viewfinder. This will help you get a better grip on what you're doing, and will help you determine if you need to move everything around a little more.
Yes, it's true. There are tons of reasons why you should shoot in RAW instead of JPEG, and this is doubly true when you want to take product photos with an iPhone. RAW allows you to edit photos easily, and that will prove incredibly useful.
Most people wouldn't know this, but any amateur photographer who is working with an iPhone should: you can shoot RAW with your iPhone! This video tutorial shows you how you can do it.
The last step you need to do if you want to take product photos with an iPhone is to clean up your shots. Using a couple of easy-to-learn Photoshop hacks, you can balance the color, remove unsightly shadows, and even help add a little bit of extra pop to your color!
To get the most use of editing software, we strongly suggest uploading your photos to your laptop and using Adobe Photoshop Elements 2018 to clean it up.
About the Creator
Skunk Uzeki
Skunk Uzeki is an androgynous pothead and a hard partier. When they aren't drinking and causing trouble, they're writing articles about the fun times they have.
Keep reading
More stories from Skunk Uzeki and writers in Photography and other communities.
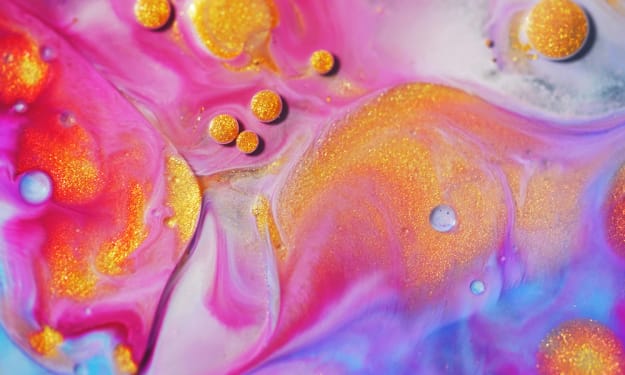
Best Abstract Photographers to Follow on Instagram
Abstract photography is hard to pin down, but absolutely wonderful to share. It's a form of art that focuses in on the minute details of life that others may miss—or that we often just overlook. Beautiful, unique, and pointedly modern, photographers who take an abstract take on life always have a way of leaving people impressed.
By Skunk Uzeki8 years ago in Photography
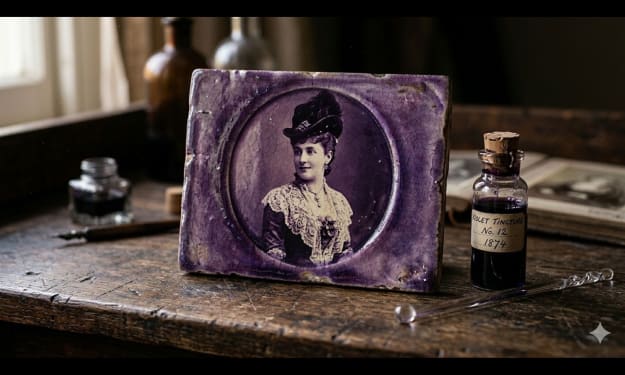
Gold Chrysotype Photography Is Back and the Colours Are Breathtaking
There is a moment when a chrysotype print is lifted from its chemical bath and held up to the light stops people mid-breath. The colours that bloom across the surface — soft dusty pinks fading into deep magenta, rich cyans pooling at the edges, velvety blacks settling into the grain of the paper — look less like a photograph and more like something pulled from a dream.
By CurlsAndCommasa day ago in Photography


Comments
There are no comments for this story
Be the first to respond and start the conversation.