
How to Take Amazing Selfies, Make Photo Collages, Invert Photos, Overlay Images, and Enhance Photos
How to Take Amazing Selfies, Make Photo Collages, Invert Photos, Overlay Images, and Enhance Photos

In the modern digital era, photo editing and personalized image creation are often popular and have become one of the most popular forms of expressing one's creativity, memory capturing, and social face enhancement. With a few right tools and techniques, people can turn ordinary photographs into stunning pieces of art. This great AI-based design tool called PhotoCut presents lots of features that allow users to take astonishing selfies, create photo collages, invert photos, overlay images, and beautify their photos with ease. Whether you are a budding photographer or an experienced professional, this article will introduce you to how to use PhotoCut to master important photography and editing techniques.
See how you’d look with a bald head with PhotoCut’s Bald Filter.
How to Take Amazing Selfies
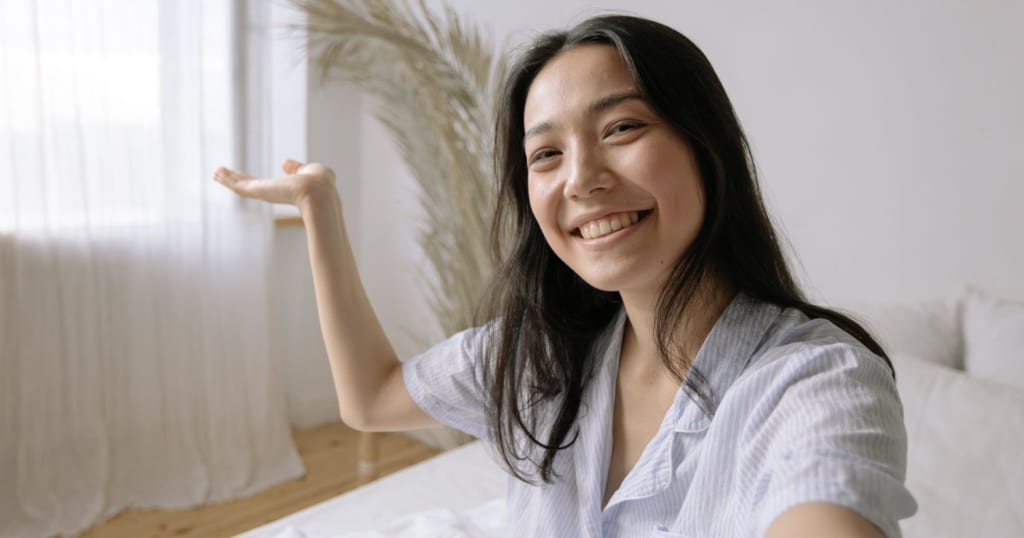
Selfies have become part of life in this twenty-first century, from the various social media accounts to an album that each person keeps in their home and sums to a thousand selfies. But having the perfect selfie is not just about clicking the button. With good equipment and tips, one can shoot impressive selfies that look polished and professional. Here are some important tips on how to snap excellent selfies:
Lighting
Lighting plays a key part in getting that perfect selfie. Most of the time, lighting tends to be natural. Positioning near wind openings or outdoors would guarantee enough soft as well as ambient light. Never make the mistake of accepting harsh lighting or direct sunlight, for they create shadows that ruin the shoot.
Angle and Framing
To take a flattering selfie, keep your camera slightly above eye level. This angle can assist in preventing a double chin appearance and help elongate your face. Tilt your head slightly and experiment with angles to find the most flattering position for your face. In addition, keep your phone at arm's length from your face; that distance has always been good for getting an evenly captured shot.
Background
Consider the background of your selfie. If it is busy or distracting, it will detract from your photo, which should be of yourself. As a result, you must choose a relatively straightforward background that complements what you have and is not overpowering to your eyes. For a dramatic effect, you could always leave the background blurred to help focus on you.
Expression
Your expression is another important factor. A natural smile can go a long way in creating a great selfie. Try to relax your face and avoid forced expressions. A slight smile or a candid, relaxed look often results in the best selfies.
PhotoCut for Enhancements
Now that you have clicked a selfie, it's time for you to improve your picture using PhotoCut. The effects available for skin smoothing, lighting adjustment, and background blur will enhance your selfie tenfold. These, of course, are complemented by PhotoCut filters and effects that will entwine or contrast your shot, whether you are going "bright and cheery" or something rather darker or moodier.
How to Make Photo Collages

A photo collage is a very interesting and creative way to fit many pictures into one frame. Photo collages are just there for birthday messages, wedding gifts, travel albums, and so on. A collage tells a story by holding related pictures. Here's how to make an eye-catching photo collage:
Select Your Photos
Choose only those images that you plan to put together into your collage. You should make sure that your chosen pictures are similar in theme or color so that they will look coherent within the collage. An example may be pictures taken from vacations, single events, or any variety of candid shots of the same subject.
Choose a Layout
The structure of your collage can greatly influence the appearance of the final image, and PhotoCut supplies bundles of templates for effortlessly arranging your pictures in the best way possible. Choose among grids or freeform designs and, even more fun, inventive shapes for your collage.
Edit and Customize
Once you select your images and layout, you can customize your collage. Hints are adjusting the spacing between images, rotating pictures to align them correctly, or applying filters for an even look. Give a better finishing touch with PhotoCut's excellent AI tools for automatic adjustments of brightness, contrast, and saturation to ensure that your photos look blended.
Add Text or Graphics
Customize your collages with text, stickers, or other graphic features. Adding dates, quotes, captions, or anything else will make your collage more personal.
Export and Share
After completing your collage, PhotoCut lets you export such a design in high resolution, making it clear enough to be printed or shared digitally. Plus, collages can easily be resized so that you can use them for everything you want, from online marketing with social media posts to printed photo books.
Make your photos look elegant by adding borders with PhotoCut.
How to Invert Photos
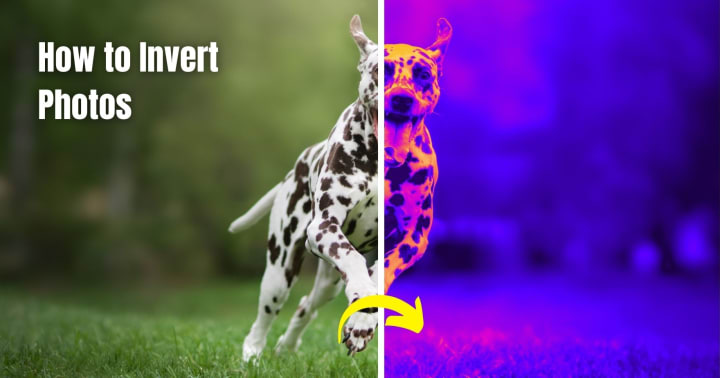
Inverting photos creates a rather breathtaking and otherworldly effect, giving it a specific artistic touch. This feature emphasizes certain aspects of a photo, such as contrasting colors or even highlighting specific details. Here's all about how to invert photos using PhotoCut.
What is Inverting a Photo?
Inverting a photo involves reversing the hues; in other words, each color on the color wheel becomes its opposite. Whites change to black, blues to orange, and reds to green. This approach produces an eye-catching, surreal-looking picture with extreme contrast.
Steps to Invert a Photo
- Upload the required image that you want to invert to PhotoCut's editor.
- Once you upload the image, look for the Invert effect menu, which is usually found under Effects or Adjustments on the PhotoCut interface.
- PhotoCut will invert the colors of your photo with just one click. It will adjust all the colors by itself, so you get a whole new version of your image.
- You can improve the impact of the inverted image with the altered brightness, contrast, and saturation besides the main inverted colors.
Uses of Inverted Photos
These inverted pictures feature themselves in creative art projects, ad material, or pictures to have a futuristic or abstract feel. You may even use inversion to play with how colors work in juxtaposition and find surprising ways to call attention to something in your photo.
Find the best Barbie captions and post templates for your photos.
How to Overlay Images
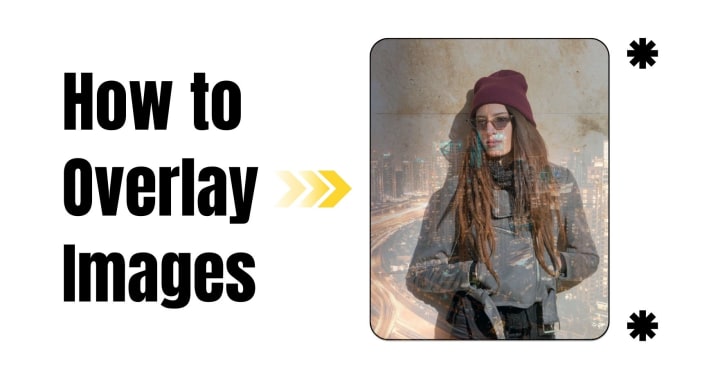
Overlay images form one of the strong building blocks in such a way that they bring multiple images into one design. Be it a double exposure effect, mixing textures, or anything like overlaid logos or text on the background, overlay images do it efficiently and beautifully. Here's how to overlay images using PhotoCut:
Steps to Overlay Images
- First, you need to choose an image that will serve as the backdrop for your work. It may be a landscape, a close-up of a person, or any other picture.
- The next step is to upload the second image that you want to put on top. This can be anything from an object, a texture, a person, or even a shape or logo.
- You can now position, resize, and rotate the second image after uploading both images. With PhotoCut, you can drag and drop the images to place them on the spot you want.
- You may change the transparency of the uppermost image and manage various blend modes, including multiply, screen, or overlay, to yield a perfect blend so that it does not appear obvious.
- Such tools can also be used for edge refinement, which smoothens out the edges of the overlaid image, allowing it to sit more naturally in the background instead of having harsh lines or cuts.
Creative Uses for Overlaying Images
Through overlaying images, people might apply their artistic interpretations to wonderful effects:
- Double Exposure: Merging two photos makes one creates an illusional, surreal image.
- Textures: Adding texture or patterns over photographs to give them a more dynamic appearance.
- Graphics and Icons: Using overlay logos, icons, or graphics above background images serves as a means of branding.
Try a new hair color virtually with PhotoCut’s Hair Color Changer.
How to Enhance Photos in Photoshop

Although PhotoCut is a very good program for the manipulation of photographs, many people would like to raise their alteration to higher levels through Photoshop, which is best known and famous for such editing features as basing its processes on layers and even correction methods and retouching that are most advanced.
Basic Enhancements in Photoshop
- Adjust the Brightness and Contrast: In Photoshop, adjustment layers allow changing the brightness and contrast of the photographs, making the photographs stand out as well as uplifting the overall atmosphere.
- Retouching: Spot Healing Brush, Clone Stamp, or Patch Tool might be put to use to remove imperfections, dirt, and other unwanted objects.
- Sharpen: Using the Sharpen filter, you may boost the detail in your photograph. However, avoid sharpening excessively; otherwise, your image may appear grainy.
- Color Grading: Through the color grading capabilities within Photoshop, it spans all that can apply color to the photo, relating it to a compound view or feel, especially for that which is shot in a professional studio or under branding schemes.
Advanced Techniques in Photoshop
- Layer Masks: It edits photos in a non-destructive way that allows one to blend, fade, or make partial exclusions of the images.
- Gradient Maps: These are often used to produce individual color scheme combinations to increase the emotional tone of a photo or make it more enticing.
- Filters and Techniques: There's an enormous range of filters in Photoshop that lend their application completely from vintage-looking images to high-contrast modern designs.
Conclusion
Using the wonderful techniques of taking some great selfies, making photo collages, photo inversion, image overlaying, and beautification of your photos in Photoshop, one can certainly take his or her photography and make it become stunning pieces of art. With the heavy reliance on tools such as PhotoCut, these techniques can easily be put to work by a novice in creating images with a professional touch. Photo editing techniques, in general, enhance your image, whether it be for flaunting on social media, preparing a meaningful gift for someone special, creating an art experiment, or whatever. With PhotoCut, graphics editing is customizable and easy to get a hold of.
Create 3D models even without expert skills with PhotoCut’s AI 3D Model Generator.
FAQs
Q1. What's the most important thing for taking a good selfie?
Ans. Good lighting is crucial! Natural, soft light is your best friend. Avoid harsh direct sunlight, which can create strong shadows. Face a window or step outside on a cloudy day.
Q2. What is the most flattering angle to hold my phone for a selfie?
Ans. Generally, it is more agreeable if the camera is pointed down from a slightly above eye level. It makes the eyes appear larger and minimizes what might be called a double chin. Play with angles that work best for you.
Q3. What are some tips for arranging photos in a collage?
Ans. Here are some tips:
Vary the sizes: Mix up large and small photos to create visual interest.
Consider the subject: Group photos with similar themes or subjects together.
Create a focal point: Use a larger photo or an interesting arrangement to draw the eye.
Use a grid layout for a clean look: This is good if you're using many photos.
Overlap photos for a more dynamic feel.
Pay attention to color balance.
Q4. Should a collage have a theme?
Ans. That depends on what you'd like! A theme provides an aim for the collage and a certain sense of cohesion, whether it be a vacation memory, birthday celebration, or nature collection. But you could also just do it for aesthetic reasons.
Q5. Does inverting a photo affect the image quality?
Ans. Inverting itself does not directly cause a loss in quality. Other adjustments might degrade some of that inversion as well, especially if you are using a compressed file format like JPEG when saving. As a general rule, work with the highest quality original.
Q6. Can I invert only part of a photo?
Ans. Indeed! In Photoshop or any other advanced editor, select the area you want inverted with the selection tools (such as lasso or magic wand) and apply the invert adjustment.
Q7. How do I overlay images?
Ans. Here’s how:
Adobe Photoshop: This is the most powerful option. You'll use layers and blending modes.
Online Photo Editors: Some online editors offer basic overlay features that don't require advanced skills.
Mobile Apps: Many photo editing apps have overlay features
PowerPoint or Google Slides: Surprisingly useful for quick, basic overlays.
Q8. What are blending modes, and how do they affect the overlay?
Ans. Blending modes control how the colors and brightness values of the top layer interact with the layers below. Common blending modes include:
Normal: The default. The top layer simply covers the layers below.
Multiply: Darkens the image by multiplying the colors of the layers.
Screen: Lightens the image by screening the colors of the layers.
Overlay: Combines multiply and screen modes, creating contrast and vivid colors.
Add: Brightens the image by adding colors from the two layers.
Q9. What's the difference between Levels and Curves adjustments?
Ans. Both control tonal range, but Curves offers more precise control.
Levels: Adjusts the black point, white point, and midtones. Adjustments are easy to make quickly.
Curves: This setting allows modifying the entire range of tones but offers precise control over specific highlight, shadow, and mid-tone curves.
Q10: What does the "Unsharp Mask" do while sharpening an image?
Ans. Unsharp mask sharpens edges and sharpens the contrast along edges, leading to the illusion of increased sharpness, controlled, in the end, by the Amount, Radius, and Threshold controls.
About the Creator
PhotoCut
AI Photo Editing Tool - Remove or Change your Background & Enhance Product Photos
Keep reading
More stories from PhotoCut and writers in Photography and other communities.
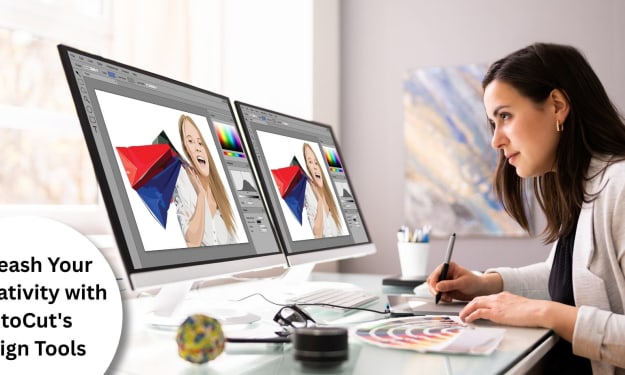
Unleash Your Creativity with PhotoCut's Design Tools
The digital universe has completely altered the way people create and personalize designs. If you are a graphic designer or an entrepreneur wishing to get the brand going, or if you simply want to create one-off personalized content, the integrating power of AI design tools takes a considerable burden off your shoulders. Another notable program is PhotoCut, which provides a suite of creative generators like T-Shirt Design Maker, Anime PFP Maker, Vision Board Maker, Chibi Maker, and Card Maker. Together, the package streamlines design procedures and enables you to produce stunning pictures quickly. Let us examine these tools' characteristics, functions, and ways in which they might support our creative pursuits.
By PhotoCut11 months ago in Photography
Why Printed Photographs Still Matter: The Art and Value of Preserving Memories in Print
In a world where most photographs live on phones, laptops, and cloud storage, it is easy to assume that printing pictures is a thing of the past. Yet something meaningful gets lost when memories stay locked inside a device. A photograph printed on high quality paper carries a weight and warmth that no screen can fully replicate. It can be held, shared, framed, and passed down through generations.
By The Iconabout 10 hours ago in Photography


Comments
There are no comments for this story
Be the first to respond and start the conversation.