
Enhancing Video Clarity on CapCut Desktop: Tips and Tricks for 5 Top Methods
Unlocking the Full Potential of Your Videos: Expert Guidance for Superior Visuals on CapCut Desktop


With the rise of AI technology, it's not just specialized AI video enhancers that can transform low-quality footage into high-quality content; AI-driven video editing tools like CapCut are also capable of enhancing video quality, allowing users to attain HD and 4K resolutions. Now, let's explore the most comprehensive tutorial on how to achieve good video quality on the CapCut desktop version.
Part 1: 5 Ways to Help You Get Good Video Quality on CapCut Desktop
In this part, we explore all the ways available on the CapCut desktop version to help users get good video quality. Some of them are AI-based tools, and some of them are special effects and filters that are helpful for improving the overall quality.
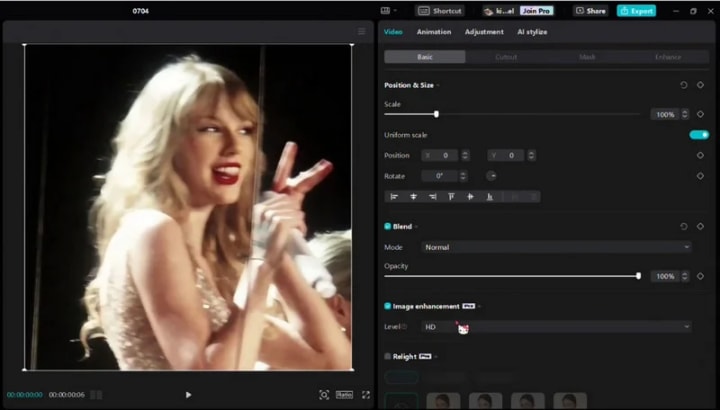
1.1 How to Get HD Video Quality on CapCut with Image Enhancement Tool
If you are editing the video in HD or UHD, but there are some clips in 720P resolution, you can use the "Image Enhancement" tool on CapCut Pro to change the resolution of these clips to HD or UHD.
Image Enhancement is an AI tool that can enhance video and image quality immediately, so there is no need to do more manual adjustments, but it is only available on CapCut Pro.
Step 1: Import your SD or any low-quality footage to CapCut Pro on your desktop.
Step 2: Drag & drop the video to the timeline.
Step 3: At the right panel, go to the "Video" section -> "Basic" -> activate "Image Enhancement", and select the "Level" to HD or UHD.
1.2 How to Get 4K Quality on CapCut without Pro Membership
If you have no CapCut Pro but want to get 4K quality of your video, you can apply the special effects or filters and manual adjustment to achieve your desired result. The operation is a little bit complex, but it still works. This is best for editing 1080P footage and exporting it to 4K Quality without ruining the overall quality.
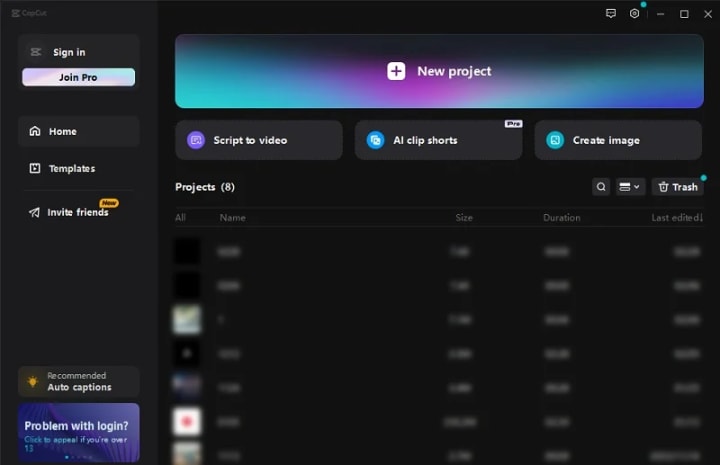
Step 1: Launch CapCut on Your PC and Import a Video
Launch CapCut on your PC, then click "+ New Project" and import a video that you want to export it as 4K quality. Then add the imported video to the timeline.
Step 2: Apply Effects to the Video
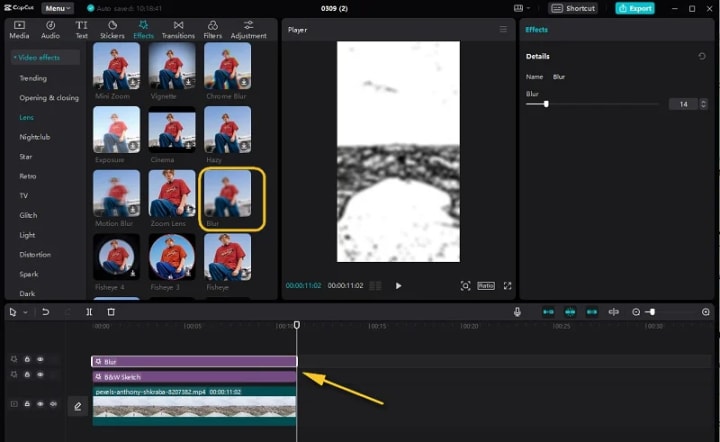
Firstly, navigate to the "Effect" section -> "Video effects" -> select the "B&W Sketch" effect from the "Comic" category and add it to the timeline. Extend this effect to make it match the length of the entire video.
Secondly, select the "Blur" Effect from the "Lens" category and add it to the timeline. Drag this effect to extend to the end of the original video.
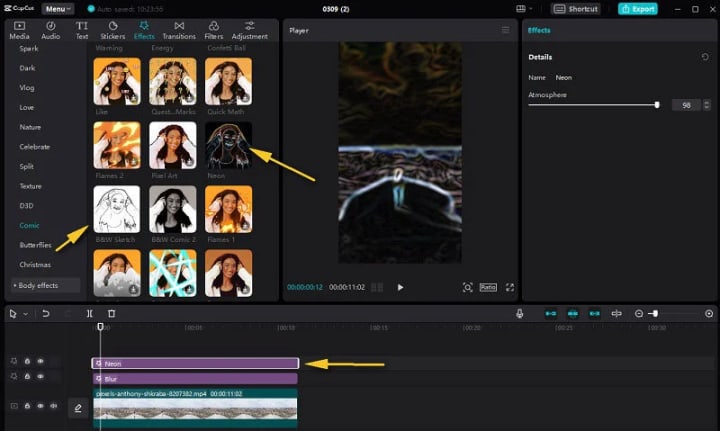
Thirdly, click the "Export" button to save this as the first video.
Finally, delete the B&W Sketch effect from the timeline, and add the "Neon" effect from the "Comic" category. Then export to save this as the second video.
Step 3: Import 2 Processed Videos and Add them as Overlays
Firstly, remove all left special effects from the timeline.
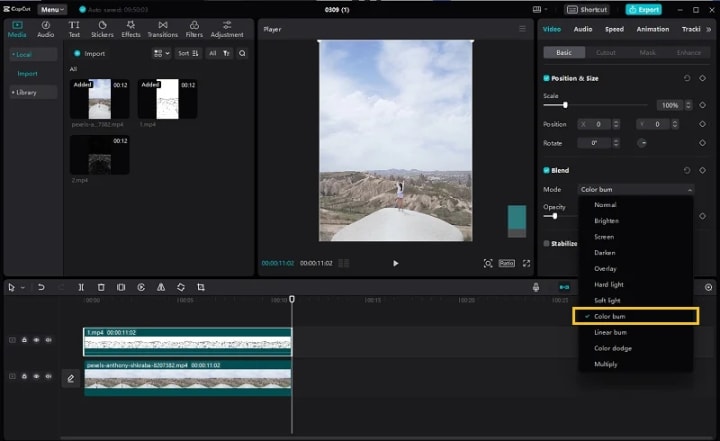
Secondly, import two processed videos to local media. Drag the first one with the "B&W Sketch" effect to the timeline, above the original video. Then go to the right panel, click the "Video" section -> "Basic" option -> "Blend", and select "Color Burn" from the Mode list.
Finally, drag the second video with the "Neon" effect to the timeline, above the first one with the "B&W Sketch" effect. Then select "Color Dodge" from the Mode list.
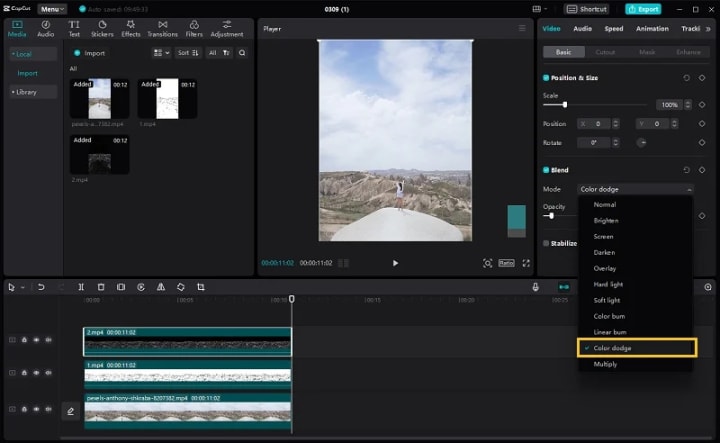
If you find the effect is unnatural, especially for the portraits, you can lower the "Opacity" to make the overall frame more natural.
Step 4: Add Custom Adjustment
Read more: avclabs.com
About the Creator
Keep reading
More stories from Madeline and writers in Photography and other communities.
Discover Three Techniques to Blur Out Details in Your Screen Recordings
Screen recording has emerged as a vital instrument for diverse purposes, such as producing instructional guides, showcasing software functionalities, and recording virtual conferences. However, you may want to blur your screen recording to hide some sensitive or personal information such as passcodes, email IDs, or contact numbers. It is in such scenarios that the capacity to selectively blur sections of your screen capture proves indispensable. This article will walk you through an array of techniques for blurring screen recordings, encompassing specialized screen capture programs, AI-driven automated blurring, and hands-on editing strategies.
By Madeline2 years ago in Photography
Curious Photography Tips Every Beginner Should Try
Have you ever wondered why two people using the same camera can produce completely different photos? The answer often lies in how well the photographer understands the camera itself. For beginners, cameras can seem filled with confusing buttons, dials, and settings. But what if those settings are actually the key to better photos?
By Craig Spiesman7 days ago in Photography
The Photographer's Code
You decide to visit your local park. You have become a close confidant to the homeless people who gather there most days. While talking to Cleo and Reed, you notice a new face in the crowd. It belongs to a stick-thin, middle-aged woman. She has her hand on her forehead as if taking her temperature.
By Paul Aaron Domenick4 days ago in Photography


Comments
There are no comments for this story
Be the first to respond and start the conversation.