
7 Fitness Photography Tips
For both fitness pro's and other photographers.

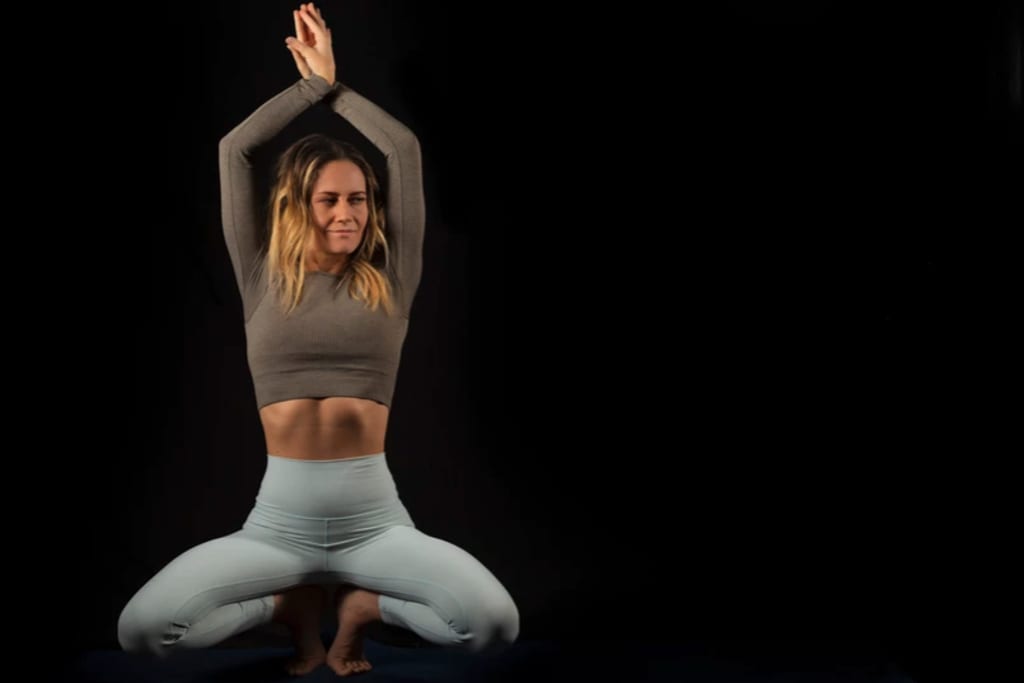
Lighting
Lighting may be the most important part of fitness photography! As trainers and instructors, we want to show off our physique in the best “light” possible. In order to do that, there are some rules to follow.
The most important of which is, do not use a light shining directly on the subject. Using a front light on your subject has its appropriate times and places, but generally speaking, not in fitness photography.
To show off physique, you always want to keep the lighting on either side of the subject. As you can see from the samples below, I used my flash from both sides of the subject, rather than a soft light coming from off to the side, or a flash directly on the camera.
This can easily be done with the use of inexpensive LED lighting from online retailers, or if you want to use window light, you can keep yourself parallel to the window light rather than directly in front. If you have curtains, you could also create a slit through the curtains rather than keeping them open completely.

Facial Expression
Not every fitness photo calls for a fierce facial expression. This is a common misconception, but is used more frequently in the world of portrait and fashion photography.
It’s still important to maintain a look that expresses concentration, sometimes even an element of strain as if you’re actually doing the work, or perhaps a little bit of fun.
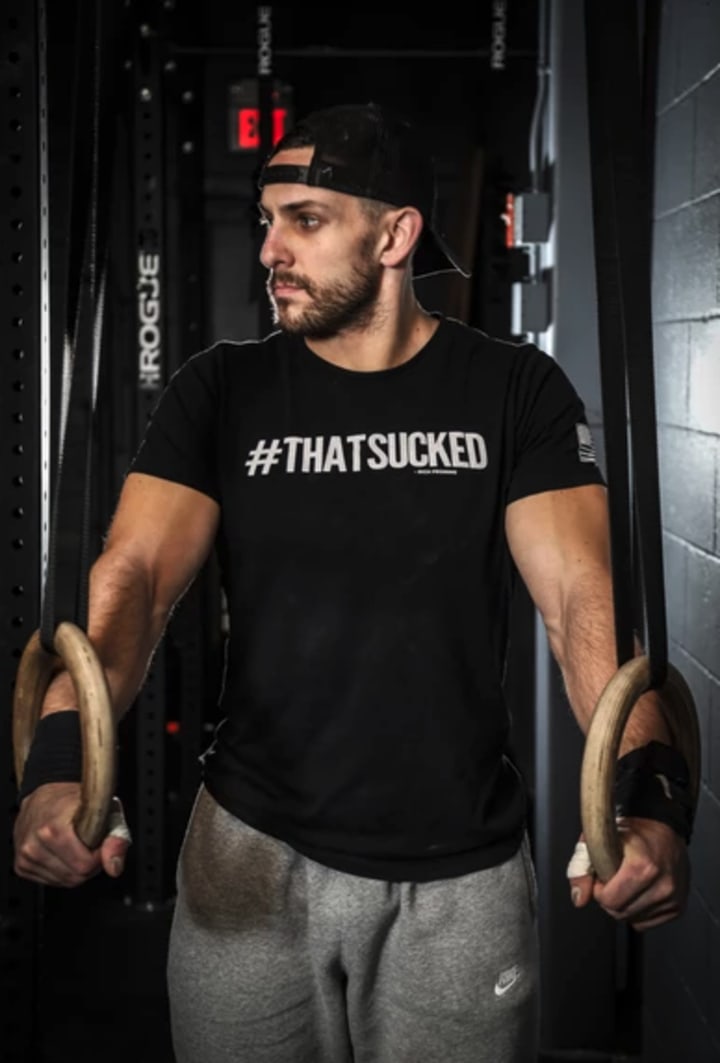
Looking away from the camera is usually the “go to” look for these kinds of photos, although there can be exceptions.
The best method to pull off this look is to keep your face as natural as possible, and pretend you’re actually doing the workout as if the camera isn’t even there.
Of course, there will also be situations that call for smiles! Specifically, promotions for gyms or group fitness photos that want to project a friendly environment will draw clients in and make them want to be a part of that positive experience. F45 www.fitnessf45training.com/ is a good example of this. F45 also uses bright colors and a lot of white on their logos and website. Showcasing a happy and fun workout environment works for their branding and message.
On the flip side, gyms like Crossfit Strong Island https://www.crossfitstrongisland.com/ are the opposite. They focus on showcasing the work, the intensity and the sweat rather than friendliness and community.
Composition and Positioning.
As a photographer, I am a big fan of shots taken straight on, from the side. What does that mean? Take a look at some of the examples below.
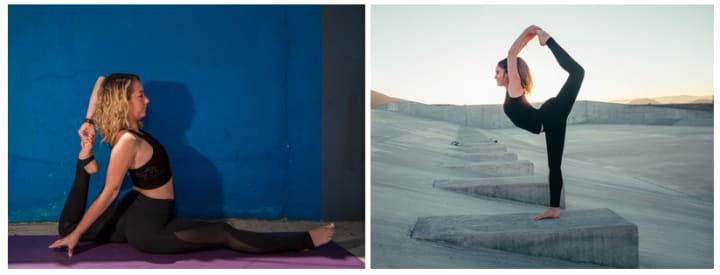
As you can see, positioning your subject in the middle with a side profile in action can be very effective. This is because the use of symmetry takes effect in these kinds of shots. This rule of nature and how we’re created is automatically appealing to the eye. Using this in images of muscles and all around toned bodies lends a natural look to your form.
Another great technique to keep in mind is putting an object in the foreground, or background. As you can see in the second example, there are weights in focus in the front of the photo, but in the back there are more out of focus. You can also see in the second photo how the subject is in focus, but the weights in the front are blurred. This is important because it differentiates the main subject from the other objects in the picture that aren’t as significant, otherwise known as depth of field.
You may want or need those unimportant aspects to be in the image if they are part of the atmosphere and the overall theme of the photo.
This of course can be achieved with an iPhone by use of the touch the subject feature, or with portrait mode.
Action
Getting an action shot with a smartphone can be challenging, but as long as it’s done outdoors in the sun, you can create some amazing photos.
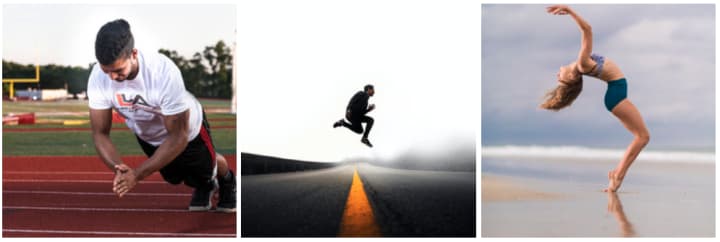
Keep in mind, the lower your light, the lower your shutter speed is on your camera. This goes for smartphones as well. It means the camera captures the image longer, creating blur. If you’re going to take an action shot of you up in the air or doing a clap push up like in the example below, then you will have to do it in broad daylight with the sun facing you if you want to capture the moment quickly. If you’re a professional photographer or know one that can assist you and they have flashes ready to go, you have more options, such as indoors or at night.
Products/Food
This really should be an article all on its own! Product photography is a huge industry and you could potentially make a career out of it all by itself. Here are a few tips and tricks to help get the most out of posting your products if you’re on a budget or if it is not your primary focus.
First, you’ll need a tripod that is compatible with your phone or something to hold your phone on the tripod. You will also need an LED light and preferably a window. (All of which can be found at an inexpensive cost with most major online retailers, except the window of course.)
Make sure the grid option on your phone is turned on. To do this go to Settings>Camera>Switch grid to ON.
Use your window for one source of light, and your LED as another turned to 5600k (that is the daylight setting on the LED).
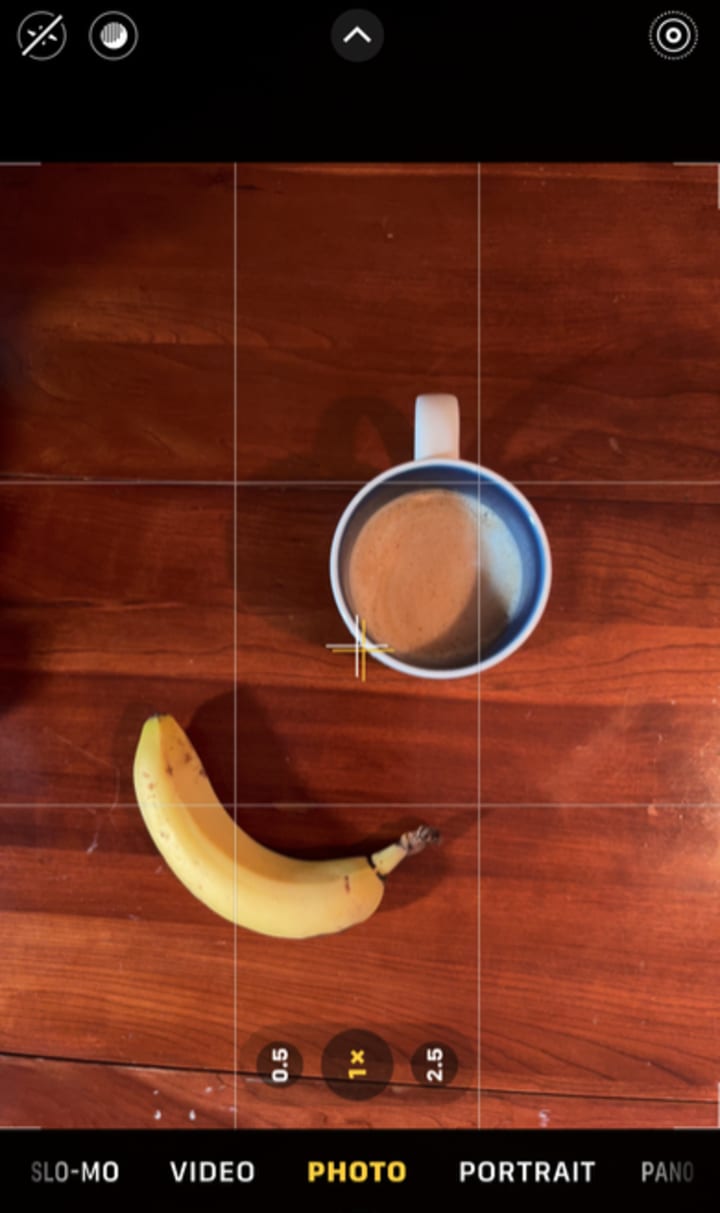
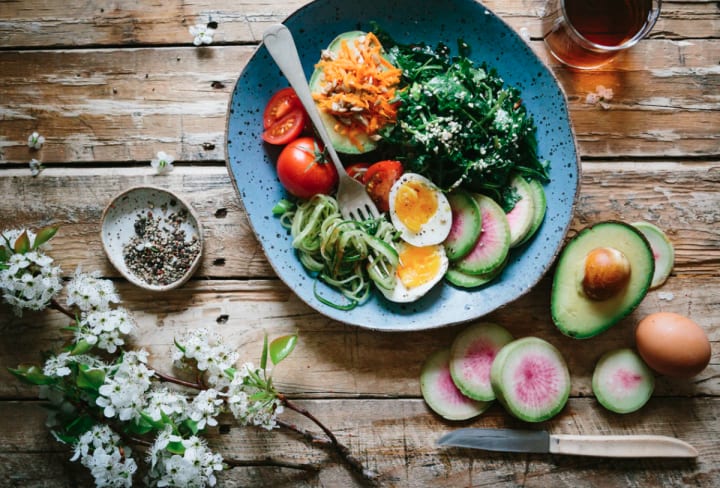
Place the light directly, or off to the side of the subject and line your grid lines up with your product. This creates those clean, overhead photos you see with products online. Nothing fancy is required to produce a decent photo. The way your grids line up depends on your preferences and the product itself, but generally you want the main focal point of your subject to either be in the dead center of your grids.
Group Shots
For a group photo, make sure what you want to convey in your photo matches all participants to create a cohesive and professional looking shot. If it’s a fun vibe, you want some smiles. If it’s all about the work, get some serious/concentrated facial expressions in there. The information in my section on facial expression would be very helpful to read in tandem with this one.
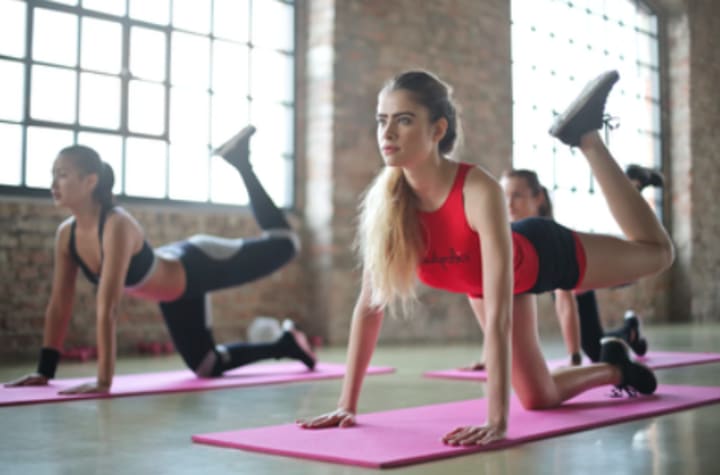
Consistency is another important aspect when it comes to these group shots. If you’re showing off a group training session or class, it is preferable to have almost everyone in the photo doing the same thing. If it’s a yoga class, everyone should be in the same pose. If it’s a step class, everyone should be in the same part of the step sequence.

What if it’s not a class and it’s just two friends working out together? Then keep it natural, keep it light, and once again be mindful of facial expression.
You can also use the depth of field rule we talked about earlier, but instead of weights or objects, it would be with people. As you can see from the sample below the people in the foreground are out of focus, while the subject in the middle is the main focal point.

You may also notice the photographer is using a lot of natural light. A wide open studio with large windows during the day is always the best for photos like these. Using this in conjunction with an LED or, if you’re a professional photographer, with your (off to the side) camera flash, your group photo will have an ideal amount of lighting that will be able to cover the entirety of your subjects.
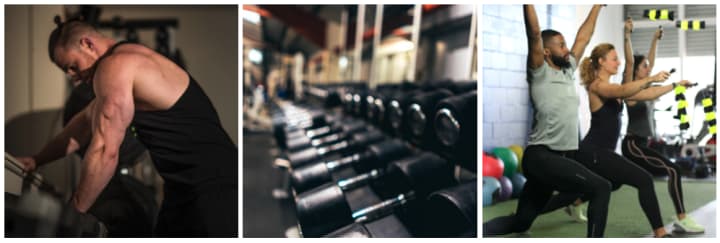
Locations
You know what they say in real estate…
Location! Location! Location!
The same could be said for photography, and especially fitness photography. Depending on what kind of approach you are going for, the location (or background) of your photo could mean the difference between catching a client’s eye or having them scroll right past.
In the example to the left, we have what may be a photography studio. Or an urban style yoga studio in a city.
In this example in the middle, we have what’s definitely a private gym.
In the one to the right, we have a structure outside which stays true to the principle of background and foreground we talked about earlier.
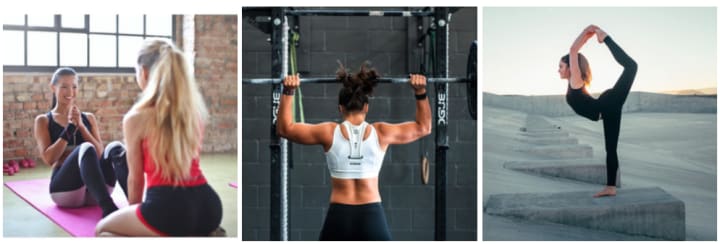
What do they have in common? They are all pretty simple. Your best bet is to stick with a location that’s not too busy. It could be the beach, an aesthetically pleasing gym, an urban area where most of the background is just brick, or if you’re a photographer, you can’t go wrong with your own studio.
Each one of these topics deserve a separate article , but this gives you a great rundown if you’re just starting out as a fitness photographer , or if you’re a trainer/instructor and want to take your content to the next level.
Follow me on Instagram @jack_hiit_photo for even more examples of photos and tips to elevate your fitness photography and successfully promote yourself or your brand!
About the Creator
Jack Lambros
I'm a photographer / videographer located in Long Island NY. I have my own business providing wedding films for couples but my true passion is active / fitness portraits and photography.
Keep reading
More stories from writers in Photography and other communities.
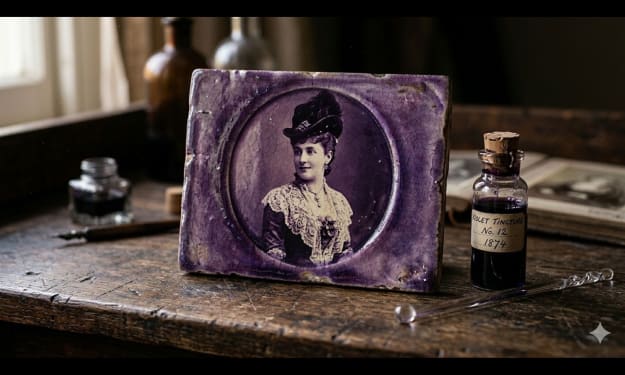
The Gold Tone (Orotone) Technique
She picked it up from a dusty shelf at an estate sale, thinking it was just an old frame. Then the light caught it. The image glowed, not like a print, not like a painting, but like something that seemed to carry its own inner warmth. That was her first encounter with an Orotone, and she bought it without asking the price.
By CurlsAndCommas4 days ago in Photography
Author’s Advice
If you would’ve asked me 20 years ago did I know I’d become a writer and an author, I would’ve said “nope, ain’t happening”. As fate would have it I did become an author and I can honestly say I’m loving it so far. It really does feel good to be a writer. I’ve learned a lot on this journey and I feel like with even me being as new to this world as I am, there’s some wisdom I need to share with every other aspiring author.
By Joe Patterson4 days ago in Journal


Comments
There are no comments for this story
Be the first to respond and start the conversation.