
Watch Me Make A Tree From Wire
I Love Wire Trees, I Live For Wire Trees

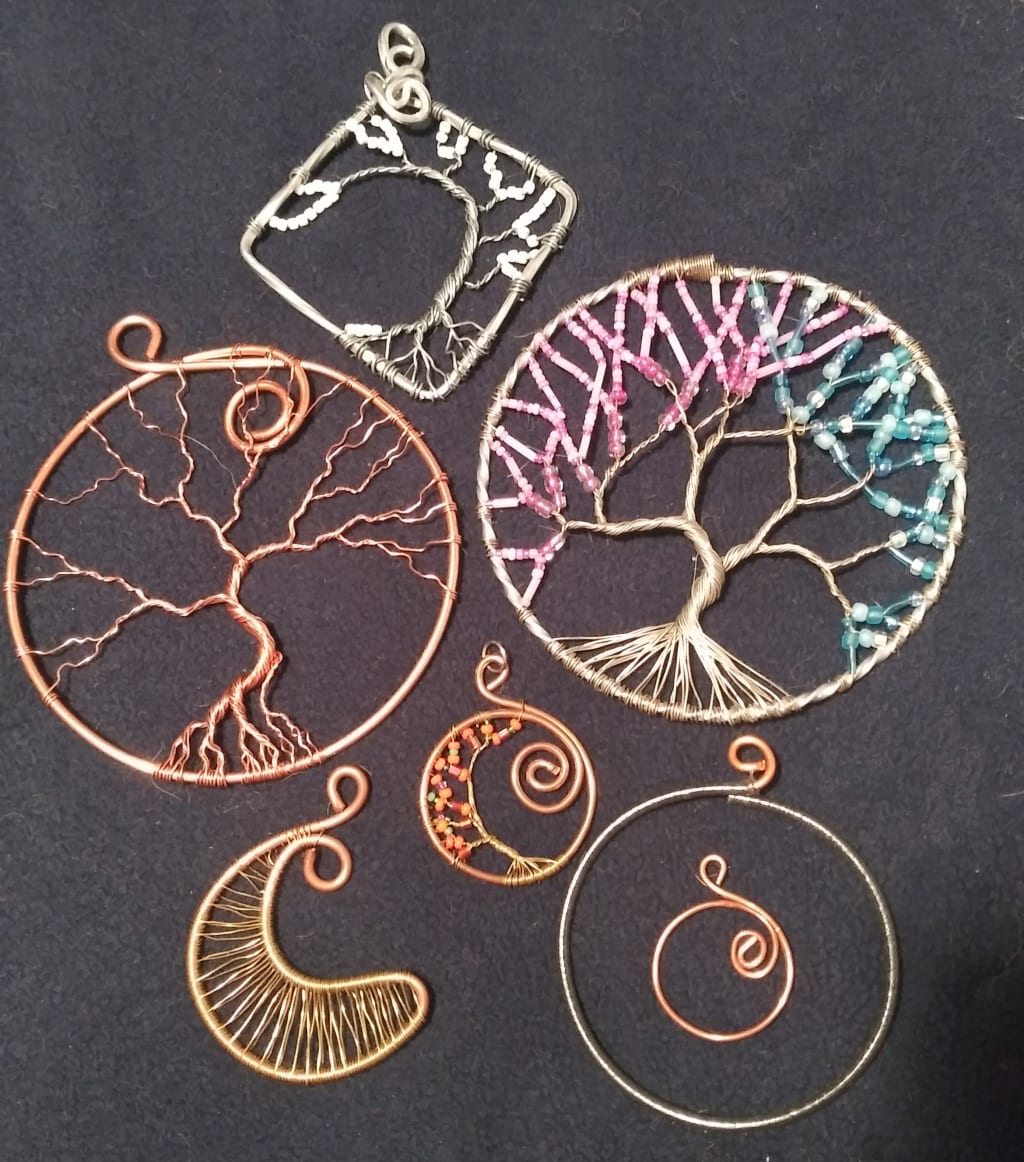
I love making trees out of wire. And when it comes to creating trees out of wire, you can use almost anything.
A lot of the wire I use actually came from a big remodel project we did on a house we owned. We ripped out all the old electrical wires and I kept a big bucket full of all the strange and interesting different gauges of wires they used to put in old homes. But really, you can start with whatever you have on hand. Here's a few examples.
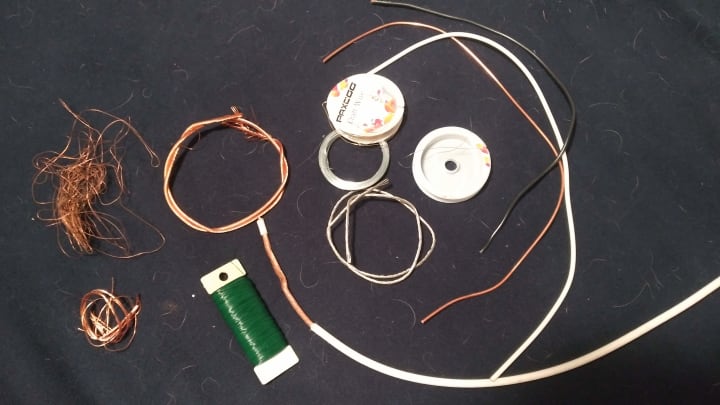
The far left jumble of little wires came out of a strange old house wire. The green wire is actually garden wire, and I've done several projects with it. It's fun and cute. My sister-in-law bought me some real, actual store-bought wire for Christmas a few years ago, and that's what you see in the round spools. Everything else is mostly modern electrical wire, some of it stripped, some of it still with the plastic casing on it. You can actually do some fun projects with the colored wires if you leave the plastic casing on it.
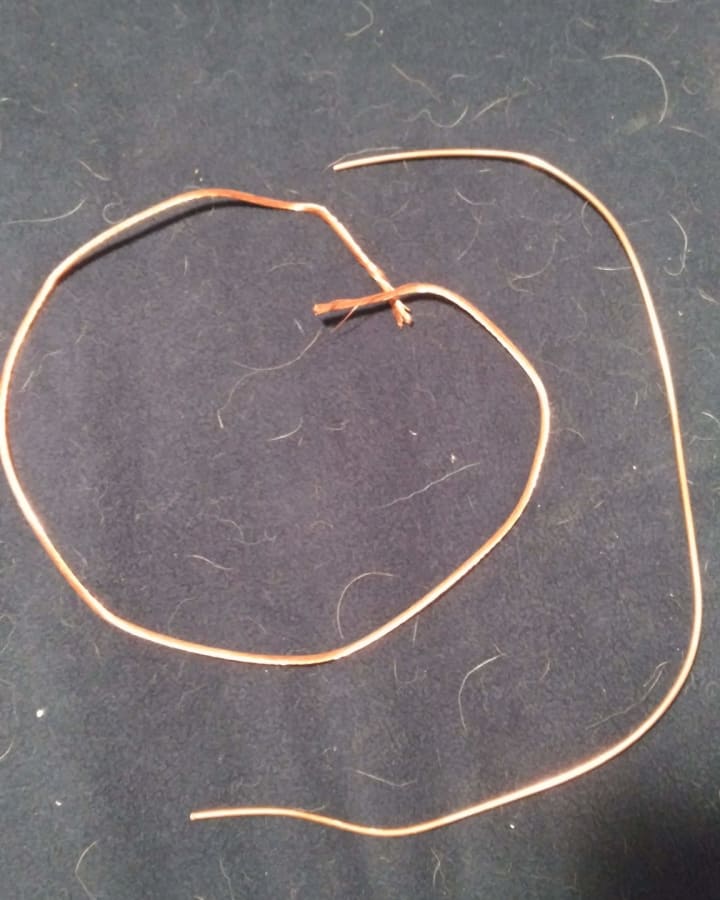
This was what I finally decided on. The wire in the center is actually an electical wire that when stripped is filled with a bunch of much smaller wires. The one around the edge came from a simple outlet wire, and I think I took the grounding wire so I didn't have to worry about stripping off the plastic casing on it.
Once you've selected your wires--you'll need a bunch of little ones, and one that's thicker and stronger and can hold its shape to create the frame--the next step is to decide what size you want your tree to be. Use anything that's round, from a cup to a candle, to... well, a roll of duct tape, just because it's handy.
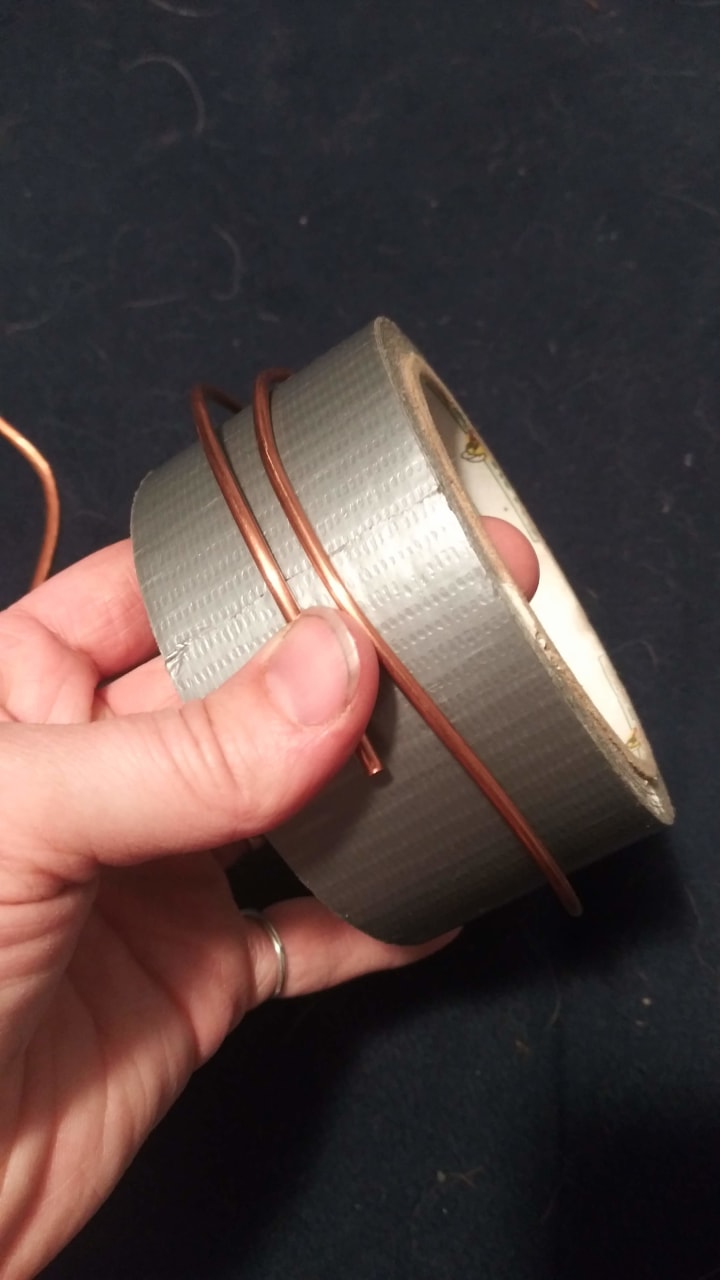
Wrap your thicker wire around your round object. You'll want enough wire to overlap a little so you can add some flourishes and hangars.
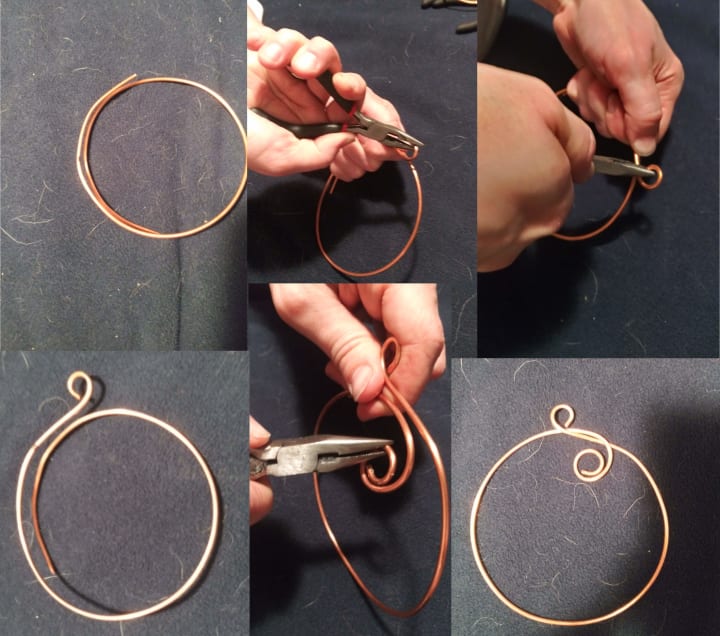
Using needle nose pliers, twist the top part of the circle back on itself to create a hook to be able to hang the artwork from. The other part of the excess you can twist inward to create a sort of "moon" like thing. This actually works a little better if you have more excess to twist up and make a bigger moon. You can also simply use it to make a more decorative hangar and twist the wire upwards instead of inside the art.
The next step is to measure the thin wires, cut them with wire cutters or a pair of scissors, and separate them, (If they're not already separated. If you're working from a spool, you'll simply measure and cut however many wires you need.) There are many different ways to make this kind of art, but the way I like to do it, you'll want your small wires to be a little more than twice as long as your frame.
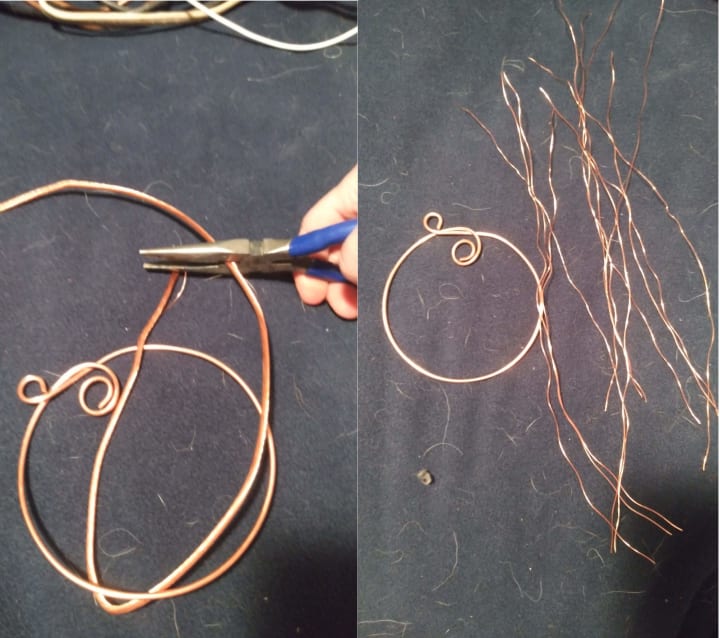
I like the number 12 for my small wires. You can pick pretty much any number you'd like. Even numbers are easier, but I've done odd numbers before as well. When I first started this, I just used all of the wires in the bundle of wires that I separated. One time I left them all twisted together as they'd been in the casing, I untwisted the bottom to attach for the trunk, and untwisted each branch as I went up, which made for a spectacularly tight trunk (and of course, I can't find the picture to show you, which is sad.)
But once you have cut your wires and separated, now at last the preparation stage is over and it's time to start making your tree!
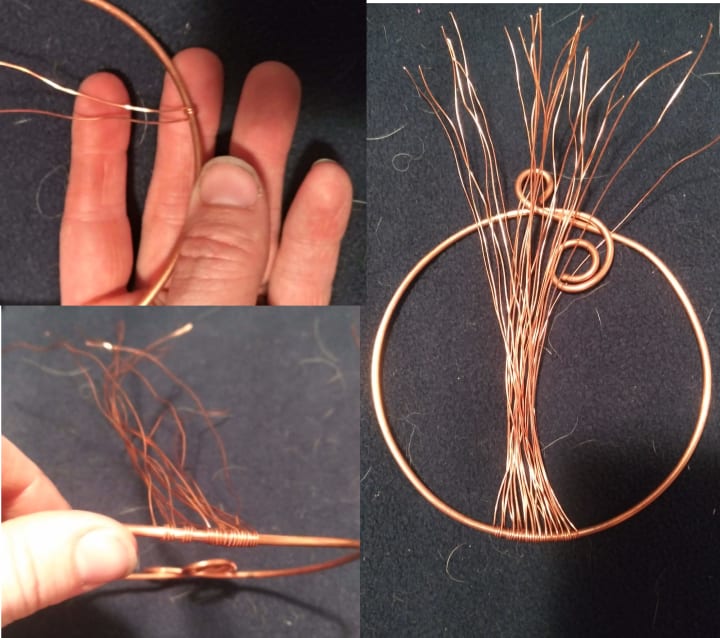
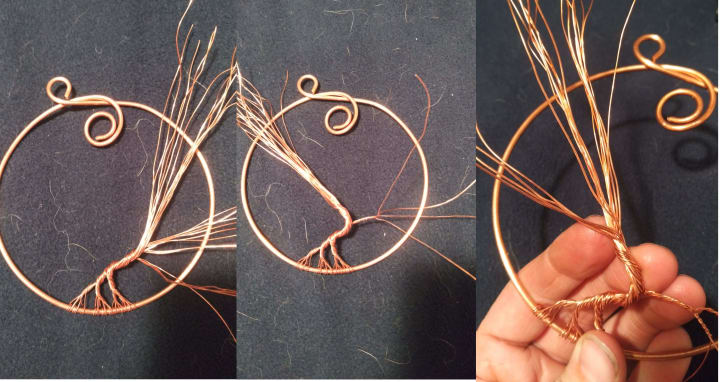
The first step is to fold those small wires in half and twist them around the bottom of your frame. These will become the roots. Since there were 12 wires we started with, we'll actually have 24 pieces coming up from the bottom of the frame. AND, don't be like me. As we'll see later in this article, I didn't ensure that the trunk was right beneath the hangar, so my tree ended up being a little crooked. This is a good point to make sure that the tree is standing where you want it to be. It's a good idea to hold it by the hangar and position your tree. (Sometimes, you may not want it in the center, which is fine.)
Next you decide what kind of trunk you want. A quick, easy, and simple way to do a trunk is to simply lay all the thin wires out and twist them up in one trunk, as is shown in the top left corner above. However, I think it's pretty to separate the trunk out a little. For this one I decided on four sections divided evenly. That's what's great with starting with 12 wires; you can divide by three or four.
Once I had the four sections divided, I twisted two of the sections together, and then after that twisted the next two together until I had one solid trunk.
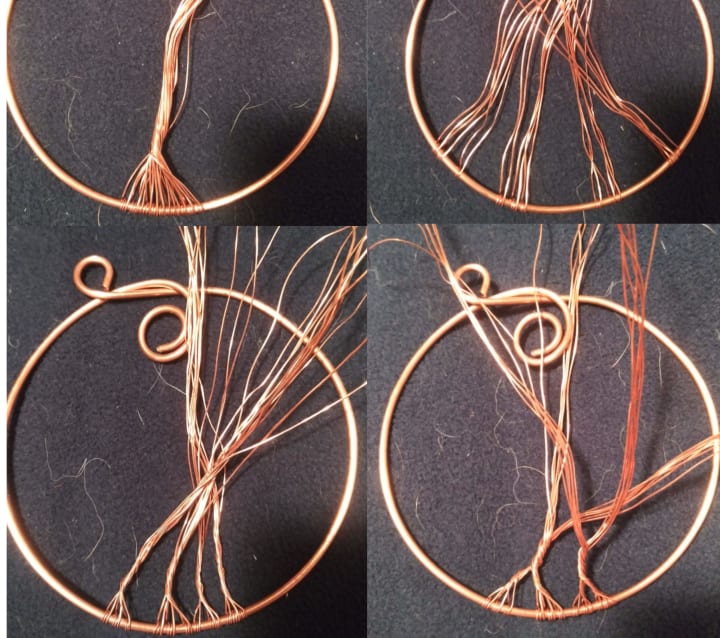
Once you have a trunk a few inches long, it's time to start breaking off the branches. I like to break them off in sections divisible by 2.
At this point, it's just a lot of twisting wires, breaking off branches, taking the branches you broke off and breaking them again until you end up with every branch standing on its own ready to touch the frame.
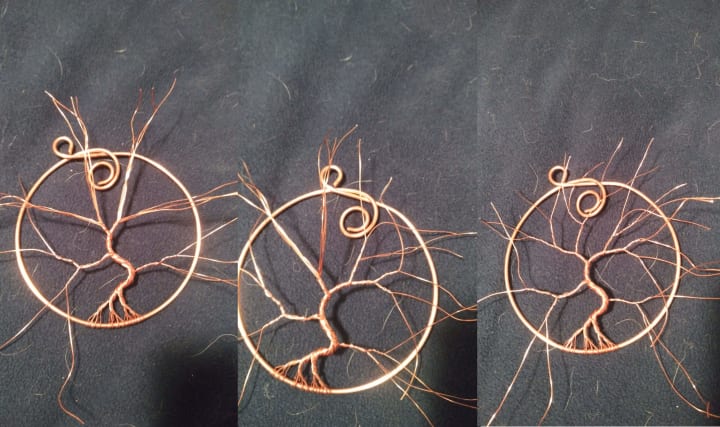
The last picture above looks a little messy, so in order to clean it up, we wrap each branch around the frame a few times. It's good to check that each branch fits first. I used to separate a branch and immediately connect it to the frame, but that got me in trouble a few times when I ran out of room on some parts of the frame and not other parts. Some areas were very crowded, other areas had a little more space I could have used, but since I'd already started securing the branches, the only way I could have changed it was to undo everything, and let's face it, I was too lazy to undo everything.
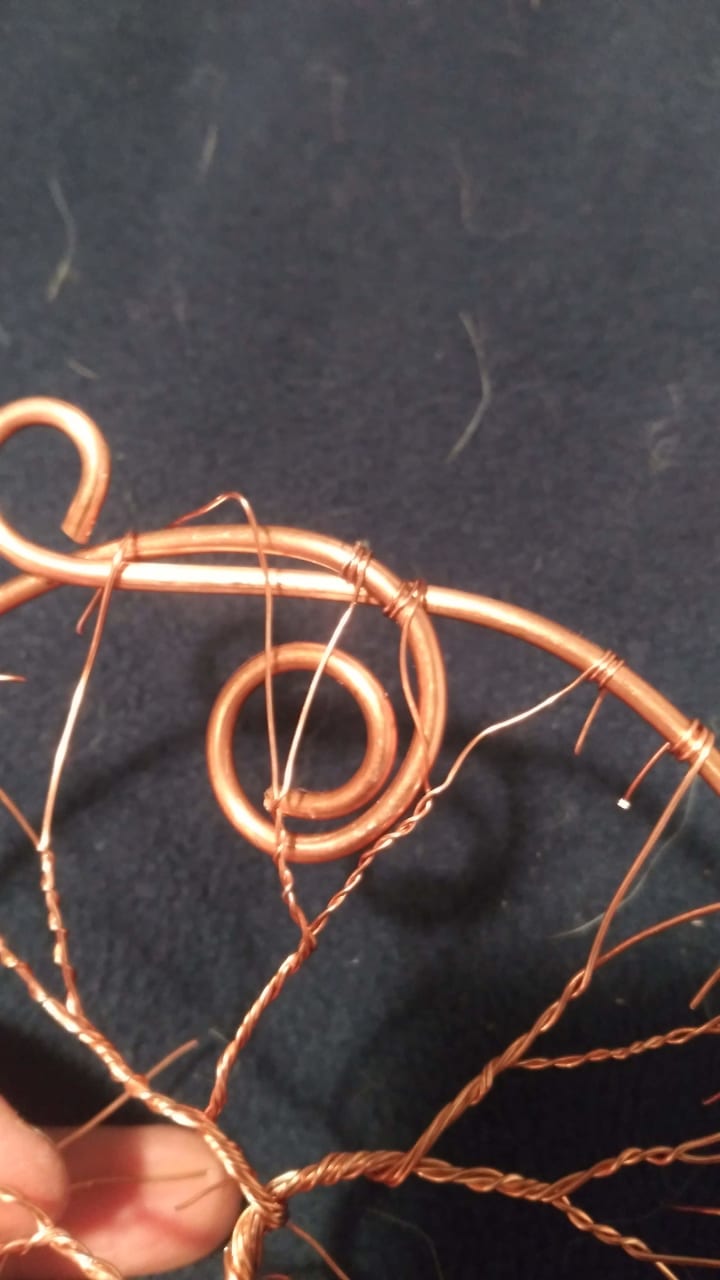
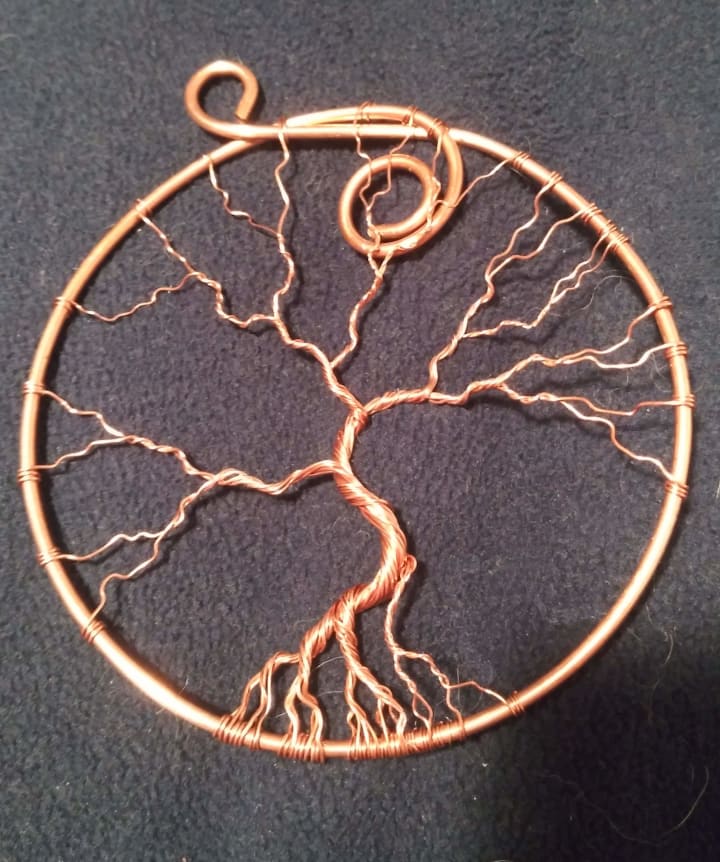
As you go along and wrap the branches around the frame, you can actually use the branches to secure your flourishes on the frame if you feel like it, and if it makes sense artistically. I usually "fold" the branches over the frame first, (as you can see in the left side of the image above) and then wrap them next. I leave the cleanup for the very last.
Speaking of cleanup...
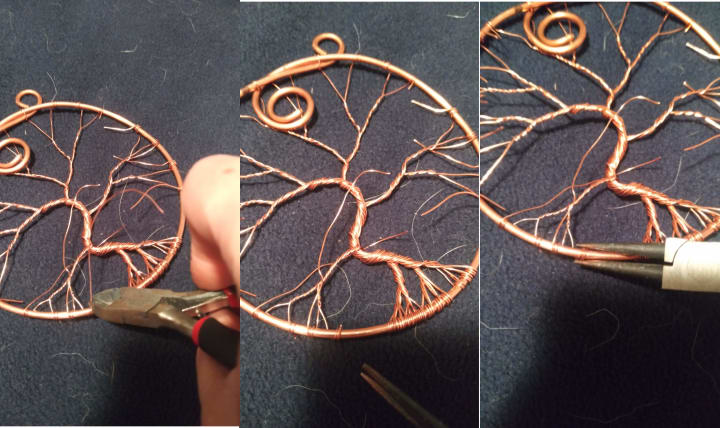
Using your small wire cutters or scissors, cut the long ends off the branches. You'll notice a little tail left over (center image above) so using a small set of pliers to press it down gives you a lot cleaner look so that you can put on the finishing touches.

You can add beads before you finish your branches if you want to, but for this project I went simpler. Even still, I love the way a tree looks with the branches twisted up a little. This can be done by grabbing the branch with a set of needle nose pliers and simply twist it a little. Go both ways, left, right, look at it a little and realize that left looked better than right. In the second image above you can see the right side of the tree has twisted branches, the left side the branches are still straight. It looks much more finished with the twists.
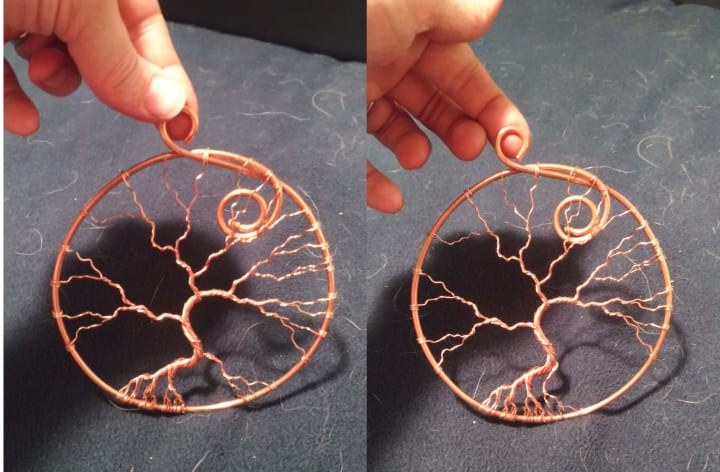
At this point, I finally stood the tree up the way it would be when it's hanging for artistic purposes, and I realized that I didn't center my tree. Nothing I could do about it at that point, so it's just a slightly lopsided tree I guess. I also felt like the lowest branch in the tree didn't look quite right. It was too skinny, too low, and I didn't like it. So... voila, I pushed it closer to the trunk and it became another part of the root system. I liked it better that way and at that point decided it was good enough to be called done.
It's simply a beautiful art, and for me it's so calming and centering. It's not complicated. It doesn't have to be perfect. It just has to make you happy and be something you enjoy.
So run to the hardware store and grab some wires, or run to the craft store and grab some copper. Or if you know someone in the middle of an electrical project, just point at a few things and say, "Can I have that?" Once you've got the materials, making a cute little tree should only take an hour or so. Do some deep breathing while you breathe a tree to life.
About the Creator
L.P. Masters
L.P. Masters loves to write in a wide variety of genres on Vocal. For her published works, she mainly sticks with Sci-fi geared towards Adults, and Paranormal geared toward Young Adults. Her published works can all be found on Amazon.
Keep reading
More stories from L.P. Masters and writers in Lifehack and other communities.
5 Simple Lifehacks to Keep Your Teeth Healthy Every Day
Healthy teeth aren’t just about occasional dental visits—they’re shaped by the little choices you make every day. Simple habits, when done consistently, can prevent cavities, gum issues, sensitivity, and other oral concerns while keeping your smile bright and comfortable. These lifehacks are easy to integrate into your routine and don’t require drastic lifestyle changes.
By Smile Sydney4 days ago in Lifehack
Review of 'Man on the Run'
My wife and I saw Man on the Run, a nearly 2-hour documentary on Amazon Prime, about Wings, Paul McCartney's group that flew around the world from shortly after The Beatles broke up in early 1970 to shortly after John Lennon was murdered at the end of 1980, making a Beatles reunion forever impossible.
By Paul Levinson7 days ago in Beat


Comments
There are no comments for this story
Be the first to respond and start the conversation.