
Tempering Chocolate with Cocoa Butter
A Foolproof Guide for Perfectly Glossy Results


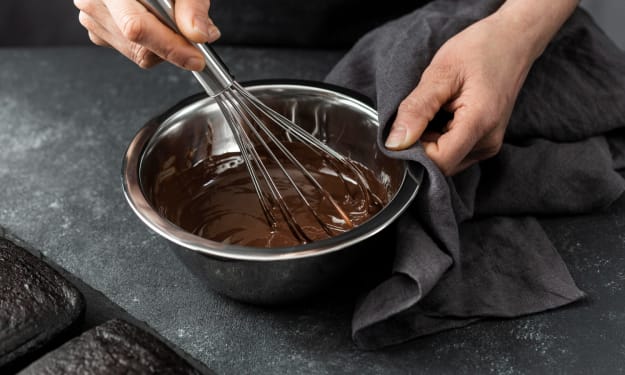
When you picture the perfect chocolate bar, you probably imagine a smooth, glossy surface that snaps cleanly when broken — the kind of finish that professional chocolatiers achieve effortlessly. The secret behind that flawless texture and shine lies in the delicate art of tempering chocolate with cocoa butter. Mastering this process ensures your chocolate has the perfect structure, sheen, and melt-in-the-mouth feel. Whether you’re a home baker or a chocolate enthusiast, learning how to temper chocolate properly is essential for creating professional-quality confections.
Understanding the Importance of Tempering
Tempering is a controlled melting and cooling process that aligns the cocoa butter crystals within chocolate. When cocoa butter solidifies correctly, it forms stable crystals (known as form V crystals), which give chocolate its glossy appearance, firm texture, and crisp snap.
Without tempering, chocolate sets with a dull, streaky surface and a soft, uneven texture. It might even develop white streaks or spots known as bloom, caused by unstable fat crystals rising to the surface. That’s why professional chocolatiers never skip tempering — it’s the key to turning melted chocolate into a masterpiece.
Why Cocoa Butter Is Crucial
Cocoa butter is the natural fat found in chocolate, and it plays a pivotal role in achieving that beautiful finish. When used in the tempering process, it acts as a stabilizer, helping to form uniform crystals quickly and consistently.
Adding a small amount of tempered or “seed” cocoa butter (often in the form of Mycryo or solid tempered chocolate) helps guide the rest of the melted chocolate into alignment. This makes the tempering process faster and more reliable — perfect for anyone looking for a foolproof approach.
The Ideal Temperature Ranges
Before you begin, it’s essential to know the target temperature ranges for different types of chocolate:
Dark chocolate: Melt to 45–50°C, cool to 27–28°C, then reheat to 31–32°C.
Milk chocolate: Melt to 40–45°C, cool to 26–27°C, then reheat to 29–30°C.
White chocolate: Melt to 40°C, cool to 25–26°C, then reheat to 28–29°C.
These temperature steps allow the right cocoa butter crystals to form and stabilize, ensuring a shiny and smooth final result.
Step-by-Step Process: How to Temper Chocolate with Cocoa Butter
Tempering may sound intimidating, but when you use the seeding method with cocoa butter, it becomes incredibly straightforward. Here’s a foolproof step-by-step guide:
1. Chop and Melt Your Chocolate
Start with finely chopped, high-quality couverture chocolate. Place about two-thirds of it in a heatproof bowl and melt it slowly over a double boiler (or in short microwave bursts) until it reaches the melting temperature range for your chocolate type. Stir gently to ensure even heating.
2. Add Cocoa Butter or Seed Chocolate
Remove the bowl from the heat and add your remaining one-third of unmelted chocolate or a small amount of tempered cocoa butter (around 1% of the total chocolate weight). Stir continuously until the chocolate cools down to the lower temperature range. This step encourages the formation of stable crystals.
3. Reheat Slightly
Once the chocolate reaches the lower end of the temperature range, gently reheat it a few degrees to reach the working temperature (usually around 31°C for dark chocolate). Avoid overheating — even a degree or two too much can undo all your work.
4. Test the Temper
Dip a spoon or knife into the chocolate and set it aside for a few minutes. If it hardens quickly with a glossy finish and no streaks, your chocolate is perfectly tempered. If it looks dull or spotty, reheat slightly and repeat the cooling process.
Tips for Consistent Results
Use a thermometer: Precision is vital. A digital thermometer ensures accuracy at every stage.
Avoid moisture: Even a drop of water can ruin chocolate texture, causing it to seize.
Work in small batches: Smaller amounts are easier to control and maintain at the right temperature.
Keep stirring: Continuous movement helps distribute the stable crystals evenly.
Common Mistakes to Avoid
Even seasoned chocolatiers can run into trouble if they rush the process or overlook small details. Here are a few pitfalls to avoid:
Overheating the chocolate: High temperatures can destroy cocoa butter crystals, forcing you to start over.
Skipping the cooling phase: Without proper cooling, stable crystals won’t form.
Ignoring humidity: Excess moisture can dull your chocolate’s shine and affect texture.
Being mindful of these factors will help you achieve consistent, professional-looking results every time.
Advanced Tip: Try Chocolate Silk Tempering
If you’re ready to take your tempering skills to the next level, consider experimenting with Chocolate silk tempering. This advanced method involves using pre-crystallized cocoa butter, also known as “silk,” maintained at about 33.5°C. When added to melted chocolate, it instantly brings it into temper without the need for traditional cooling and reheating.
This method is especially popular among professional chocolatiers and bean-to-bar makers because it offers speed, consistency, and control. While it requires a bit of specialized equipment to maintain precise temperature, it’s an efficient and innovative approach once mastered.
Bringing It All Together
The process of tempering chocolate may seem intricate at first, but with patience, precision, and the right tools, it becomes second nature. Using cocoa butter as your tempering guide is a game-changer, transforming the task from trial-and-error into a reliable, repeatable technique.
Whether you’re dipping truffles, molding bars, or coating fruits, perfectly tempered chocolate elevates your creations from homemade treats to professional-quality delights. Once you’ve mastered the technique, every batch will boast that glossy finish and irresistible snap — the true mark of chocolate perfection.
About the Creator
Candy Desouza
If you’re eager to learn, join Edariyo Chocolate Academy in Mumbai to explore the art of chocolate-making.
Keep reading
More stories from Candy Desouza and writers in Lifehack and other communities.
A Complete Guide to Tempering Chocolate Methods
Tempering chocolate is both an art and a science — the secret behind that glossy finish, crisp snap, and smooth texture you find in perfectly made chocolate bars or truffles. For chocolatiers and home bakers alike, mastering tempering can transform ordinary melted chocolate into a professional-quality confection. Whether you’re working with dark, milk, or white chocolate, understanding the tempering chocolate methods is essential to achieve that flawless result every time.
By Candy Desouza4 months ago in Education
Federated AI Discovery Engine
The Federated AI Discovery Engine is a computational framework designed to support biomarker discovery, evaluation, and validation in distributed data settings, where patient-level data are housed across multiple Trusted Research Environments (TREs) and cannot be centralised. The system enables consistent analytical workflows to be executed across institutions and geographies while preserving local data governance, security, and regulatory constraints.
By James @ Kode4 days ago in Lifehack


Comments
There are no comments for this story
Be the first to respond and start the conversation.